Craving the Ultimate Chili Dog? Here’s Your Homemade Guide!
Ever wondered how to recreate that iconic, mouth-watering Chili Dog experience right in your own kitchen? Ditching the drive-thru for a homemade version of this classic American comfort food not only offers superior flavor but also gives you complete control over the ingredients, ensuring a healthier and more satisfying meal. Getting creative with your Hot Dog recipes at home is a rewarding culinary adventure, transforming simple ingredients into a gourmet delight. Let’s dive into mastering this beloved dish.
Ingredients & Kitchen Tools
To embark on this delicious journey, gather the following:
- For the Chili:
* 1 lb Ground Beef (80/20 lean): The foundation of our savory chili. You can substitute with ground turkey for a leaner option.
* 1 large Onion, chopped: Adds aromatic depth.
* 2 cloves Garlic, minced: Essential for robust flavor.
* 1 (15 oz) can Tomato Sauce: Provides a rich, tangy base.
* 1 (15 oz) can Kidney Beans, drained and rinsed: Adds texture and protein. Optional if you prefer a bean-free chili.
* 2-3 tbsp Chili Powder: The main spice for that classic chili taste. Adjust to your heat preference.
* 1 tsp Cumin: Earthy and warm, complements the chili powder.
* ½ tsp Smoked Paprika: A smoky touch for complexity.
* ¼ tsp Cayenne Pepper (optional): For a spicy kick.
* Salt and Black Pepper to taste: Essential for seasoning.
* 1 tbsp Olive Oil: For sautéing.
- For the Hot Dogs:
* 8 all-beef Hot Dogs: Choose your favorite brand for the best results.
* 8 Hot Dog Buns: Quality buns are crucial for a good experience.
- Optional Toppings:
* Shredded Cheddar Cheese: A classic Chili Dog topping.
* Diced Onions: For a crisp, pungent contrast.
* Jalapeños (fresh or pickled): For extra heat.
* Mustard and Ketchup: Traditional condiments.
Kitchen Tools:
- Large Skillet or Dutch Oven: For browning ground beef and simmering chili.
- Saucepan: For heating the hot dogs.
- Spatula/Wooden Spoon: For stirring.
- Knife and Cutting Board: For chopping vegetables.
- Measuring Spoons and Cups: For accurate ingredient quantities.
Prep Time & Cooking Schedule

- Prep Time: 15 minutes
- Cook Time: 30-40 minutes (20-25 minutes for chili, 10-15 minutes for hot dogs and assembly)
- Total Time: Approximately 45-55 minutes
This schedule allows for simultaneous prep and cooking of the chili and hot dogs, getting this delightful dish on your table in under an hour. You can even prepare the chili ahead of time and simply reheat it when ready to assemble.
Step-by-Step Instructions
1. Prepare the Chili Base: In a large skillet or Dutch oven, heat 1 tablespoon of olive oil over medium heat. Add the chopped onion and cook until softened, about 5-7 minutes. Add the minced garlic and cook for another minute until fragrant.
2. Brown the Ground Beef: Add the ground beef to the skillet, breaking it apart with a spatula. Cook until thoroughly browned, draining any excess grease.
3. Simmer the Chili: Stir in the tomato sauce, drained kidney beans (if using), chili powder, cumin, smoked paprika, and cayenne pepper (if desired). Season with salt and black pepper to taste. Bring the mixture to a simmer, then reduce heat to low, cover, and let it cook for at least 20 minutes, allowing the flavors to meld. The longer it simmers, the richer the taste! This carefully crafted Chili Dog filling is almost ready.
4. Cook the Hot Dogs: While the chili simmers, cook your hot dogs. You can grill, pan-fry, or boil them according to your preference. For grilling, heat a grill to medium-high and cook for 5-7 minutes, turning occasionally, until nicely charred. For boiling, bring a pot of water to a boil, add hot dogs, and cook for 5-7 minutes.
5. Warm the Buns: Briefly warm the hot dog buns. You can toast them lightly on the grill, in a dry skillet, or microwave them for 10-15 seconds for a soft bun.
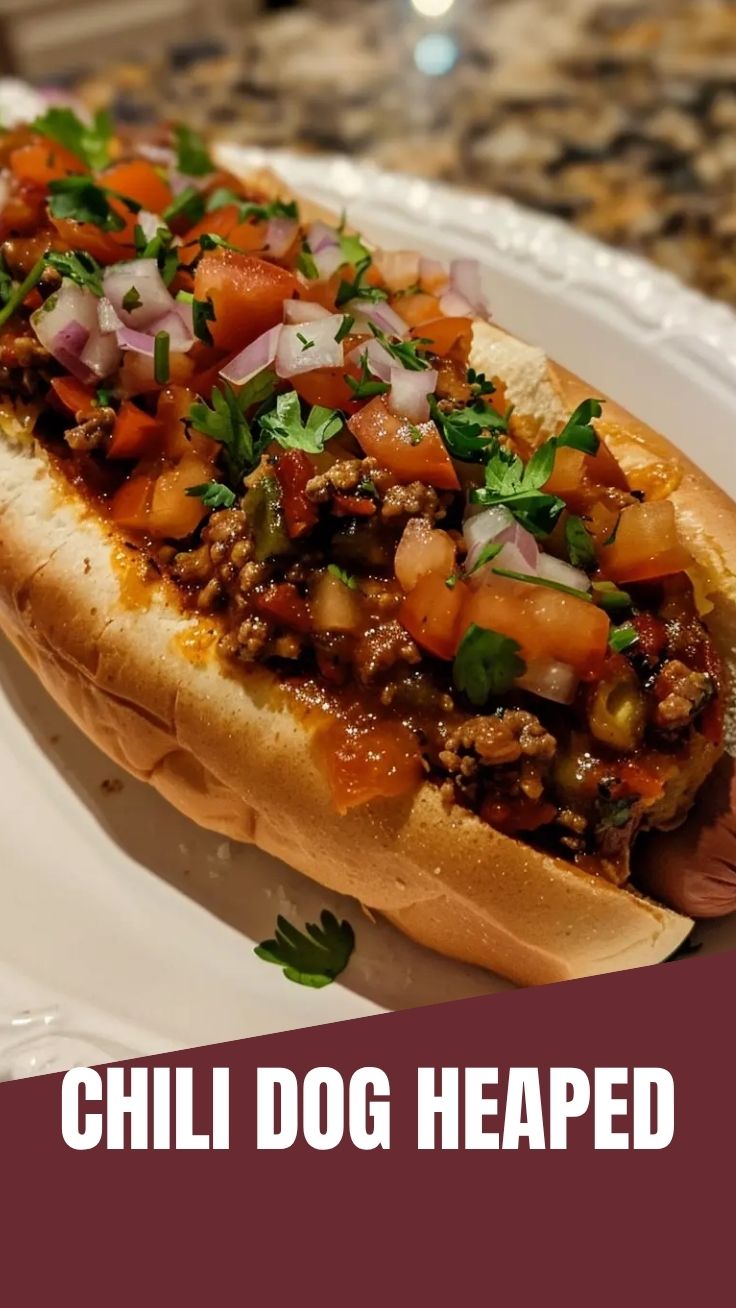
6. Assemble and Serve: Place a hot dog in each warmed bun. Spoon a generous amount of the homemade chili over the hot dog. Top with your favorite fixings like shredded cheddar cheese, diced onions, or jalapeños. Serve immediately and enjoy!
Nutritional Benefits & Advantages
Making your own Chili Dog offers several advantages. By using lean ground beef or turkey, you can reduce saturated fat content. The onions, garlic, and beans (if included) add significant fiber, vitamins, and minerals. Kidney beans are an excellent source of plant-based protein and iron. Furthermore, controlling the sodium and sugar levels, often high in store-bought versions, leads to a healthier and equally delicious meal.
Tips, Variations & Cooking Advice
- Spice Level: Adjust the chili powder and cayenne to your desired heat. For extra mild, omit cayenne.
- Vegetarian Option: Substitute ground beef with a plant-based ground “meat” alternative and ensure the chili base is vegetarian-friendly.
- Bean Variations: Try black beans or pinto beans instead of kidney beans for a different flavor profile.
- Cheese Choices: Experiment with Monterey Jack, pepper jack, or a sharp cheddar for varying cheese notes.
- Grilling the Buns: For a fantastic texture, lightly butter and grill the insides of your buns.
Common Mistakes to Avoid
- Under-Seasoning the Chili: Don’t be shy with salt and pepper! Taste and adjust as it simmers.
- Overcooking the Hot Dogs: This can lead to rubbery hot dogs. Cook just until heated through and lightly browned/charred if desired.
- Greasy Chili: Ensure you drain excess fat from the ground beef after browning. This prevents a greasy final product.
- Not Warming the Buns: Cold, unstirred buns detract from the overall experience. Always warm them!
Storage & Meal Prep Tips
The chili can be made in advance and stored in an airtight container in the refrigerator for up to 3-4 days. It also freezes well for up to 3 months. Thaw frozen chili in the refrigerator overnight and reheat gently on the stovetop or in the microwave. Keep cooked hot dogs and buns separate until assembly to maintain their best texture. This makes meal prep a breeze for a quick weekday lunch or dinner.
Conclusion
Creating your own homemade Chili Dog from scratch is not only a fun and rewarding experience but also guarantees a dish bursting with fresh, customizable flavors. From the rich, savory chili to the perfectly cooked Hot Dog, every bite is a testament to the joy of home cooking. We encourage you to give this recipe a try and share your results! What are your favorite toppings? Let us know in the comments below!
FAQs
- Can I make the chili spicier?
Absolutely! Increase the amount of cayenne pepper, add a pinch of red pepper flakes, or incorporate some diced jalapeños or serrano peppers into the chili while it simmers for an extra kick.
- What’s the best way to cook hot dogs for chili dogs?
Grilling or pan-frying your hot dogs will give them a wonderful smoky flavor and slightly crispy exterior, which holds up well to the chili. Boiling is also an option for a softer hot dog.
- Can I use a different type of bean in the chili?
Yes, feel free to substitute kidney beans with pinto beans, black beans, or even a mix of different beans. Adjust the cooking time slightly if using pre-cooked canned beans, as they only need to be heated through.
- How do I prevent the buns from getting soggy?
Warm your buns just before assembly and avoid overloading them with too much chili. A slightly toasted bun can also offer more structural integrity against the moist chili. If bringing to a potluck, transport the chili and hot dogs separately and assemble just before serving.
Quick way to grow Chili Dog in 7 days
Ingredients
Equipment
Method
- Gently place your chili dog seed into a pot filled with fertile imagination soil; ensure it's snug and covered.
- Find a sunny spot for your pot, provide plenty of warmth, and give it a good watering with optimistic thoughts.
- For the next six days, ensure consistent "sunlight" and water your growing chili dog with positive affirmations.
- Observe closely for any sprouts of bun or hints of frankfurter peeking through the soil.
- On day seven, with a sense of wonder, carefully unearth your fully grown chili dog from the soil.
- Wipe off any excess "soil," add your preferred phantom toppings, and enjoy your homegrown delight!