
The Ultimate Guide to Perfectly Roasted Crispy Chickpeas: A Healthy Snack Revolution
Have you ever opened a bag of store-bought snacks, only to feel a pang of guilt after the first handful? What if I told you that you could transform a humble pantry staple into a crave-worthy, protein-packed treat that rivals any potato chip? Welcome to the world of homemade Crispy Chickpeas (Roasted) —a game-changer for anyone seeking Healthy Snacks that don’t compromise on flavor or crunch. Preparing this recipe at home isn’t just about saving money; it’s about taking control of your ingredients, customizing spices to your palate, and enjoying a snack that’s as nutritious as it is addictive. In this comprehensive guide, we’ll walk you through every step to achieve that perfect golden crunch, from ingredient selection to storage hacks.
Ingredients & Kitchen Tools
Ingredients
– 1 can (15 oz) chickpeas (garbanzo beans) – The star of the show. Opt for low-sodium or no-salt-added to control seasoning.
– 2 tablespoons olive oil – Helps achieve crispiness. Avocado oil works as a neutral substitute.
– 1 teaspoon salt – Enhances flavor. Use sea salt or kosher salt for best results.
– 1/2 teaspoon garlic powder – Adds savory depth. Onion powder or smoked paprika can be swapped.
– 1/2 teaspoon cumin – Earthy warmth. Try chili powder or curry powder for a twist.
– Optional: 1/4 teaspoon cayenne pepper – For heat lovers. Omit or reduce for a milder version.
Kitchen Tools
– Colander – For rinsing and draining chickpeas.
– Clean kitchen towel or paper towels – Essential for drying chickpeas thoroughly.
– Baking sheet – Rimmed to prevent oil drips.
– Parchment paper or silicone baking mat – Prevents sticking and eases cleanup.
– Mixing bowl – For tossing chickpeas with oil and spices.
– Spatula – For flipping halfway through roasting.
Prep Time & Cooking Schedule
– Prep Time: 10 minutes (includes rinsing, drying, and seasoning)
– Cook Time: 30–40 minutes
– Resting Time: 5–10 minutes (after roasting, to allow chickpeas to crisp further)
– Total Time: Approximately 45–50 minutes
Planning Tip: Roast chickpeas while you prepare dinner or during a lazy Sunday afternoon. They’re perfect for meal prep—make a double batch to last the week. The key is patience: rushing the drying or roasting process leads to soggy results.
Step-by-Step Instructions
1. Preheat and Prepare: Preheat your oven to 400°F (200°C). Line a baking sheet with parchment paper.
2. Rinse and Drain: Open the can of chickpeas, pour into a colander, and rinse thoroughly under cold water. Shake off excess water.
3. Dry Thoroughly: Spread chickpeas on a clean kitchen towel or paper towels. Gently roll them around to absorb moisture. Pro tip: Remove any loose skins—they burn easily and hinder crispiness.
4. Season: Transfer dried chickpeas to a mixing bowl. Drizzle with olive oil, then add salt, garlic powder, cumin, and cayenne (if using). Toss until evenly coated.
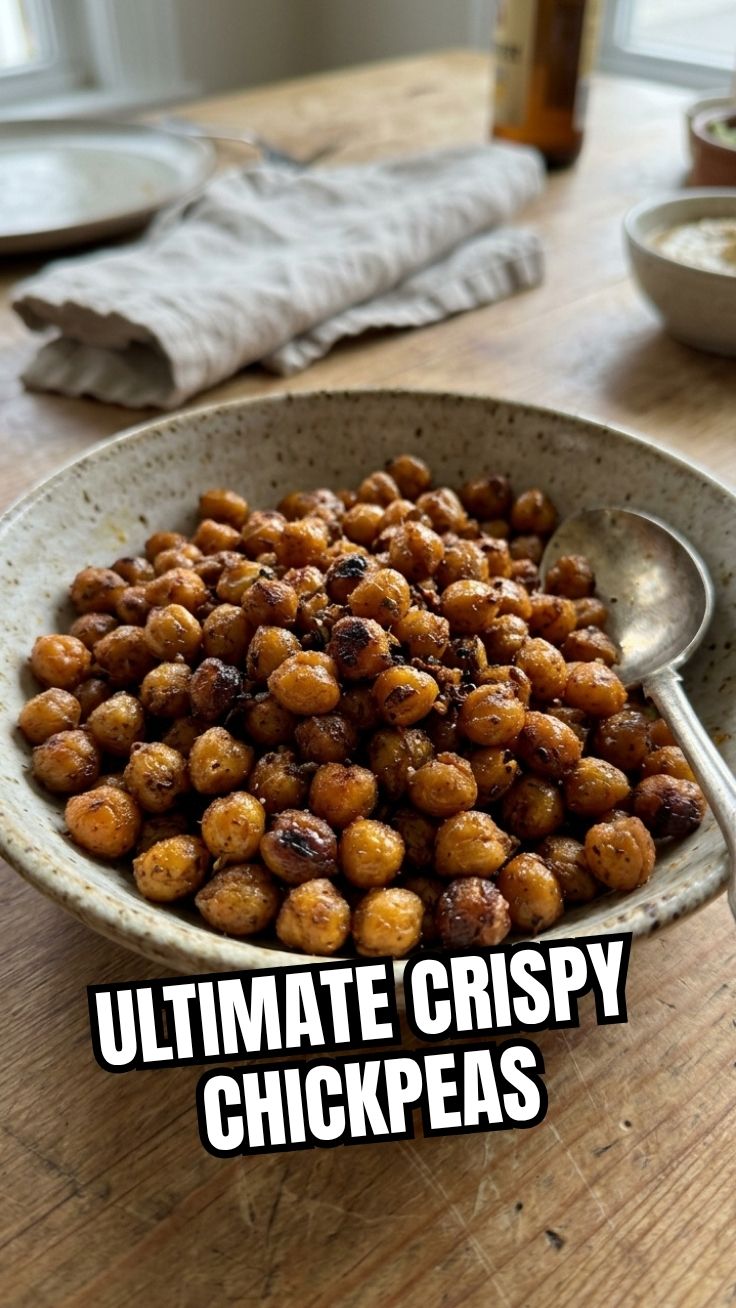
5. Roast: Spread chickpeas in a single layer on the prepared baking sheet. Roast for 30–40 minutes, shaking the pan or flipping with a spatula halfway through. Texture cue: They should be golden brown and sound hollow when shaken.
6. Cool and Crisp: Remove from oven and let rest on the baking sheet for 5–10 minutes. They will continue to crisp as they cool. Temperature control: If they’re not crunchy after cooling, return to the oven for 5-minute intervals.
Keyword Integration: This method ensures your Crispy Chickpeas (Roasted) turn out perfectly every time, making them an ideal addition to your repertoire of Healthy Snacks that satisfy cravings without guilt.
Nutritional Benefits & Advantages
Chickpeas are a nutritional powerhouse. One cup of cooked chickpeas provides about 15 grams of protein, 12 grams of fiber, and essential minerals like iron, magnesium, and folate. Roasting them with minimal oil preserves these benefits while creating a low-calorie, high-satiety snack. Compared to processed chips or crackers, Crispy Chickpeas (Roasted) offer sustained energy, support digestive health, and help stabilize blood sugar levels. They’re naturally gluten-free, vegan, and packed with antioxidants from spices like cumin and garlic powder.
Tips Variations & Cooking Advice
– Flavor Variations: Swap cumin for za’atar, Italian seasoning, or lemon pepper. For a sweet twist, use cinnamon and a pinch of sugar.
– Cooking Methods: An air fryer works wonders—cook at 375°F for 15–20 minutes, shaking halfway. For a stovetop version, pan-fry in a skillet over medium heat until golden.
– Dietary Adaptations: This recipe is already gluten-free and dairy-free. For oil-free roasting, use aquafaba (chickpea liquid) as a binder and roast at 375°F.
– Portion Changes: Double the batch for parties or weekly snacks. Store in an airtight container to maintain crunch.
Common Mistakes to Avoid
– Skipping the drying step: Moisture is the enemy of crispiness. Pat chickpeas until bone-dry.
– Overcrowding the pan: Chickpeas need space to roast, not steam. Use two baking sheets if needed.
– Underseasoning: Chickpeas are bland on their own. Be generous with spices and salt.
– Opening the oven too often: Each peek releases heat and extends cooking time. Trust the timer.
– Storing while warm: Trapped steam softens chickpeas. Cool completely before storing.
Storage & Meal Prep Tips
– Refrigeration: Store cooled chickpeas in an airtight container at room temperature for up to 5 days. Avoid refrigerating—moisture will soften them.
– Freezing: Freeze in a single layer on a baking sheet, then transfer to a freezer bag. Reheat in a 350°F oven for 5–7 minutes to restore crunch.
– Reheating: To revive stale chickpeas, spread on a baking sheet and roast at 350°F for 3–5 minutes. Avoid microwaving—it makes them chewy.
– Meal Prep: Roast a large batch on Sunday and portion into snack bags for the week. Pair with fresh veggies or hummus for a balanced lunch.
Conclusion
Mastering Crispy Chickpeas (Roasted) is a simple yet transformative skill that elevates your snacking game. By following these steps, you’ll create a crunchy, flavorful treat that’s far superior to anything from a bag. Whether you’re looking for Healthy Snacks to fuel your day or a crowd-pleasing appetizer, this recipe delivers on all fronts. We encourage you to experiment with spices, share your creations on social media, and explore more wholesome recipes on our site. Your taste buds—and your body—will thank you.
FAQs
1. Can I use dried chickpeas instead of canned?
Yes! Soak 1 cup dried chickpeas overnight, then boil until tender (about 1 hour). Drain, dry, and proceed with the recipe. Cooking time may vary slightly.
2. Why are my chickpeas still soft after roasting?
They likely weren’t dried enough, or the oven temperature was too low. Ensure chickpeas are bone-dry and roast at 400°F. If still soft, return to the oven for 5-minute intervals.
3. Can I make these without oil?
Absolutely. Toss chickpeas with aquafaba (chickpea liquid) and spices, then roast at 375°F. They’ll be slightly less crispy but still delicious.
4. How do I prevent chickpeas from burning?
Watch the color—they should be golden brown, not dark. If edges darken too quickly, reduce oven temperature by 25°F and extend cooking time.
5. Can I add sugar for a sweet version?
Yes! After roasting, toss with cinnamon and a light dusting of powdered sugar. For a caramelized version, add a tablespoon of maple syrup before roasting, but watch closely to prevent burning.