The Ultimate Dutch Baby Pancake Recipe: Fluffy, Golden, and Easy to Make
Have you ever wondered why a single pancake can feel so decadent, yet come together in just minutes? The answer lies in a puffed, buttery oven-baked creation that’s equally impressive for breakfast, brunch, or even a quick dinner. I’m talking about the Dutch Baby Pancake, a showstopper that rises dramatically in the oven and collapses into a custard-like bowl perfect for toppings. While it shares a close kinship with the German Pancake, the Dutch baby is typically made in a cast-iron skillet and boasts a slightly thicker, more custard-like interior. Preparing this recipe at home saves you money, lets you control the ingredients, and fills your kitchen with a heavenly aroma of vanilla and butter. With just a handful of pantry staples, you can create a restaurant-quality dish in under 30 minutes. This guide provides a data-driven, foolproof method to ensure your pancake puffs perfectly every time.
Ingredients & Kitchen Tools
For the Batter
– 3 large eggs – Room temperature eggs create a smoother batter and better rise.
– ½ cup all-purpose flour – For structure; sift to avoid lumps.
– ½ cup whole milk – Warm milk helps the batter emulsify. Substitute with oat or almond milk for dairy-free.
– 1 tablespoon granulated sugar – Adds subtle sweetness; omit for a savory version.
– 1 teaspoon vanilla extract – Enhances flavor; use vanilla bean paste for a richer taste.
– Pinch of salt – Balances sweetness and strengthens the gluten network.
– 2 tablespoons unsalted butter – Melted in the skillet before adding batter; use vegan butter for dairy-free.
Kitchen Tools
– 10-inch cast-iron skillet – Retains heat best for a high rise. Use a 9-inch pie dish or oven-safe nonstick pan as substitute.
– Blender or whisk – Blender gives a silky batter in seconds; a whisk works with a bit more elbow grease.
– Measuring cups and spoons
– Spatula – For scraping batter and serving.
– Oven mitts – The skillet gets extremely hot.
Prep Time & Cooking Schedule
– Prep Time: 5 minutes (including egg warming)
– Cook Time: 20–22 minutes
– Total Time: 25–27 minutes
– Resting Time: None required, but let the pancake cool for 2 minutes before serving to avoid burns.
Planning Tip: Preheat your oven and skillet together for at least 15 minutes. This ensures the pan is screaming hot when the batter hits it, which is critical for that dramatic puff.
Step-by-Step Instructions
1. Preheat your oven to 425°F (220°C). Place a 10-inch cast-iron skillet inside the oven while it preheats. The hot pan is non-negotiable for a great Dutch Baby Pancake.
2. Blend the batter. In a blender, combine eggs, flour, milk, sugar, vanilla, and salt. Blend on high for 20–30 seconds until completely smooth with no flour pockets. If whisking by hand, whisk until no lumps remain, then let the batter rest for 5 minutes to relax the gluten.
3. Melt the butter. Carefully remove the hot skillet from the oven (use oven mitts!). Add the 2 tablespoons of butter and swirl until melted and bubbling. Pour the batter directly into the center of the skillet.
4. Bake immediately. Return the skillet to the oven and bake for 20–22 minutes, without opening the door, until the pancake is puffed and deeply golden brown. The edges should be crisp and rise well above the pan. A classic German Pancake has similar puffing behavior, but this version uses a slightly higher butter-to-egg ratio for extra richness.
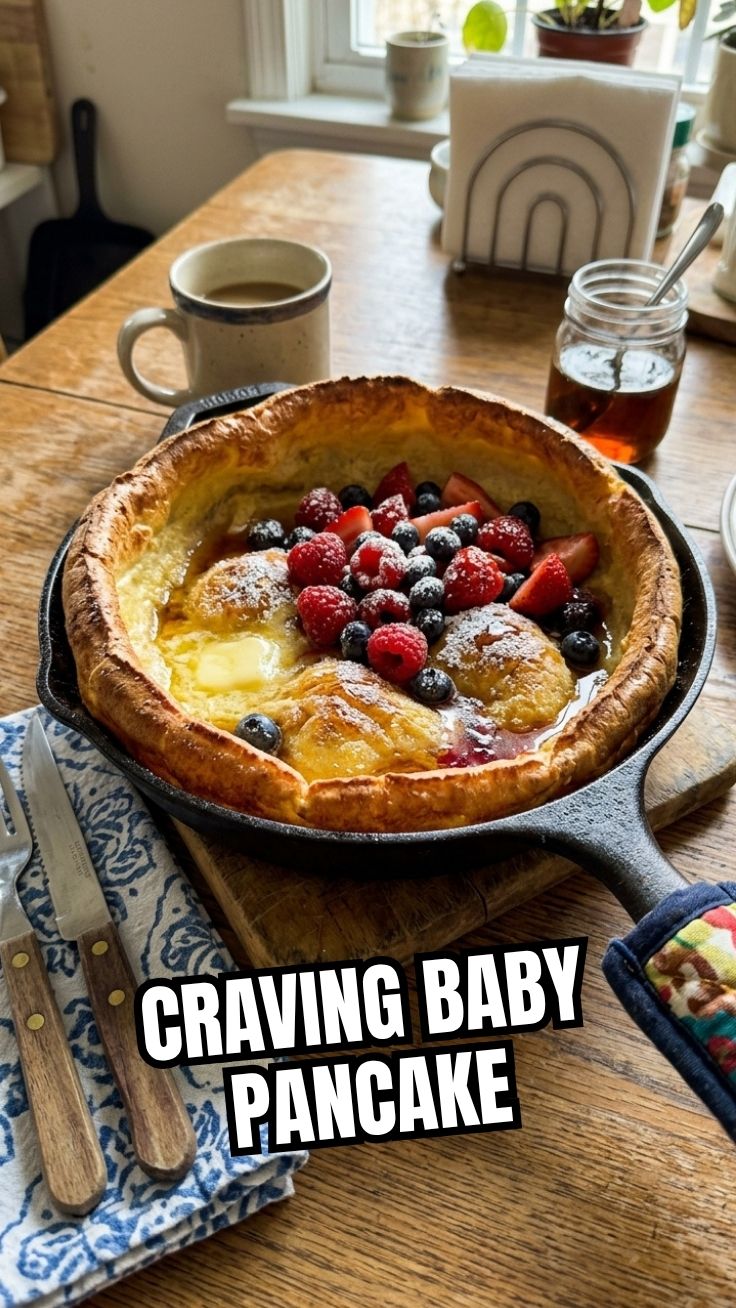
5. Serve at once. The pancake will deflate quickly after being removed. Top with powdered sugar, fresh berries, lemon juice, or maple syrup. Cut into wedges and enjoy while warm.
Texture cues: The interior should be soft, custard-like, and slightly eggy. If the center is too runny, bake 2–3 minutes longer. For a crispier top, brush with melted butter before serving.
Nutritional Benefits & Advantages
A Dutch baby pancake is surprisingly nutrient-dense for a decadent breakfast. Each serving (1/4 of the recipe) provides approximately:
– Protein: 8g from eggs and milk – supports muscle repair and satiety.
– Calcium: 6% daily value – from milk, essential for bone health.
– Vitamin D: Eggs are a natural source, aiding immune function.
– Healthy fats: Butter provides conjugated linoleic acid (CLA) in moderation.
Compared to traditional pancakes, this oven-baked version uses less oil and no leavening agents (baking powder/soda), relying solely on steam and egg structure for lift. It’s naturally gluten-free if you swap the flour (see tips below). The high egg content also makes it a lower-carb option when served with berries instead of syrup.
Tips, Variations & Cooking Advice
– Flavor Variations: Add ½ teaspoon cinnamon or nutmeg to the batter. For a savory spin, omit sugar and add black pepper, thyme, and shredded Gruyère cheese before baking.
– Ingredient Swaps: Use whole wheat pastry flour for a nuttier flavor. Replace milk with buttermilk for tanginess. For a dairy-free version, use almond milk and vegan butter.
– Alternative Cooking Methods: Bake in a 9-inch pie dish or a stainless steel oven-safe pan. Avoid non-stick pans that can’t handle high heat.
– Portion Changes: Halve the recipe for a personal-sized pancake in a 6-inch skillet. Double it for a large family brunch.
– Dietary Adaptations: Make it gluten-free by using a 1:1 gluten-free flour blend (add 1 tablespoon extra milk). For keto, substitute almond flour (1/4 cup) and erythritol.
Common Mistakes to Avoid
1. Cold eggs or milk – Cold ingredients prevent proper emulsification, resulting in a dense pancake. Warm them in a bowl of hot water for 5 minutes.
2. Skipping preheating the skillet – A lukewarm pan won’t create the steam needed for a high rise. Always preheat for at least 10 minutes with the oven.
3. Opening the oven door too early – The sudden temperature drop can cause the pancake to collapse. Resist checking until the timer rings.
4. Overmixing the batter – Using a blender is fine, but hand-whisking too vigorously develops gluten, making the pancake tough. Mix only until smooth.
5. Pouring batter into a cold pan – The butter must be bubbling hot. If the butter isn’t sizzling, return the skillet to the oven for another minute.
Storage & Meal Prep Tips
– Refrigeration: Leftover Dutch baby pancake can be stored in an airtight container in the refrigerator for up to 2 days.
– Freezing: Wrap individual slices in plastic wrap, then foil. Freeze for up to 1 month.
– Reheating: For best texture, reheat in a 350°F (175°C) oven for 5–7 minutes until crisp. Avoid the microwave, which makes it soggy. Alternatively, toast in a dry skillet over medium heat for 2 minutes per side.
– Meal Prep: The dry ingredients (flour, sugar, salt) can be pre-mixed in a jar. When ready, add wet ingredients and blend. The batter does not store well once mixed – bake immediately.
Conclusion
This recipe proves that a stunning, puffed pancake is within anyone’s reach. By mastering the heat and the simple batter, you can create a centerpiece breakfast that delights family and guests alike. The Dutch Baby Pancake remains a versatile classic, while the similar German Pancake offers its own unique appeal. Remember to preheat your skillet, use room-temperature eggs, and serve immediately for that dramatic puff. I encourage you to try this recipe this weekend, top it with your favorite fruit or syrup, and share your creation with friends. For more breakfast inspiration, explore our other quick bread and pancake recipes – your oven is ready to impress.
FAQs
Q1: Can I make a Dutch baby pancake without a cast-iron skillet?
Yes. Use an oven-safe 9-inch pie dish, a 10-inch stainless steel skillet, or a ceramic baking dish. Avoid glass or non-stick pans that aren’t rated for 425°F.
Q2: Why didn’t my pancake puff up?
Most likely the pan wasn’t hot enough, or the oven temperature was too low. Preheat the skillet for at least 10 minutes and always use an oven thermometer. Also ensure your eggs and milk are at room temperature.
Q3: Can I add fruit directly into the batter?
It’s better to add fruit after baking because fresh fruit releases juices that can prevent proper puffing. For baked-in fruit, toss in frozen berries mixed with a little flour to absorb moisture.
Q4: How do I make it less eggy?
Use one less egg and add 2 tablespoons more milk. The texture will be less custard-like, but still good. Alternatively, add a teaspoon of lemon zest to mask the egg flavor.
Q5: Can I prepare the batter the night before?
It’s not recommended. The leavening action depends on fresh eggs and immediate baking. If you must prepare ahead, combine dry ingredients and separate wet ones, then mix and bake immediately in the morning.
—
Try this recipe and let us know how it turned out! For more easy brunch ideas, check out our guide to fluffy omelets and savory muffins.

Quick way to grow a 6-inch Dutch Baby Pancake. Dutch Baby Pancake
Ingredients
Equipment
Method
- Preheat your oven to 425°F (220°C) with a 6-inch cast iron skillet inside. This ensures the skillet is hot when you add the batter.
- In a medium bowl, whisk together the flour, milk, eggs, sugar, and salt until smooth. Make sure there are no lumps in the batter.
- Carefully remove the hot skillet from the oven and add the unsalted butter. Swirl the butter around until it is melted and coats the bottom and sides of the skillet.
- Pour the batter into the hot skillet. The batter will immediately start to sizzle around the edges.
- Return the skillet to the oven and bake for 15-20 minutes, or until the pancake is puffed up and golden brown around the edges. Avoid opening the oven door during baking.
- Once baked, remove the Dutch baby from the oven. It will start to deflate slightly as it cools.
- Serve immediately with your favorite toppings such as fresh fruit, powdered sugar, maple syrup, or lemon juice.