“`json
{
“blog_post”: “
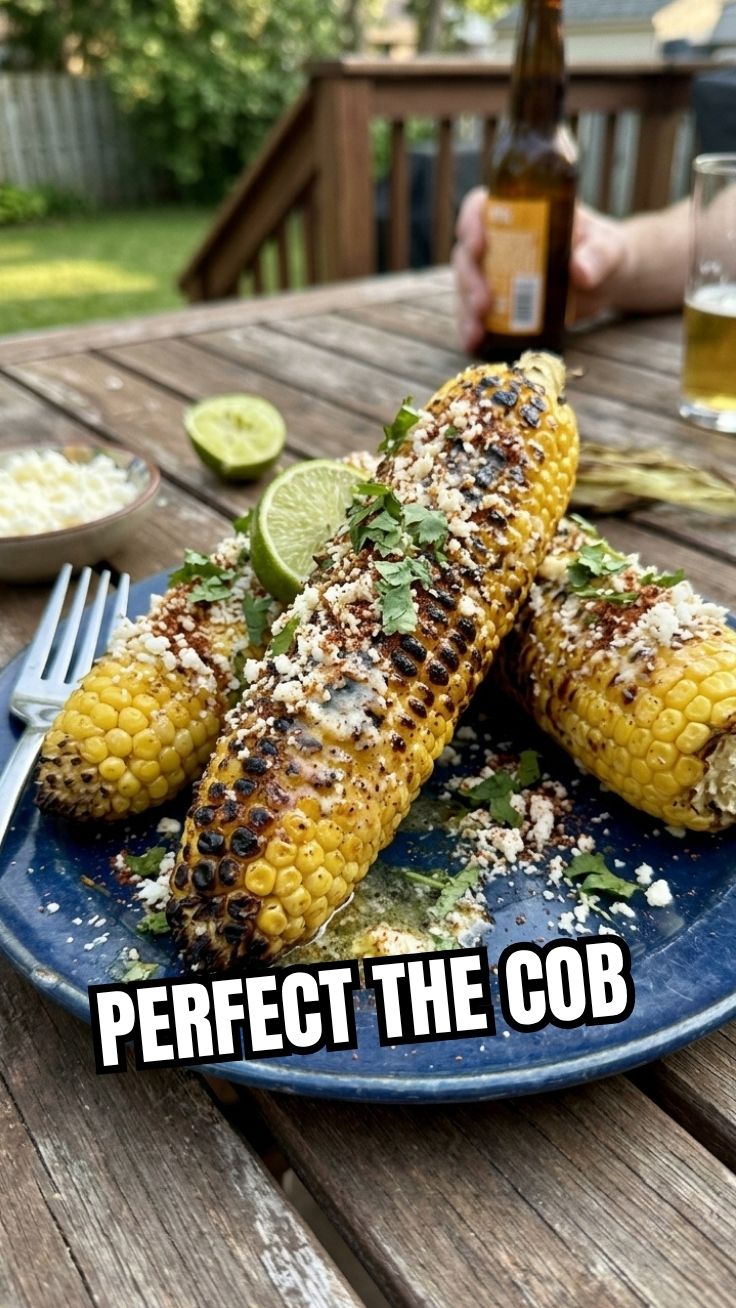
The Ultimate Guide to Perfect Grilled Corn on the Cob (Elote-Style)
\n\n
Have you ever bitten into a piece of grilled corn that was dry, unevenly charred, or just plain bland? It’s a common disappointment, but the good news is that achieving that sweet, smoky, and juicy perfection is entirely within your reach. Homemade Grilled Corn on the Cob isn’t just a summer side dish – it’s a canvas for bold flavors, and making it yourself lets you control everything from the butter to the spice. Whether you’re after classic elote, a chili-lime kick, or a simple herb butter finish, the best grilled corn recipes start with a solid technique. In this guide, you’ll learn the essential steps to get consistently charred, tender kernels every time.
\n\n
Ingredients & Kitchen Tools
\n
Having the right ingredients and tools ensures smooth cooking. Below is a checklist of everything you need, along with optional swaps.
\n
- \n
- Fresh corn on the cob (4–6 ears) – Look for still-husked ears with moist green husks and plump kernels.
- Butter or vegan margarine (4 tablespoons) – Adds richness; salted or unsalted both work. For dairy-free, use coconut oil or a plant-based butter.
- Salt and pepper (to taste) – Use flaky sea salt for a better crunch.
- Chili powder or smoked paprika (1 tsp) – Provides warmth and depth; omit for plain corn.
- Cotija cheese or feta (½ cup, crumbled) – Authentic elote uses cotija; feta or nutritional yeast are fine substitutes.
- Fresh lime juice (1–2 limes) – Adds brightness.
- Fresh cilantro (¼ cup, chopped) – Optional but recommended for elote.
- Kitchen tools: Grill (gas or charcoal), tongs, basting brush, large bowl, aluminum foil (if grilling in husks), and a sharp knife for husking.
- Prep time: 10 minutes (shucking, washing, mixing seasonings).
- Cook time: 12–15 minutes (rotating every 3–4 minutes over medium-high heat).
- Resting time: 2–3 minutes after grilling to allow butter to set.
- Total time: ~25 minutes. If you’re marinating or soaking husks, add 30 minutes for soaking beforehand.
- Prepare the corn: Remove all husks and silk threads. Rinse under cold water and pat dry. You can leave a thin layer of husk attached for a steamed effect, but for maximum char, go completely bare.
- Preheat the grill: Clean the grates and oil them lightly using a paper towel dipped in vegetable oil. This prevents sticking.
- Grill the corn: Place the ears directly on the grate. Cook for 12–15 minutes, turning every 3–4 minutes with tongs. Look for charred spots on about 40% of the surface. If kernels start to pop, the heat is too high – move corn to a cooler zone.
- Season while hot: Remove corn from the grill. Immediately brush with melted butter (or a flavored oil). Sprinkle with salt, pepper, and chili powder. For an authentic elote, scatter crumbled cotija cheese and squeeze lime juice over the top. This is where many grilled corn recipes shine – don’t be shy with the toppings.
- Rest and serve: Let the corn sit for 2–3 minutes so the butter and seasonings meld. Garnish with cilantro and serve immediately.
- Flavor variations: Try a garlic-herb butter (minced garlic + parsley), a spicy sriracha-lime dressing, or a smoky chipotle mayo spread.
- Ingredient swaps: Use olive oil instead of butter for a dairy-free version. Replace cotija with crumbled feta or omit cheese entirely for a clean paleo option.
- Alternative cooking methods: If you don’t have a grill, use a grill pan on the stovetop over high heat, or broil the corn in the oven on a baking sheet for 10–12 minutes (flip halfway).
- Portion changes: Scale up or down easily – each ear cooks in the same time, just adjust the number of ears.
- Dietary adaptations: For keto, reduce butter to 1 tablespoon per ear; for whole30, use ghee or avocado oil.
- Overcooking: Corn turns mushy when grilled too long. Set a timer and check for a slight snap in the kernels.
- Undersalting: Kernels need enough salt to bring out sweetness – taste before serving and adjust.
- Grilling without oil: Dry corn sticks to grates and chars unevenly. Lightly oil the corn or the grates.
- Adding toppings too early: Cheese or mayo will drip off if applied before the corn has cooled slightly. Brush butter first, then add dry toppings.
- Can I grill corn without removing the husk? Yes, but you’ll get a more steamed texture. Peel back husks, remove silk, then fold husks back and soak in water for 20 minutes before grilling. This prevents the corn from drying out.
- Why is my grilled corn tough? Tough kernels usually mean undercooking or cooking at too low a heat. Make sure the grill is truly medium-high (you should not be able to hold your hand over the heat for more than 2 seconds).
- How do I make this dairy-free? Replace butter with a plant-based margarine or avocado oil. Omit cheese or use a dairy-free alternative like Follow Your Heart’s parmesan-style shreds.
- Can I prepare the corn ahead of time? You can shuck and pre-season the corn a few hours in advance, but grill just before serving. Pre-cooked grilled corn can be reheated in a skillet or oven as described above.
- What if I don’t have a grill? A cast-iron grill pan on the stove works perfectly. Heat it over high heat until smoking, then reduce to medium-high and cook corn for 10–12 minutes, turning every 2 minutes.
\n
\n
\n
\n
\n
\n
\n
\n
\n\n
Prep Time & Cooking Schedule
\n \n
\n
Planning ahead prevents last-minute stress.
\n
- \n
\n
\n
\n
\n
\n
This schedule is perfect for a weeknight dinner or a weekend barbecue – just fire up the grill while you prep the toppings.
\n\n
Step-by-Step Instructions
\n
Follow these steps for foolproof results. Temperature control is key: aim for medium-high heat (around 400°F / 200°C) for a good char without burning.
\n
- \n
\n
\n
\n
\n
\n
\n
The secret to this particular batch of grilled corn recipes is the balance of heat and citrus – it’s a version that works equally well for a side or a light main course.
\n\n
Nutritional Benefits & Advantages
\n
Corn on the cob is naturally gluten-free and packed with fiber, vitamins B and C, and antioxidants like lutein and zeaxanthin (good for eye health). Grilling adds no extra fat (beyond what you brush on), making it a lighter alternative to boiled corn with heavy cream. The chili and lime boost metabolism and provide vitamin C, while cotija cheese offers calcium and protein. This dish fits into vegetarian, vegan (with swaps), and low-calorie diets.
\n\n
Tips Variations & Cooking Advice
\n
- \n
\n
\n
\n
\n
\n
\n\n
Common Mistakes to Avoid
\n
- \n
\n
\n
\n
\n
\n\n
Storage & Meal Prep Tips
\n
Leftover grilled corn can be stored in an airtight container in the refrigerator for up to 3 days. To freeze, remove kernels from the cob and place in a freezer bag – they’ll keep for 3 months. Reheat in a skillet over medium heat for 2–3 minutes, or microwave for 45 seconds. For best texture, avoid reheating in the microwave if you want to preserve the char – a quick broil or dry pan works wonders.
\n\n
Conclusion
\n
Mastering Grilled Corn on the Cob gives you a versatile foundation for any summer meal. Whether you stick with classic elote or experiment with your own spice blends, the technique remains the same: hot grill, frequent turns, and bold seasoning. The world of grilled corn recipes is vast, and this simple method unlocks endless creativity. Try this recipe tonight, snap a photo, and share your version – we’d love to see how you make it your own.
\n\n
FAQs
\n
- \n
\n
\n
\n
\n
\n
\n\n
”
}
“`
Grilled Corn on the Cob
Ingredients
Equipment
Method
- Remove husks and silk from the corn on the cob.
- Preheat grill to medium-high heat.
- Brush corn with melted butter and season with salt and pepper.
- Grill corn, turning occasionally, for 10-15 minutes, or until tender and lightly charred.
- Serve hot.