Why This Bold and Hearty Recipe Deserves a Spot in Your Weekly Meal Plan
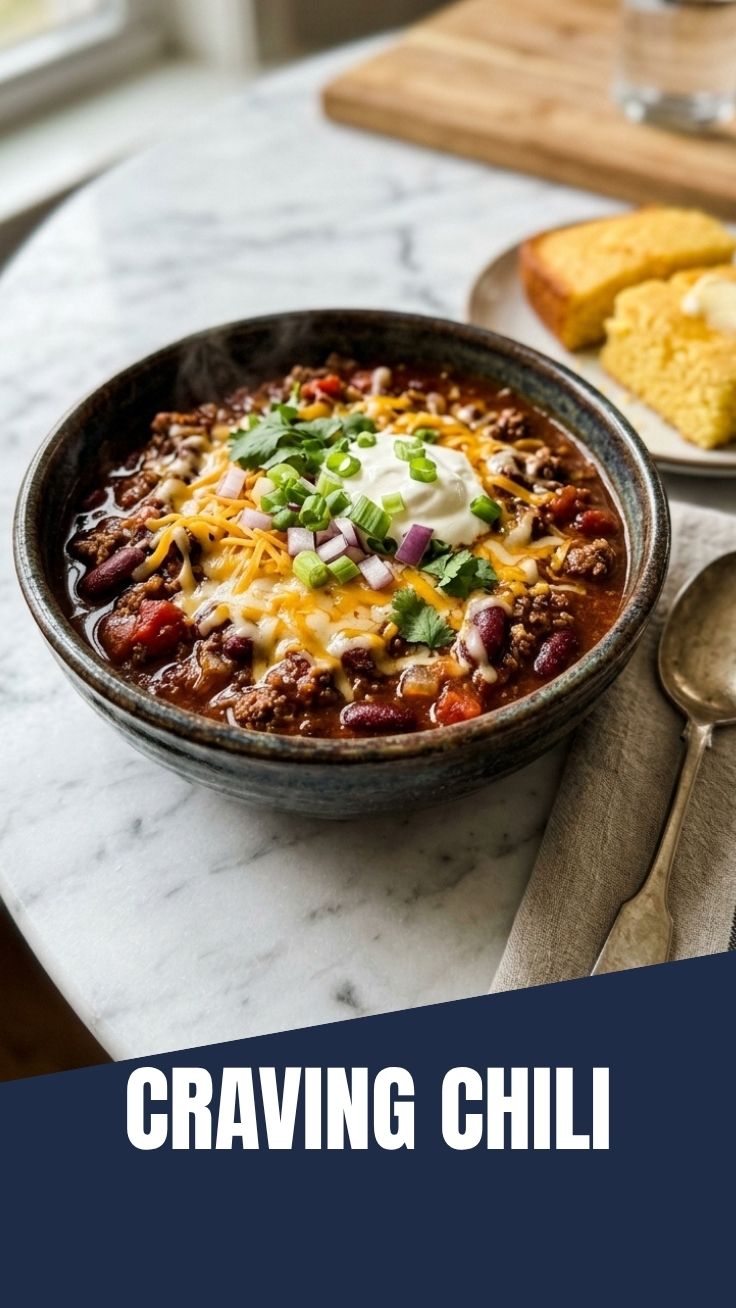
Have you ever craved a meal that delivers both comfort and a kick of heat without requiring hours in the kitchen? Imagine coming home after a long day to the aroma of tender protein, aromatic spices, and creamy broth simmering on the stove. Preparing this dish at home isn’t just about saving money—it gives you total control over quality, heat level, and nutritional content. Whether you’re meal-prepping for the week or feeding a hungry family, this one-pot wonder delivers satisfaction in every spoonful. This Chili recipe transforms simple ingredients into something deeply comforting and nourishing.
What makes this version truly stand out is the careful balance of flavors and textures. It’s naturally creamy without heavy cream, packed with protein, and can be customized to your preferred heat level. If you love food that warms you from the inside out, then this Spicy masterpiece will become your go-to.
—
Ingredients & Kitchen Tools
For the Recipe:
– Boneless, skinless chicken breasts (or thighs) – 1.5 lbs: Thighs stay juicier, but breasts work for leaner results.
– Great Northern beans – 2 cans (15 oz each), drained and rinsed: Navy or cannellini beans work too.
– Green chiles – 1 can (4 oz): Mild or hot, depending on your tolerance.
– Jalapeño pepper – 1, seeded and minced: Leave seeds for extra heat.
– Yellow onion – 1 medium, diced
– Garlic cloves – 4, minced
– Chicken broth – 4 cups: Low-sodium preferred.
– Ground cumin – 2 tsp
– Dried oregano – 1 tsp
– Smoked paprika – 1 tsp
– Salt and black pepper – To taste
– Greek yogurt or sour cream – ½ cup: For creaminess at the end.
– Fresh cilantro – ¼ cup, chopped (for garnish)
– Lime juice – 2 tbsp (fresh)
Kitchen Tools:
– Large Dutch oven or heavy-bottomed pot (5–6 quart)
– Wooden spoon or silicone spatula
– Chef’s knife
– Cutting board
– Can opener
– Measuring spoons and cups
– Ladle
Optional Substitutions:
– Vegan version: Replace chicken with extra firm tofu or jackfruit, use vegetable broth.
– Dairy-free: Omit yogurt; use blended cashews or a splash of full-fat coconut milk.
—
Prep Time & Cooking Schedule
– Prep Time: 15 minutes (chopping, mincing, draining beans)
– Cook Time: 30–35 minutes
– Total Time: About 50 minutes
Planning Tip:
Start your rice or cornbread while the chili simmers. This dish tastes even better the next day, so making it ahead is a wise choice.
—
Step-by-Step Instructions
1. Sauté the aromatics: Heat 1 tablespoon of olive oil in your Dutch oven over medium heat. Add the diced onion and cook for 4–5 minutes until translucent. Stir in the minced garlic and jalapeño, cooking another 60 seconds until fragrant. If you enjoy a bolder experience, this is where you can lean into the Spicy side by adding extra jalapeño or a pinch of cayenne.
2. Bloom the spices: Add cumin, oregano, and smoked paprika. Stir constantly for 30 seconds—this releases their essential oils and deepens flavor.
3. Add chicken and broth: Place the chicken breasts in the pot. Pour in the chicken broth and green chiles. Bring to a gentle boil, then reduce heat to low. Cover and simmer for 18–20 minutes, or until the chicken reaches an internal temperature of 165°F.
4. Shred the chicken: Remove the chicken to a cutting board. Use two forks to shred it into bite-sized pieces. Return the shredded chicken to the pot.
5. Add beans and finish: Stir in the drained beans. Simmer uncovered for 5–7 minutes to thicken slightly. For an ultra-creamy texture, take 1 cup of the chili and blend it, then stir back into the pot.
6. Final touches: Remove from heat. Stir in Greek yogurt and lime juice. Taste and adjust salt and pepper. Garnish with cilantro. This Chili recipe is now ready to serve.
Texture cue: The broth should coat the back of a spoon—not watery, not overly thick. If it’s too thin, simmer longer; if too thick, add a splash of broth.
—
Nutritional Benefits & Advantages
This dish is a powerhouse of lean protein and fiber, helping you stay full and satisfied for hours. Great Northern beans supply resistant starch that supports gut health and stable blood sugar levels. The chicken provides complete protein for muscle repair and satiety. Cumin and oregano offer anti-inflammatory properties, while the jalapeño adds a metabolism-boosting compound called capsaicin. Using Greek yogurt instead of cream cuts saturated fat while adding probiotics. Each serving delivers around 35 grams of protein and 12 grams of fiber—perfect for weight management and sustained energy.
—
Tips Variations & Cooking Advice
– Smoke lover’s twist: Add 1 chipotle pepper in adobo sauce for a smoky-sweet heat.
– Creamy avocado version: Top with sliced avocado, shredded cheese, and tortilla strips.
– Gluten-free: This recipe is naturally gluten-free. Double-check broth labels.
– Dairy-free adaptation: Omit yogurt; stir in ¼ cup unsweetened cashew cream or canned coconut cream.
– Slow cooker method: Add everything except yogurt, lime, and garnishes. Cook on low 6–8 hours or high 3–4 hours. Shred chicken, stir in final ingredients before serving.
– Extra veggies: Fold in corn kernels, diced zucchini, or spinach during the last 5 minutes.
—
Common Mistakes to Avoid
1. Overcooking the chicken: Leads to dry, stringy meat. Simmer just until cooked through and shred immediately.
2. Skipping the spice bloom: Adding dry spices directly to liquid results in flat flavor. Always toast them in hot oil first.
3. Adding dairy too early: Yogurt or sour cream will curdle if boiled. Remove from heat before stirring in.
4. Using too much liquid: If you add extra broth or fail to drain beans, your chili will be watery. Simmer uncovered to reduce if needed.
5. Dull heat profile: If the chili lacks kick, add a splash of hot sauce or a pinch of cayenne at the end rather than during cooking.
—
Storage & Meal Prep Tips
– Refrigeration: Store in an airtight container for up to 4 days. The flavors improve overnight.
– Freezing: This chili freezes beautifully. Portion into freezer-safe bags or containers, leaving 1-inch headspace. Freeze up to 3 months.
– Reheating: Thaw overnight in the fridge. Reheat on the stovetop over medium-low heat, stirring occasionally. Add a splash of broth if needed. Microwave in 60-second bursts, stirring between each.
– Texture preservation: If freezing, consider adding the yogurt and lime after thawing and reheating, as they can separate during freezing.
—
Conclusion
This one-pot meal proves that Chili can be both nourishing and deeply satisfying without relying on heavy ingredients. The Spicy elements are easily adjustable, making it accessible to all palates while still delivering a warming, savory experience. By cooking at home, you gain control over every element—from sodium levels to heat intensity—while enjoying leftovers that taste even better the next day. Give it a try, and don’t forget to share your result with friends who love bold, wholesome food.
—
FAQs
1. Can I use canned chicken to save time?
Yes, but the texture will be softer and less flavorful. If using, add it with the beans and simmer just 5 minutes to heat through.
2. My chili is too watery. How do I thicken it?
Simmer uncovered for 5–10 more minutes to reduce. Alternatively, mash some beans against the pot side with a spoon to release natural starches.
3. Can I make this in an Instant Pot?
Absolutely. Sauté onions, garlic, and spices on Sauté mode. Add chicken, broth, and chiles. Pressure cook on High 12 minutes. Quick release, shred chicken, stir in beans and remaining ingredients.
4. What if I don’t have Great Northern beans?
Cannellini, navy beans, or even canned chickpeas work well. Each offers a slightly different creaminess.
5. How do I reduce the heat without losing flavor?
Skip the jalapeño and use mild green chiles. Add a tablespoon of brown sugar or honey at the end to balance any remaining heat.
6. Can I substitute chicken with another protein?
Yes, try shredded turkey, pork shoulder, or even cooked lentils for a plant-based version. Adjust cooking times accordingly.
Best way to grow Chili: 5 Steps for Spicy Peppers.
Ingredients
Equipment
Method
- Start your chili seeds indoors 8-10 weeks before the last frost date.
- Plant seeds 1/4 inch deep in good quality potting mix and keep the soil moist and warm.
- Once seedlings have at least two sets of true leaves, transplant them into larger pots or directly into your garden after the last frost.
- Ensure they are in a sunny spot with well-draining soil.
- Water regularly, especially during dry spells, keeping the soil consistently moist but not waterlogged.
- Feed your plants with a balanced fertilizer every 2-4 weeks.
- Monitor your plants for pests like aphids and spider mites, treating them with organic pest control methods if necessary.
- Healthy plants are more resistant to pests and diseases.
- Harvest chilies when they reach their full color and desired size.
- Cut the peppers from the plant using shears or a sharp knife, leaving a small piece of stem attached.