The Ultimate Apple Crisp Recipe: Warm, Buttery, and So Easy to Make
Have you ever craved a dessert that tastes like a warm hug on a cool autumn evening? That’s exactly what a perfectly baked Apple Crisp delivers—tender cinnamon-spiced apples under a golden, crunchy oat topping. While a classic Apple Pie is a labor of love with its finicky crust, this rustic cousin comes together in half the time with no rolling or chilling required. Learning to make an apple crisp at home means you control the sweetness, choose your favorite apple varieties, and enjoy a dessert that’s endlessly adaptable. In this guide, I’ll walk you through every step—from selecting the right fruit to serving it bubbling hot. Whether you’re a seasoned baker or a complete beginner, this recipe will become your go-to for cozy, crowd-pleasing comfort.
Ingredients & Kitchen Tools
For the Apple Filling
– 6 medium apples (Honeycrisp, Granny Smith, or a mix) – Peeled, cored, and sliced ¼-inch thick. A blend of tart and sweet gives the best flavor.
– 2 tablespoons lemon juice – Prevents browning and brightens the fruit.
– ¼ cup granulated sugar (or coconut sugar) – Adjust based on apple sweetness.
– 1 teaspoon ground cinnamon – The essential spice; add ¼ teaspoon nutmeg if desired.
– 1 tablespoon cornstarch – Thickens the juices without making them gummy.
For the Crisp Topping
– 1 cup old-fashioned rolled oats – Not quick oats; they provide texture and chew.
– ½ cup all-purpose flour (or gluten-free 1:1 blend) – Binds the topping.
– ½ cup packed brown sugar (light or dark) – Adds depth and caramel notes.
– ½ teaspoon salt – Balances sweetness.
– ½ cup cold unsalted butter (or vegan butter) – Cubed; cutting it in creates that crumbly texture.
Kitchen Tools
– 9×9-inch baking dish (or 2-quart casserole)
– Large mixing bowl
– Smaller bowl for topping
– Pastry cutter or fork (or your fingers)
– Chef’s knife and cutting board
– Measuring cups and spoons
– Spatula and peeler
Optional substitutions: Swap oats for chopped nuts (pecans or walnuts) for extra crunch; use maple syrup instead of brown sugar (reduce liquid elsewhere); replace butter with coconut oil for a dairy-free version.
Prep Time & Cooking Schedule
– Prep time: 15 minutes (peeling and slicing apples, mixing topping)
– Cook time: 35–40 minutes at 375°F (190°C)
– Resting time: 10 minutes after baking (lets juices settle)
– Total time: 1 hour
Plan ahead: The topping can be made a day in advance and stored in the refrigerator. Apples should be sliced just before assembling to prevent browning. If you’re serving it for a dinner party, assemble the crisp, cover, and refrigerate up to 4 hours before baking—just add 5 extra minutes to the bake time.
Step-by-Step Instructions
1. Preheat your oven to 375°F (190°C). Lightly grease the baking dish with butter or nonstick spray.
2. Prepare the apples: In a large bowl, toss the sliced apples with lemon juice, granulated sugar, cinnamon, and cornstarch. Stir until every piece is coated. Let them sit for 5 minutes—this maceration draws out juices that will create a luscious sauce. For best results, use a mix of firm-sweet apples like Fuji and tart Granny Smith. Too much soft apple (like McIntosh) can turn mushy.
3. Make the crisp topping: In a separate bowl, combine oats, flour, brown sugar, and salt. Add the cold cubed butter. Using a pastry cutter or your fingertips, work the butter into the dry mixture until it resembles coarse crumbs with some pea-sized butter bits. Do not overmix—those small butter lumps will melt into steam pockets, giving you a crunchy, tender topping. This is the hallmark of a great apple crisp that stands apart from a traditional apple pie crust.
4. Assemble: Pour the apple mixture into the prepared dish, spreading evenly. Sprinkle the topping over the apples in an even layer—don’t press it down. Leave some clumps for texture.
5. Bake on the center rack for 35–40 minutes. The crisp is ready when the topping is deep golden brown and the filling bubbles at the edges. If the top browns too quickly, tent loosely with foil after 20 minutes.
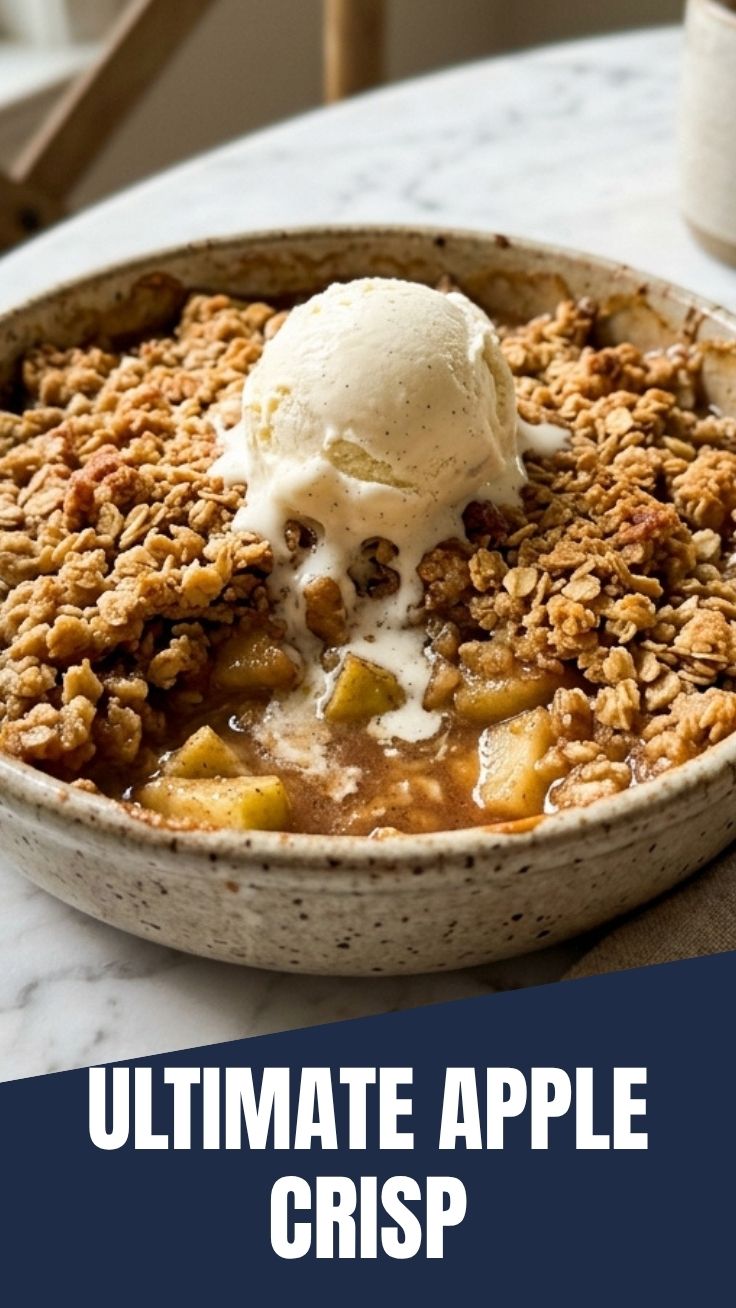
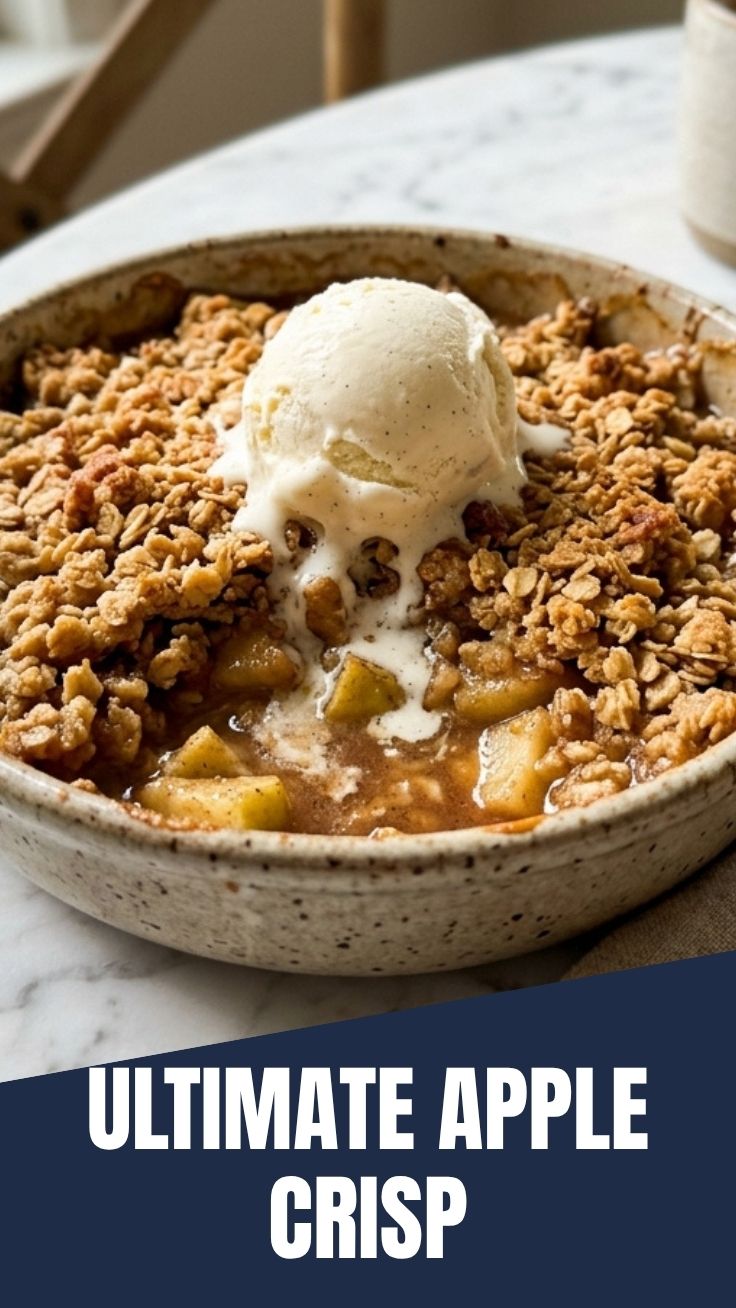
6. Rest and serve: Let the crisp cool for 10 minutes. Serve warm with vanilla ice cream, whipped cream, or a drizzle of caramel sauce. The resting time allows the filling to thicken so it doesn’t run across your plate.
Nutritional Benefits & Advantages
This apple crisp offers more than just irresistible flavor. Apples are rich in fiber (especially pectin) and vitamin C, supporting digestion and immunity. Oats provide beta-glucan, a soluble fiber that helps lower cholesterol. When you use less sugar and swap in whole-grain oats, this dessert becomes a relatively wholesome treat compared to buttery pie crusts or frosted cakes. One serving (about ⅙ of the dish) contains roughly 280 calories, 10g fat, 45g carbs, and 3g protein. To boost nutrition, reduce sugar to 2 tablespoons and add a tablespoon of flaxseed meal to the topping. Compared to a slice of Apple Pie, the crisp typically has less saturated fat and no refined pastry—making it a lighter yet equally satisfying choice for your sweet tooth.
Tips Variations & Cooking Advice
– Flavor twists: Add ½ teaspoon cardamom or ginger to the apple mixture. Toss in a handful of fresh or frozen cranberries for a tart pop. Replace half the oats with chopped pecans for extra crunch.
– Alternative cooking methods: Make individual ramekins (bake 20–22 minutes) or a larger 9×13 pan (increase bake time by 5–7 minutes). For a slow-cooker version, cook on low for 3 hours, then uncover and cook on high for 30 minutes to crisp the topping.
– Dietary adaptations: Use certified gluten-free oats and a 1:1 gluten-free flour blend for a celiac-safe dessert. Substitute butter with refined coconut oil or a nut-based vegan butter for dairy-free needs. For lower sugar, use a monk fruit–erythritol blend in place of both sugars (reduce liquid by 1 tablespoon).
– Seasonal swaps: In summer, try peaches or nectarines instead of apples; reduce baking time by 5 minutes. For a fall twist, add ½ cup diced pear with the apples.
Common Mistakes to Avoid
– Soggy topping: Usually caused by pressing the topping down or using too-small oats. Sprinkle loosely and use old-fashioned rolled oats, not quick oats.
– Watery filling: Not enough cornstarch or skipping the maceration step. Let the apples sit with sugar and cornstarch for 5 minutes to release—then pour everything into the dish, including the thick juice.
– Burnt edges, undercooked center: Oven temperature too high. Stick to 375°F and use a glass or ceramic dish for even heat distribution. If the edges brown too fast, lower to 350°F and bake 5 minutes longer.
– Butter pooling on top: Butter too warm or overmixed in the topping. Keep butter cold and work quickly. If you see butter leaking, gently stir the topping with a fork before baking.
– Mushy apples: Overbaking or using overly soft apples. Check at 30 minutes—apples should be tender but still hold their shape. Remove when bubbling and golden.
Storage & Meal Prep Tips
Cool completely (about 30 minutes) before storing. Cover the dish tightly with foil or transfer leftovers to an airtight container. Refrigerate for up to 4 days. For longer storage, freeze the unbaked crisp: assemble in a freezer-safe dish, wrap in plastic then foil, and freeze up to 3 months. Bake from frozen at 375°F for 50–55 minutes, adding 10 minutes. To reheat individual portions, microwave for 30–45 seconds (topping stays softer) or oven at 350°F for 10 minutes to revive crunch. Never let the crisp sit at room temperature for more than 2 hours—the apple filling can ferment. For meal prep, you can pre-slice the apples and toss them with lemon juice, sugar, and cornstarch; store in a sealed bag in the fridge for up to 12 hours before assembling.
Conclusion
Making a homemade apple crisp is one of the simplest yet most rewarding desserts you can pull off. With just a handful of pantry staples and fresh apples, you create a warm, bubbly dish that rivals any bakery version. The beauty lies in its flexibility—whether you’re swapping flours for a gluten-free diet or adding a scoop of ice cream, it never fails to impress. This apple pie alternative brings all the nostalgic comfort without the fuss of rolling dough. I hope you give this recipe a try, experiment with your favorite spice blends, and share the results with friends and family. After one bite, you’ll understand why this humble crisp has earned a permanent spot in my autumn baking rotation. Ready your apples and preheat that oven—your coziest dessert awaits!
FAQs
1. Can I use frozen apples for apple crisp?
Yes, but thaw them completely and drain excess liquid first. Reduce the cornstarch to 2 teaspoons, as frozen apples release more water. Bake 5–7 minutes longer.
2. What’s the best apple for crisp?
A mix of tart and sweet works best: Granny Smith (tart) + Honeycrisp or Fuji (sweet). Avoid Red Delicious, which turns mushy. Gala and Braeburn also hold up well.
3. Why did my crisp turn out watery?
You likely didn’t use enough cornstarch or the apples were very juicy. Next time, toss apples with 1½ tablespoons cornstarch and let them sit 10 minutes before baking. Also, make sure your topping isn’t so thick that it traps steam.
4. Can I make this vegan or gluten-free?
Absolutely. Use vegan butter or coconut oil, and a gluten-free 1:1 flour blend with certified gluten-free oats. The texture will be nearly identical—just avoid overmixing the topping.
5. How do I prevent the topping from burning?
If your oven runs hot or the topping darkens too quickly, lay a sheet of foil loosely over the dish after 20 minutes of baking. Remove foil for the last 5 minutes to re-crisp the top.
Quick way to grow 5 Apple Crisp apple trees
Ingredients
Equipment
Method
- Choose a sunny location with well-draining soil and dig holes twice the width of the root ball and just as deep for each of your five saplings.
- Carefully remove the saplings from their containers, gently loosen the roots, and place each sapling in a hole, ensuring the root collar is level with the ground.
- Backfill the holes with soil, gently tamping to remove air pockets, then water thoroughly to settle the soil around the roots.
- Apply a 2-3 inch layer of mulch around the base of each tree, keeping it a few inches away from the trunk to prevent rot.
- Insert a tree stake about 6 inches from the trunk of each tree and secure the sapling to the stake with a tree tie, allowing for some movement.
- Water the trees regularly, especially during dry periods, to ensure consistent moisture for optimal growth.