Why Homemade Pancakes Beat Store-Bought Every Time
Have you ever woken up craving that golden, fluffy stack but settled for a boxed mix because you thought scratch-made was too complicated? The truth is, mastering Pancakes at home takes less than 20 minutes and delivers a texture and flavor that no pre-packaged product can match. Homemade pancakes allow you to control the sweetness, incorporate fresh ingredients, and avoid unnecessary preservatives. Whether you’re a weekend breakfast enthusiast or a parent looking for a quick weekday meal, this guide will show you how to create consistently perfect pancakes. In this article, we’ll explore not only classic Pancakes but also a variety of Pancake recipes that you can adapt to your taste, diet, and schedule. Let’s dive into the science and art of the fluffiest breakfast staple.
Ingredients & Kitchen Tools
Essential Ingredients
– All-purpose flour – 1½ cups. Provides structure; for a lighter texture, sift before measuring.
– Granulated sugar – 2 tablespoons. A modest amount; adjust for sweeter or savory variations.
– Baking powder – 2 teaspoons. The main leavening agent; check freshness for proper rise.
– Baking soda – ½ teaspoon. Reacts with buttermilk or acid to create extra lift.
– Salt – ¼ teaspoon. Enhances overall flavor, not just sweetness.
– Buttermilk – 1¼ cups. Adds tanginess and activates the baking soda. Substitute with milk + 1 tablespoon lemon juice.
– Egg – 1 large, room temperature. Binds and enriches the batter.
– Butter – 3 tablespoons melted, plus extra for the pan. Adds richness and prevents sticking.
– Vanilla extract – 1 teaspoon. Optional but highly recommended for depth.
Kitchen Tools
– Large mixing bowl – for dry ingredients.
– Medium bowl – for wet ingredients.
– Whisk – to combine without overmixing.
– Griddle or non-stick skillet – ensures even heat distribution.
– 1/4 cup measuring cup – for consistent pancake size.
– Spatula – thin, flexible for flipping.
– Cooling rack – optional but prevents sogginess if making multiple batches.
Optional Substitutions
– Gluten-free: Use a 1:1 gluten-free flour blend with xanthan gum.
– Dairy-free: Replace buttermilk with almond milk + vinegar, and use coconut oil instead of butter.
– Egg-free: Use a flax egg (1 tbsp ground flax + 3 tbsp water) for a vegan version.
Prep Time & Cooking Schedule
– Prep time: 10 minutes (gather ingredients, combine dry and wet, rest batter).
– Cook time: 8–12 minutes (2–3 minutes per side, depending on heat).
– Resting time: 5 minutes after mixing the batter. This allows gluten to relax and bubbles to form, leading to taller pancakes.
– Total time: about 25 minutes from start to plate.
Planning tip: If you’re serving a crowd, hold cooked pancakes in a 200°F oven on a baking sheet while you finish the batch. This keeps them warm without drying out.
Step-by-Step Instructions
1. Combine dry ingredients: In a large bowl, whisk together flour, sugar, baking powder, baking soda, and salt. Make a well in the center.
2. Mix wet ingredients: In a separate bowl, whisk buttermilk, egg, melted butter, and vanilla until smooth.
3. Combine: Pour wet mixture into the dry well. Stir gently with a spatula until just incorporated – a few lumps are fine. Overmixing develops gluten and creates tough Pancakes.
4. Rest the batter: Let it sit for 5 minutes. During this time, the baking powder and soda react, producing tiny bubbles that will make your pancakes airy.
5. Heat the griddle: Set over medium heat. Add a small pat of butter or a drizzle of oil. When the butter sizzles but doesn’t brown, you’re ready.
6. Pour batter: Use a ¼-cup measure to pour rounds onto the griddle. Leave about 2 inches of space between each.
7. Watch for bubbles: When the edges look set and bubbles appear on the surface (about 2–3 minutes), flip with a thin spatula. Cook another 1–2 minutes until golden brown.
8. Check doneness: The second side cooks faster. Press gently – the center should spring back. Remove and keep warm.
Temperature control: If the first pancake browns too quickly, reduce heat slightly. The ideal surface temperature is 350°F – hot enough to cook through without burning. For buttermilk variations, slightly lower heat prevents the sugars from scorching.
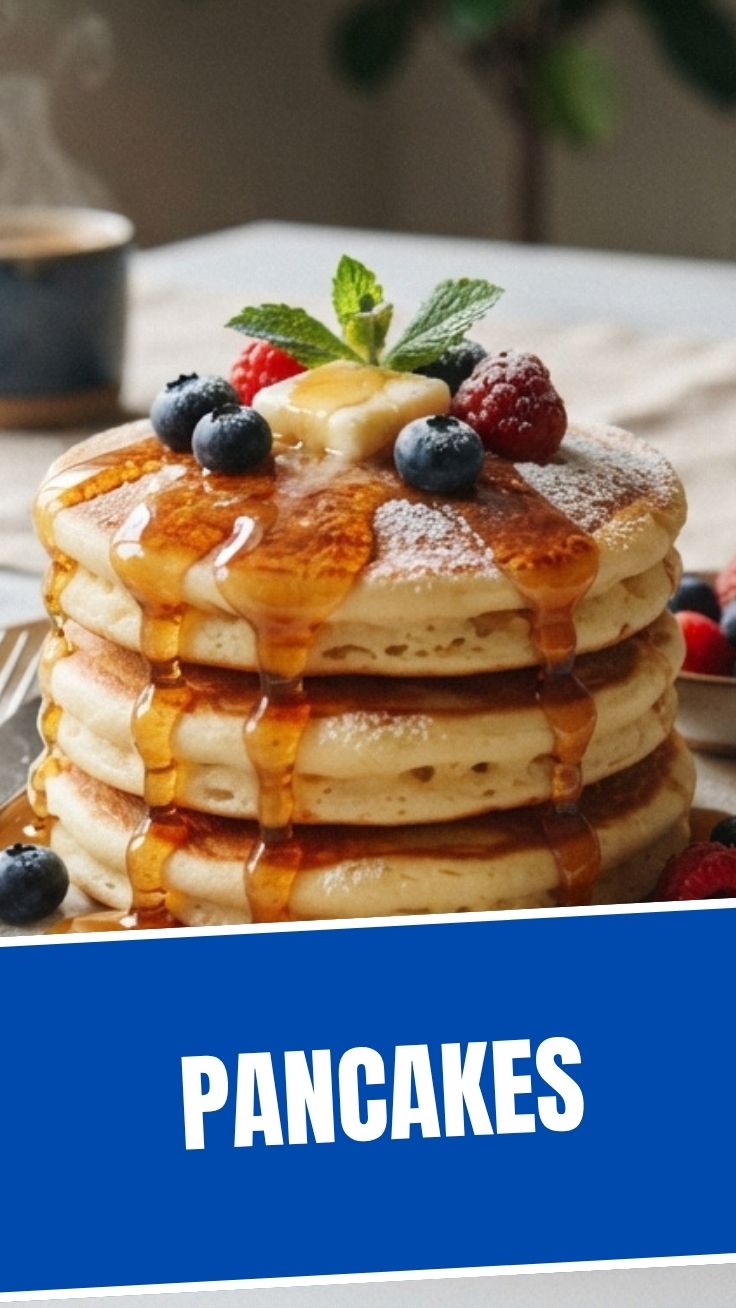
Texture cue: A perfectly cooked pancake is golden brown on both sides, fluffy inside, and has a slight dome shape. If your pancakes are flat, your baking powder may be old or the batter was overmixed.
Ingredient handling: Always measure flour by spooning into the cup and leveling off – scooping directly packs it, leading to dense pancakes. For the best Pancake recipes, room-temperature eggs and buttermilk blend more evenly, so take them out 15 minutes before starting.
Nutritional Benefits & Advantages
A single serving (3 pancakes, about 240g) provides approximately:
– Calories: 350
– Protein: 9g
– Carbohydrates: 48g (with 10g sugar)
– Fat: 14g (mostly from butter)
– Calcium: 15% of the daily value (from buttermilk)
Homemade pancakes offer control over fat and sugar content. Using buttermilk adds probiotics and calcium, while whole-grain flour variations boost fiber. The moderate protein helps sustain energy, making this a balanced breakfast option. Compared to restaurant versions, which often use excess butter and syrup, home-cooked pancakes can be part of a healthy diet when paired with fresh fruit or a side of eggs.
Tips Variations & Cooking Advice
– Flavor variations: Add ½ cup blueberries, chocolate chips, or sliced bananas to the batter after resting. For a savory twist, mix in cooked bacon bits and shredded cheddar.
– Alternative cooking methods: Use a waffle iron for waffle-style pancakes (increase butter to 4 tbsp). For mini pancakes, use a tablespoon measure and cook in batches.
– Portion changes: For jumbo pancakes, use ⅓ cup batter and cook slightly longer. For silver dollar pancakes, use 1 tablespoon – perfect for kids.
– Dietary adaptations: To make gluten-free, substitute the flour with a 1:1 blend and add ½ teaspoon xanthan gum if not included. For dairy-free, use oat milk + 1 tablespoon lemon juice in place of buttermilk, and coconut oil for butter.
– Texture boost: Separate the egg white, whip it to stiff peaks, and fold in at the end for extra-fluffy results.
Common Mistakes to Avoid
– Overmixing the batter: This develops gluten, resulting in tough, rubbery pancakes. Stir only until the flour disappears – lumps are okay.
– Using a cold griddle: If the pan isn’t hot enough, the batter spreads too thin and absorbs oil, making greasy pancakes. Always preheat for at least 2 minutes.
– Flipping too early: Wait until bubbles form and the edges look set. Flipping prematurely leads to raw centers and collapsed pancakes.
– Pressing down with the spatula: After flipping, don’t press down – it deflates the air bubbles. Let them rise naturally.
– Skipping the resting period: The 5-minute rest is crucial for letting the leavening agents activate and the gluten relax. Without it, pancakes are dense.
Storage & Meal Prep Tips
– Refrigeration: Store leftover pancakes in an airtight container or zip-top bag for up to 3 days. Place a paper towel in the container to absorb excess moisture.
– Freezing: Arrange cooled pancakes in a single layer on a baking sheet, freeze until solid (about 1 hour), then transfer to a freezer bag. They keep for up to 2 months.
– Reheating: For best texture, reheat in a toaster or toaster oven at 350°F for 3–4 minutes. Microwave works but can make them chewy – use 30-second intervals with a damp paper towel.
– Meal prep tip: Make a double batch on weekends, freeze individually, and grab one each morning. Reheat directly from frozen in the toaster.
Conclusion
Mastering the art of homemade breakfast is simpler than you think. With just a few staple ingredients and a little patience, you can create restaurant-quality Pancake recipes that are customizable, healthier, and far more satisfying than any boxed mix. Remember, the key to perfect Pancakes lies in the balance of wet and dry ingredients, proper heat control, and not overworking the batter. Whether you prefer classic golden stacks or adventurous savory versions, these Pancake recipes will become a staple in your kitchen. Try them this weekend, experiment with your favorite toppings, and share your results with us – we’d love to see your fluffy creations!
FAQs
1. Can I make pancakes without buttermilk?
Yes. Mix 1¼ cups milk with 1 tablespoon lemon juice or white vinegar, let sit for 5 minutes, then use as a substitute. The acidity still activates the baking soda for a similar rise.
2. Why are my pancakes burning on the outside but raw inside?
Your heat is too high. Reduce the burner to medium-low and allow the pan to cool slightly. The center needs time to cook; lower heat ensures even cooking.
3. How do I make pancakes fluffier?
Separate the egg white, beat it to stiff peaks, and fold it into the batter last. Also, ensure your baking powder is fresh (less than 6 months old) and let the batter rest for 5 minutes.
4. Can I use whole wheat flour instead of all-purpose?
Absolutely. Substitute up to half the all-purpose flour with whole wheat for a nuttier flavor and extra fiber. You may need to add 1–2 tablespoons extra liquid, as whole wheat absorbs more moisture.
5. How do I store and reheat leftover pancakes?
Refrigerate in an airtight container for up to 3 days, or freeze for 2 months. Reheat in a toaster or oven at 350°F for 3–4 minutes to restore crisp edges and fluffy centers. Avoid microwaving if possible.
Proven way to grow perfect Pancakes
Ingredients
Equipment
Method
- In a large bowl, whisk together the dry ingredients: flour, baking powder, salt, and sugar.
- In a separate bowl, whisk together the wet ingredients: egg, milk, and melted butter.
- Pour the wet ingredients into the dry ingredients and mix until just combined; avoid overmixing to ensure fluffy pancakes.
- Heat a lightly oiled griddle or frying pan over medium-high heat.
- Pour approximately 1/4 cup of batter per pancake onto the hot griddle.
- Cook for 2-3 minutes per side, or until golden brown and cooked through.
- Serve immediately with your favorite toppings.