The Ultimate Guide to Perfect Homemade Sesame Chicken: A Takeout Favorite Done Right
Have you ever wondered why Sesame Chicken from your favorite Chinese Takeout tastes so addictive, yet recreating it at home often falls short? The secret lies in the perfect balance of crisp-tender chicken, a glossy sweet-savory sauce, and the nutty aroma of toasted sesame seeds. Preparing this iconic dish at home not only saves money but lets you control the quality of ingredients, reduce sodium, and avoid unwanted additives. Whether you’re craving a weeknight dinner that satisfies the whole family or want to impress guests with your culinary skills, mastering Sesame Chicken at home is a game-changer. You’ll get that signature sticky glaze, crunchy exterior, and tender interior without leaving your kitchen.
Ingredients & Kitchen Tools
Essential Ingredients
– 1 lb boneless, skinless chicken thighs (or breasts for leaner option) – thighs stay juicier during frying
– 1/3 cup cornstarch – creates the signature crispy coating
– 2 large eggs, beaten – helps the cornstarch adhere
– 1/4 cup all-purpose flour – adds structure to the crust
– 3 tbsp toasted sesame seeds – for garnish and nutty flavor
– 3 tbsp vegetable oil for frying – use peanut or avocado oil for high smoke point
For the Sauce
– 1/4 cup soy sauce (low-sodium recommended)
– 3 tbsp honey – provides natural sweetness and glossy finish
– 2 tbsp rice vinegar – balances sweetness with acidity
– 1 tbsp sesame oil – adds depth and aroma
– 2 cloves garlic, minced
– 1 tsp fresh ginger, grated
– 1 tbsp cornstarch + 2 tbsp water – slurry for thickening
Kitchen Tools
– Large mixing bowl
– Whisk
– Wok or deep skillet
– Tongs or slotted spoon
– Paper towels
– Small saucepan
Optional Substitutions
– Gluten-free: Use tamari instead of soy sauce and rice flour instead of all-purpose flour
– Sugar-free: Replace honey with monk fruit sweetener or sugar-free maple syrup
– Dairy-free: This recipe is naturally dairy-free
Prep Time & Cooking Schedule
Total time: 35 minutes | Prep: 15 minutes | Cook: 20 minutes | Resting: 5 minutes (optional)
Planning your cooking schedule is key to achieving restaurant-quality results. Start by setting up your mise en place—chop the garlic and ginger, mix the sauce ingredients (except the cornstarch slurry), and beat the eggs. Cut the chicken into 1-inch bite-sized cubes for even cooking. The actual frying process moves quickly, so having everything ready prevents burning. If you’re serving with rice, start that first since it takes 20 minutes to cook. The entire dish comes together in under 40 minutes, making it achievable even on busy weeknights.
Step-by-Step Instructions
1. Prepare the Chicken: Pat the chicken pieces dry with paper towels—moisture is the enemy of crispiness. Season lightly with salt and white pepper.
2. Create the Coating: In a bowl, combine cornstarch and flour. In another bowl, beat the eggs. Dip each chicken piece first into the egg, then coat thoroughly with the cornstarch-flour mixture. Shake off excess for a light, crispy crust.
3. Fry to Golden Perfection: Heat oil in a wok or deep skillet over medium-high heat (350°F). Fry the chicken in batches, being careful not to overcrowd the pan. Cook for 4-5 minutes, turning occasionally, until golden brown and cooked through (internal temp 165°F). Transfer to paper towels to drain.
4. Make the Sauce: In a small saucepan, combine soy sauce, honey, rice vinegar, sesame oil, garlic, and ginger. Bring to a gentle simmer over medium heat. Whisk the cornstarch slurry and add it slowly, stirring constantly until the sauce thickens to a glossy, syrupy consistency—about 1-2 minutes. This is where the magic happens for your Sesame Chicken.
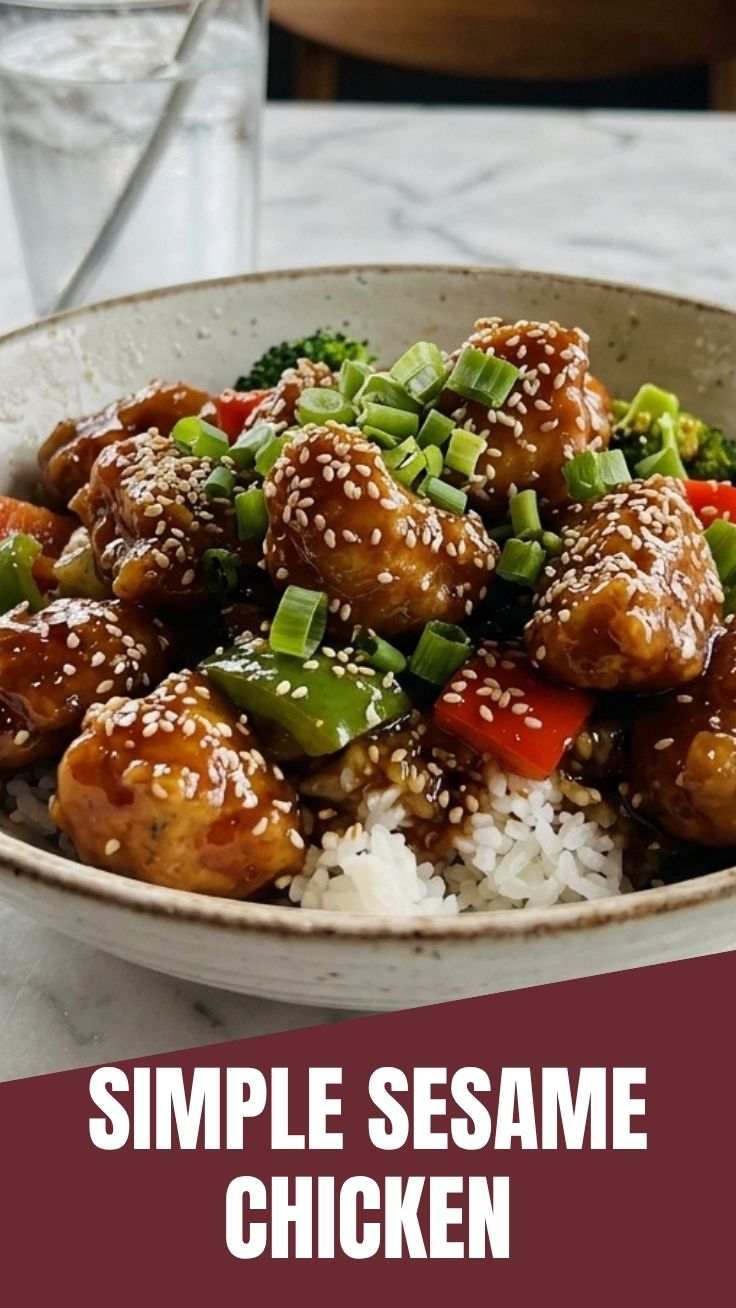
5. Combine and Glaze: Toss the fried chicken pieces in the warm sauce until evenly coated. Sprinkle generously with toasted sesame seeds and sliced green onions. Serve immediately over steamed rice or alongside steamed broccoli for a complete Chinese Takeout experience at home.
Pro Tip: For extra crunch, double-fry the chicken. After the first fry, let it rest for 2 minutes, then fry again for 30 seconds. This creates an ultra-crispy exterior that holds up better under the sauce.
Nutritional Benefits & Advantages
Homemade Sesame Chicken offers significant advantages over takeout versions. By controlling the oil type and amount, you reduce unhealthy fats by up to 40%. Chicken thighs provide high-quality protein (about 25g per serving), iron, and B vitamins essential for energy metabolism. Sesame seeds are rich in copper, manganese, and calcium, supporting bone health and antioxidant defenses. The ginger and garlic in the sauce offer anti-inflammatory benefits and aid digestion. When served with brown rice and vegetables, this dish becomes a balanced meal with fiber, vitamins, and sustained energy. Plus, you avoid MSG, excessive sodium (which can exceed 1,500mg in takeout portions), and preservatives commonly found in restaurant versions.
Tips Variations & Cooking Advice
Flavor Variations
– Spicy Sesame Chicken: Add 1-2 tbsp sriracha or chili garlic sauce to the sauce
– Orange Sesame Chicken: Replace rice vinegar with orange juice and add orange zest
– Honey Garlic Version: Double the honey and garlic for extra sweetness
Cooking Method Alternatives
– Air Fryer: Spray coated chicken with oil and air fry at 400°F for 10-12 minutes, shaking halfway
– Baked Option: Place on a wire rack over a baking sheet, bake at 425°F for 15-18 minutes
– Stir-Fry Only: Skip the coating and stir-fry chicken strips for a lighter version
Dietary Adaptations
– Gluten-free: Use tamari, rice flour, and ensure cornstarch is certified gluten-free
– Low-carb: Serve over cauliflower rice and use monk fruit sweetener
– Nut-free: Replace sesame oil with avocado oil and skip sesame seeds (or use hemp seeds)
Common Mistakes to Avoid
1. Soggy Coating: The biggest culprit is excess moisture. Pat chicken dry thoroughly and don’t skip the egg wash step—it creates a barrier that seals moisture in and keeps the coating crisp.
2. Burning the Sauce: Garlic and honey burn easily. Keep the sauce at a gentle simmer, not a rolling boil. Add the garlic and ginger only after the liquid has heated, and stir constantly.
3. Overcrowding the Pan: Frying too many pieces at once lowers the oil temperature, resulting in greasy, soggy chicken. Cook in batches and let the oil return to 350°F between rounds.
4. Sauce Too Thick or Thin: The cornstarch slurry should be added gradually. If the sauce is too thick, thin with a tablespoon of water. If too thin, simmer longer or add more slurry.
5. Skipping the Rest: Letting the fried chicken rest on paper towels for 2 minutes before saucing helps maintain crispiness. Saucing immediately can make the coating fall off.
Storage & Meal Prep Tips
Refrigeration: Store leftover Sesame Chicken in an airtight container for up to 4 days. Keep the sauce and chicken separate if possible—this prevents sogginess. To reheat, use an air fryer at 375°F for 5 minutes or a skillet over medium heat with a splash of water to rehydrate the sauce.
Freezing: The fried chicken (without sauce) freezes beautifully for up to 3 months. Place on a baking sheet in the freezer for 1 hour until solid, then transfer to a freezer bag. To serve, reheat directly from frozen in an air fryer or oven at 400°F for 10 minutes, then toss with fresh sauce.
Meal Prep: Double the recipe and freeze half the coated, uncooked chicken. On busy nights, fry straight from frozen (add 2 minutes to cooking time). The sauce can be made ahead and refrigerated for up to a week—just reheat gently before using.
Conclusion
Mastering Sesame Chicken at home transforms your kitchen into the best Chinese Takeout spot in town. You now have the tools to create that perfect balance of crispy, sticky, sweet, and savory—all while controlling the quality and nutrition of every ingredient. The key takeaways are simple: dry your chicken well, fry in batches, and don’t rush the sauce. Whether you’re serving it over jasmine rice or alongside steamed bok choy, this dish delivers restaurant-quality results with home-cooked love. Try this recipe tonight, share your creation on social media, or explore our other Asian-inspired dishes. Your taste buds will thank you, and your wallet will too.
FAQs
Can I use chicken breast instead of thighs?
Absolutely! Chicken breast works well, but it’s leaner and can dry out faster. Cook to 160°F internal temperature and let it rest for 5 minutes before slicing to retain moisture. For extra juiciness, brined the breast in salt water for 30 minutes before cooking.
How do I make the sauce less sweet?
Reduce the honey to 2 tablespoons and add an extra tablespoon of rice vinegar. You can also add a pinch of red pepper flakes to balance the sweetness with heat. For a tangier version, use lemon juice instead of half the honey.
My chicken came out greasy—what went wrong?
Three common causes: oil temperature was too low (should be 350°F), you overcrowded the pan, or the coating was too thick. Use a thermometer to check oil temperature, fry in small batches, and shake off excess flour mixture before frying.
Can I make this dairy-free?
Yes, this recipe is naturally dairy-free! All ingredients—chicken, eggs, cornstarch, soy sauce, honey, and sesame oil—are dairy-free. Just double-check your soy sauce brand for any hidden dairy ingredients.
How do I reheat leftovers without losing the crunch?
For the crispiest results, use an air fryer at 375°F for 4-5 minutes. If using a microwave, place a paper towel under the chicken to absorb excess moisture, but expect some softness. A skillet over medium heat with a splash of water works well too—just cover briefly to steam, then uncover to crisp.
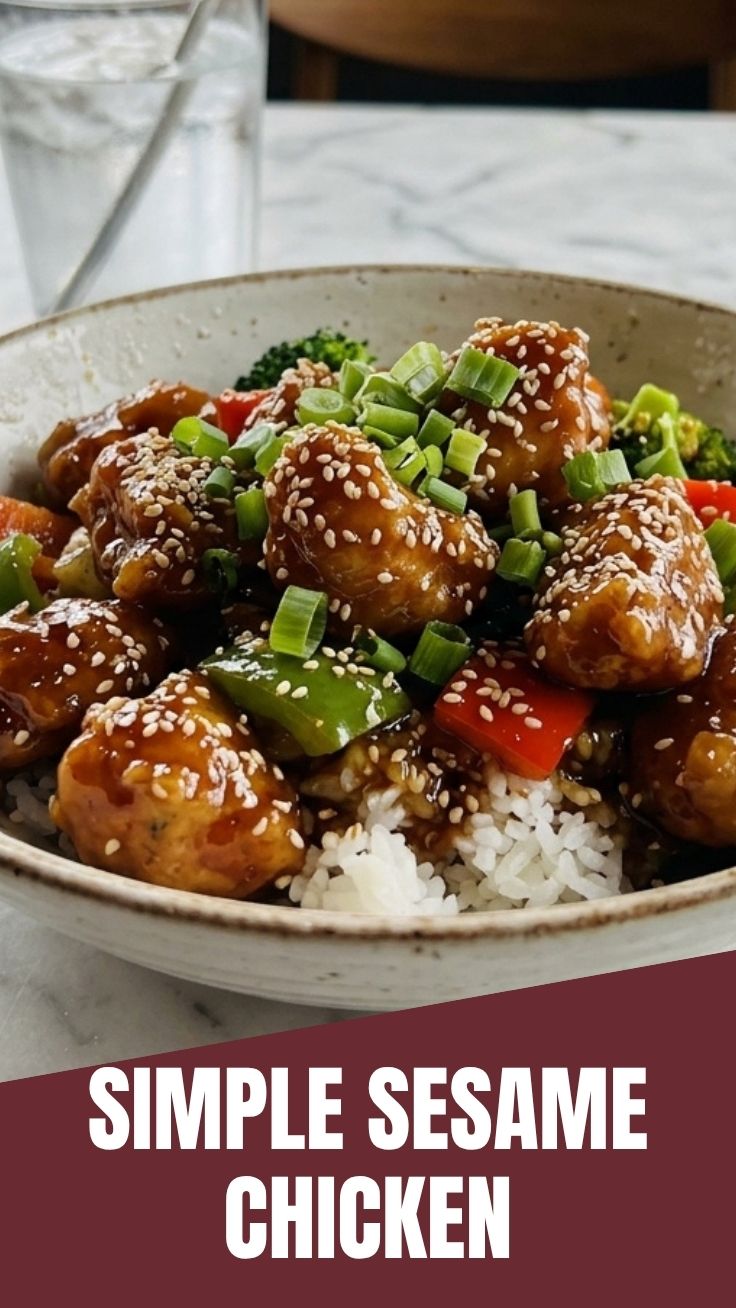
Quick way to grow a simple Sesame Chicken dish
Ingredients
Equipment
Method
- Toss the chicken pieces with cornstarch in a bowl until evenly coated.
- In a separate bowl, whisk together soy sauce, honey, rice vinegar, sesame oil, grated ginger, and minced garlic to create the sauce.
- Heat a large skillet or wok over medium-high heat with a little oil.
- Add the cornstarch-coated chicken and cook for 5-7 minutes until browned and cooked through.
- Pour the prepared sauce over the chicken and stir to coat, cooking for an additional 2-3 minutes until the sauce thickens.
- Remove from heat and garnish with sesame seeds and sliced green onions.
- Serve immediately with rice or noodles.