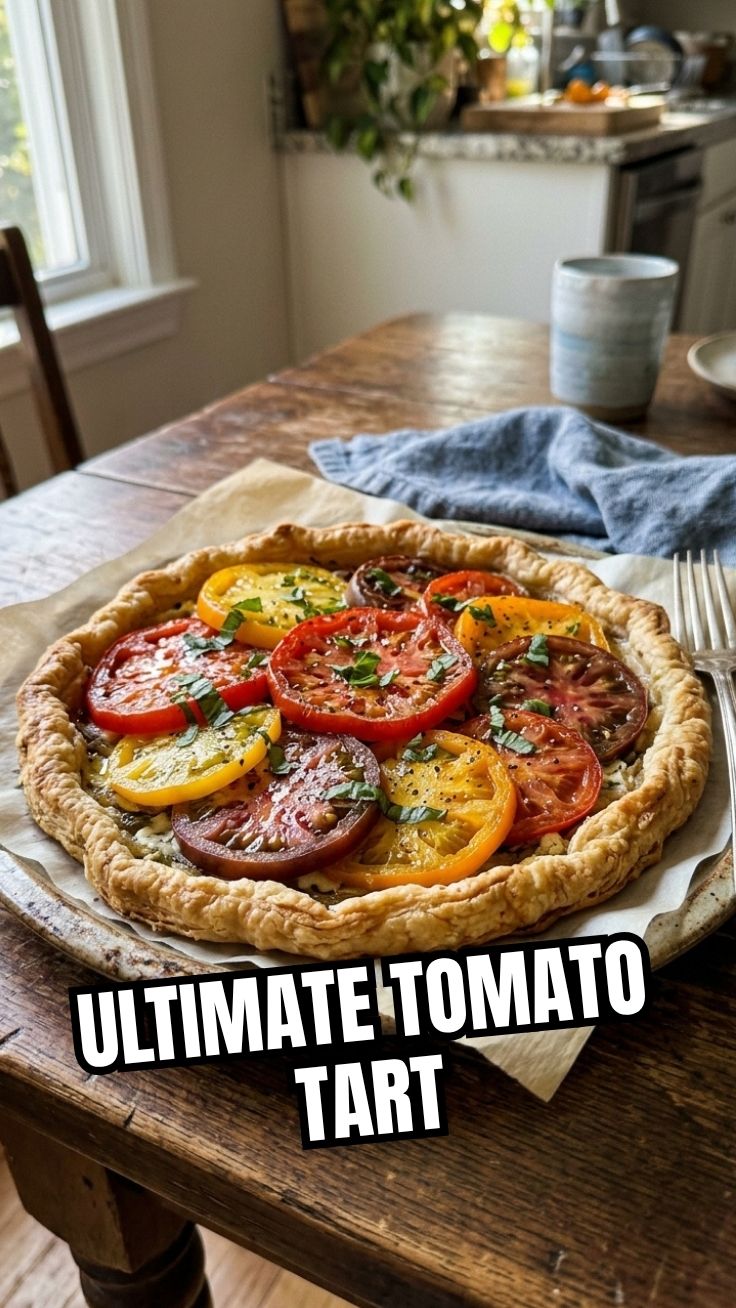
A Slice of Summer: Mastering the Perfect Heirloom Tomato Tart
Have you ever bitten into a tomato that tastes like pure sunshine? That’s the magic of an heirloom tomato—uneven, colorful, and bursting with sweet-acidic complexity. Now imagine that flavor cradled in a buttery, flaky crust with a whisper of fresh herbs and creamy cheese. That’s precisely what a homemade Tomato Tart (Heirloom) delivers. Crafting this tart at home isn’t just about following a recipe; it’s about celebrating the peak of summer produce and controlling every layer of flavor. You can adjust the tang, the salt, the herbaceousness—all while avoiding the preservatives and soggy crusts of store‑bought versions. Plus, once you master one tart, you open the door to endless Heirloom Tomato Recipes that showcase these gems in pasta salads, caprese stacks, and roasted sides. Let’s dive into the art of the Heirloom Tomato Tart.
Ingredients & Kitchen Tools
For the Pastry (or use store‑bought puff pastry)
– 1 ¼ cups all‑purpose flour (or gluten‑free blend)
– ½ teaspoon salt
– ½ cup cold unsalted butter, cubed (or vegan butter for dairy‑free)
– 3–4 tablespoons ice water
For the Filling
– 3–4 medium heirloom tomatoes (assorted colors for visual appeal)
– 1 cup ricotta cheese (or dairy‑free alternative like cashew cream)
– ½ cup grated Parmesan (omit for vegan; use nutritional yeast)
– 2 cloves garlic, minced
– 2 tablespoons fresh basil, chopped (plus extra for garnish)
– 1 tablespoon fresh thyme leaves
– 1 egg yolk (for brushing; skip for vegan)
– Salt and black pepper to taste
– Optional: 1 teaspoon balsamic glaze for drizzling
Kitchen Tools
– 9‑inch tart pan with removable bottom
– Rolling pin
– Parchment paper
– Sharp knife and cutting board
– Pastry brush
– Measuring cups and spoons
– Food processor (optional, for dough)
Prep Time & Cooking Schedule

– Prep Time: 25 minutes (including slicing tomatoes and making dough)
– Chill Time: 30 minutes (for the pastry)
– Blind‑Baking Crust: 15 minutes
– Assemble & Bake: 35–40 minutes
– Rest Time: 10 minutes after baking
– Total: about 1 hour 50 minutes
Plan ahead: slice the tomatoes 15 minutes early and let them drain on paper towels to prevent a watery tart. The pastry can be made a day ahead and refrigerated.
Step‑by‑Step Instructions
1. Make the Pastry – In a food processor, pulse flour and salt. Add cold butter cubes; pulse until mixture resembles coarse meal. Drizzle ice water, 1 tablespoon at a time, pulsing until dough holds together when pressed. Flatten into a disc, wrap in plastic, and refrigerate for 30 minutes.
2. Blind‑Bake the Crust – Preheat oven to 400°F (200°C). On a floured surface, roll dough to ⅛‑inch thick. Transfer to tart pan, press into corners, and trim edges. Prick bottom with fork, line with parchment, and fill with pie weights or dried beans. Bake 12 minutes, remove weights, and bake 3‑4 minutes more. Cool slightly.
3. Prep the Tomatoes – While crust bakes, slice heirloom tomatoes ¼‑inch thick. Lay on paper towels, sprinkle with salt, and let rest 10 minutes to draw out moisture. Pat dry.
4. Make the Cream Base – In a bowl, mix ricotta, Parmesan, garlic, basil, thyme, salt, and pepper. Spread evenly over pre‑baked crust.
5. Layer the Tomatoes – Arrange tomato slices overlapping in concentric circles on top of the ricotta. Season with a pinch of flaky salt and pepper. Brush edges of crust with egg yolk for a golden shine.
6. Bake – Reduce oven to 375°F (190°C). Bake tart 35–40 minutes until crust is deep golden and tomatoes are slightly caramelized. Let rest 10 minutes before slicing. This Heirloom Tomato Tart shines best when served warm or at room temperature. For more ways to use those extra tomatoes, explore other Heirloom Tomato Recipes like quick pasta tosses or layered salads.
Nutritional Benefits & Advantages
Heirloom tomatoes are not just photogenic—they pack a nutritional punch. One medium heirloom provides about 20% of your daily vitamin C, plus lycopene (a powerful antioxidant linked to heart health). The variety of colors (purple, yellow, green) indicates different phytonutrients: red ones offer lycopene; yellow ones supply beta‑carotene. The ricotta adds protein and calcium, while olive oil (if you drizzle before serving) delivers healthy fats. This tart is also naturally gluten‑free if you use alternative flour, and easily vegan with plant‑based cheese. By making it at home, you control sodium and skip processed additives.
Tips, Variations & Cooking Advice
– Flavor Twists: Swap basil for rosemary or oregano; add a layer of caramelized onions under the tomatoes for sweetness.
– Crust Options: Use frozen puff pastry for a flakier, quicker base (no blind‑baking needed). For a grain‑free version, try almond‑flour shortcrust.
– Vegan / Dairy‑Free: Replace ricotta with blended silken tofu + lemon juice + nutritional yeast. Omit egg wash—brush crust with plant‑based milk.
– Portion Changes: Bake in a rectangular tart pan or mini tartlet pans for individual servings.
– Roasting Trick: For deeper flavor, roast tomato slices at 425°F for 10 minutes before arranging on tart—this concentrates sugars and reduces moisture.
Common Mistakes to Avoid
– Soggy Bottom: Always drain and salt the tomatoes. Skipping this leads to a wet crust. Pre‑baking the crust is non‑negotiable.
– Overpowering Herbs: Fresh herbs go a long way; stick to 2 tablespoons total. Dried herbs? Use 1 teaspoon.
– Slicing Too Thick: ¼‑inch slices cook evenly and layer nicely. Thicker cuts release excess water and don’t soften properly.
– Skipping Rest Time: Cutting into the tart immediately causes the filling to run. Let it set 10 minutes so slices hold their shape.
Storage & Meal Prep Tips
– Refrigerate: Store leftover tart in an airtight container for up to 3 days. The crust will soften slightly, but flavor remains bright.
– Freeze: You can freeze the fully baked tart for up to 1 month. Wrap tightly in foil then plastic. Thaw overnight in fridge.
– Reheat: For best texture, reheat slices in a 350°F oven for 8‑10 minutes or in an air fryer at 300°F for 5 minutes. Avoid microwaving—it makes the crust chewy.
– Meal Prep: Make the dough and slice tomatoes a day ahead. Assemble and bake just before serving.
Conclusion
This Heirloom Tomato Tart is a celebration of seasonal produce and simple technique—a dish that tastes like summer on a plate. From the flaky, buttery crust to the juicy, caramelized tomatoes layered over creamy ricotta, every bite delivers satisfaction. Whether you serve it as a light lunch, appetizer, or vegetarian main, it’s a recipe you’ll return to while the farmers’ market overflows with color. Don’t stop here; use your leftover tomatoes to explore other Heirloom Tomato Recipes like chilled gazpacho or quick tomato bruschetta. Try this tart this week, snap a photo, and share your masterpiece—you’ll see just how easy and rewarding home‑cooked brilliance can be.
FAQs
1. Can I use regular tomatoes instead of heirloom?
Yes, though flavor and color variety will be less pronounced. Roma or beefsteak work; just ensure they are ripe and drain well.
2. My crust shrank during blind‑baking. How to prevent?
Chill the dough thoroughly before rolling, and avoid stretching it into the pan. Use pie weights and don’t overwork the dough.
3. Can I make this tart ahead of time?
Yes! Bake fully, cool, and refrigerate. Reheat in a 350°F oven for 10 minutes. The crust stays crispier if reheated before serving.
4. What cheese substitutes work best for a dairy‑free version?
Cashew cream (soaked cashews blended with lemon and salt) or a thick vegan cream cheese. Nutritional yeast adds a Parmesan‑like tang.
5. Why are my tomatoes releasing too much water?
Salt them and let them sit for at least 10 minutes. Blot dry with extra paper towels. Also, avoid super‑ripe over‑watery heirlooms; slightly firm ones hold shape better.