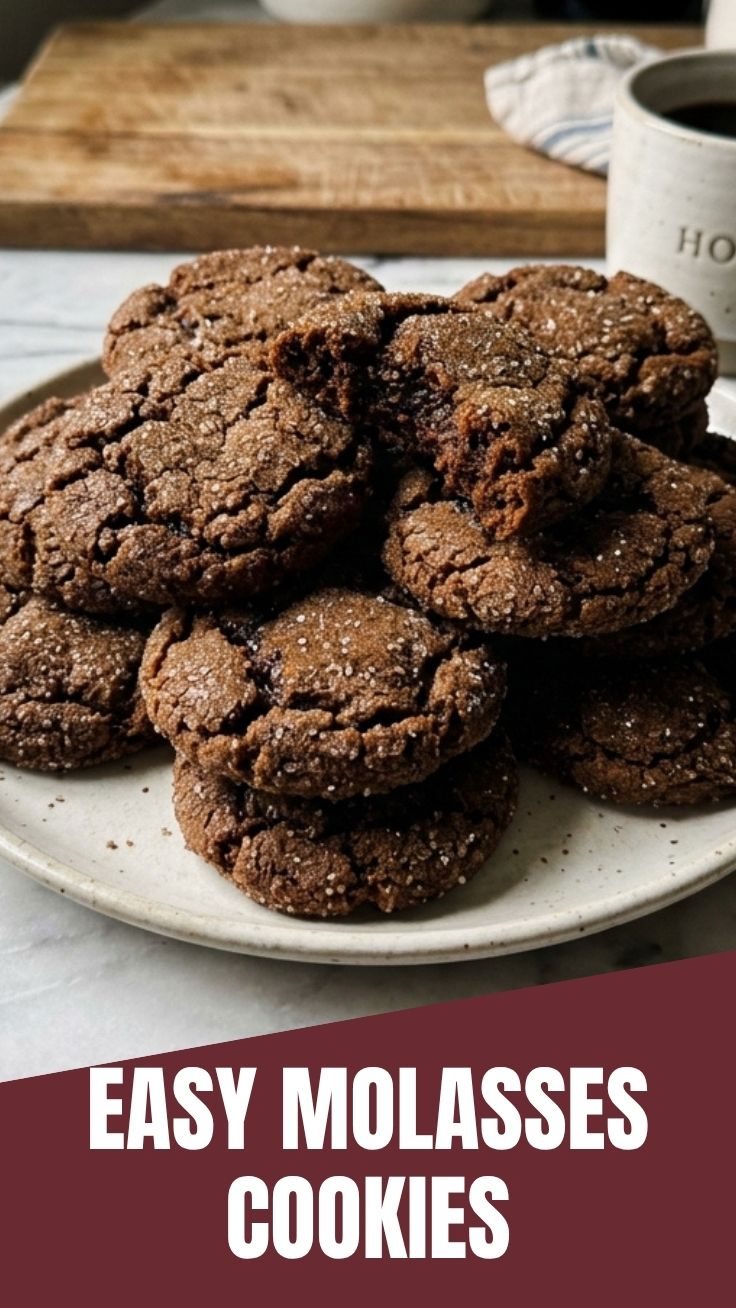
The Ultimate Guide to Perfect Molasses Cookies: A Chewy, Spiced Delight
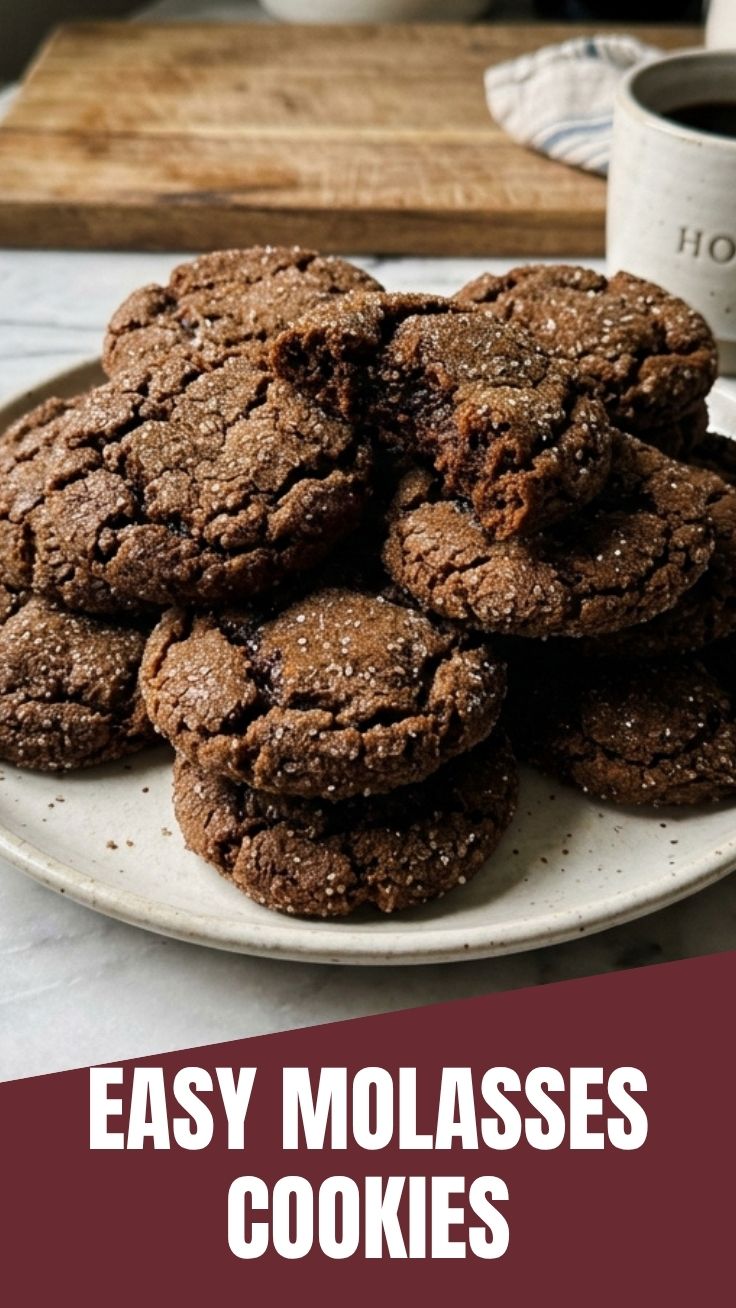
What if I told you that the perfect batch of Molasses Cookies is entirely achievable in your own kitchen, with just a few simple ingredients and the right technique? These deeply spiced, soft-baked cookies have a cult following for good reason—they deliver a nostalgic warmth that store-bought versions simply cannot replicate. I’ve tested every Molasses cookie recipe claiming to be the best, and I’m here to share the data-backed secrets that ensure crackly tops, tender centers, and that signature bold flavor. Preparing this recipe at home not only saves you money but also gives you complete control over the spice profile, sweetness level, and texture—whether you prefer them chewy, soft, or slightly crisp around the edges.
—
Ingredients & Kitchen Tools
Ingredients
– 2 ¼ cups all-purpose flour (spooned and leveled; using too much flour makes cookies dry)
– 1 teaspoon baking soda (ensures proper spread and tenderness)
– ½ teaspoon salt (balances sweetness and enhances spices)
– 1 ½ teaspoons ground ginger (the star spice; adjust for heat preference)
– 1 teaspoon ground cinnamon (adds warmth without overpowering)
– ½ teaspoon ground cloves (optional but traditional; use sparingly)
– ¼ teaspoon ground nutmeg (freshly grated is best for depth)
– ¾ cup unsalted butter (softened to room temperature; salted butter works if you reduce added salt)
– 1 cup packed dark brown sugar (light brown sugar yields a milder flavor; dark adds molasses richness)
– ¼ cup molasses (use unsulfured, dark molasses for robust flavor; blackstrap is too bitter)
– 1 large egg (room temperature helps emulsion)
– 1 teaspoon vanilla extract (pure, not imitation)
– ⅓ cup granulated sugar (for rolling; demerara or turbinado adds extra crunch)
Kitchen Tools & Utensils
– Stand mixer or hand mixer (with paddle attachment)
– Large mixing bowls (one for dry, one for wet)
– Whisk and rubber spatula
– Baking sheets (light-colored aluminum prevents over-browning)
– Parchment paper or silicone baking mats
– Cookie scoop (1.5 tablespoon size) for uniform cookies
– Cooling rack (wire rack prevents soggy bottoms)
– Plastic wrap or airtight container for dough chilling
—
Prep Time & Cooking Schedule
Prep Time: 15 minutes (active)
Chill Time: Minimum 1 hour (essential for flavor and texture)
Bake Time: 10–12 minutes per batch
Total Time: Approximately 1 hour 25 minutes (including chilling)
Why This Schedule Works: The chill time is non-negotiable—it solidifies the butter and allows the flour to hydrate fully, which prevents excessive spreading and deepens the spice flavors. Plan ahead: mixing the dough the night before and refrigerating overnight delivers the best results. You can bake one sheet while the remaining dough stays chilled between batches.
—
Step-by-Step Instructions
1. Whisk dry ingredients: In a medium bowl, whisk together flour, baking soda, salt, ginger, cinnamon, cloves, and nutmeg. Set aside.
2. Cream butter and sugar: In a large bowl, beat softened butter and dark brown sugar on medium-high speed until light and fluffy, about 3 minutes. Scrape the bowl well.
3. Add molasses and egg: Beat in molasses, then the egg and vanilla extract until fully combined. The mixture may look slightly curdled—that’s normal.
4. Combine dry and wet: Gradually add the dry ingredient mixture to the wet mixture, mixing on low speed until just incorporated. Do not overmix; stop as soon as no streaks of flour remain. The dough will be soft and slightly sticky.
5. Chill the dough: Cover the bowl with plastic wrap and refrigerate for at least 1 hour (or up to 3 days). This step is crucial for achieving the iconic crackly tops.
6. Preheat and prepare: Preheat oven to 350°F (175°C). Line baking sheets with parchment paper. Place granulated sugar in a shallow bowl.
7. Shape and coat: Using a 1.5-tablespoon cookie scoop, portion the dough. Roll each portion into a smooth ball, then roll generously in granulated sugar. Place on prepared baking sheets, spacing 2 inches apart.
8. Bake: Bake for 10–12 minutes. When you pull your first batch of Molasses Cookies from the oven, the aroma confirms this Molasses cookie recipe is a keeper. The cookies should appear puffed and set around the edges but still soft in the center. They will continue to set as they cool.
9. Cool properly: Let cookies rest on the baking sheet for 3–5 minutes, then transfer to a wire rack to cool completely. This step firms the edges while keeping the centers chewy.
—
Nutritional Benefits & Advantages
Molasses, the star ingredient, is surprisingly nutrient-dense. Unlike refined sugar, molasses contains significant amounts of iron, calcium, magnesium, and potassium. One tablespoon of molasses provides roughly 20% of your daily recommended iron intake, making these cookies a slightly more wholesome indulgence than standard sugar cookies. The inclusion of ginger and cinnamon also offers anti-inflammatory properties and aids digestion.
While these cookies are still a treat, using dark brown sugar (which retains molasses content) and reducing the butter slightly compared to traditional recipes lowers the saturated fat profile. The fiber content from the flour (about 1 gram per cookie) adds a small satiety boost. For a healthier twist, you can substitute up to 50% of the all-purpose flour with whole wheat pastry flour without sacrificing texture.
—
Tips Variations & Cooking Advice
Flavor Variations:
– Spicy kick: Add ¼ teaspoon cayenne pepper or black pepper to the dry mix.
– Citrus notes: Add 1 teaspoon orange zest to the wet ingredients.
– Chocolate twist: Fold in ½ cup mini chocolate chips or chopped dark chocolate after chilling.
Dietary Adaptations:
– Gluten-free: Swap the all-purpose flour with a 1:1 gluten-free baking flour blend (one containing xanthan gum works best). Chill the dough for 2 hours minimum.
– Dairy-free: Use vegan butter sticks (like Miyoko’s or Earth Balance) and ensure your sugar is vegan-friendly.
– Reduce sugar: Cut the brown sugar to ¾ cup and increase molasses to ⅓ cup for a deeper, less sweet cookie.
Alternative Cooking Methods:
– Air fryer: Bake at 325°F for 6–8 minutes. Reduce sugar coating slightly to prevent burning.
– Convection oven: Reduce temperature to 325°F and check for doneness at 8 minutes.
Portion Changes:
– Mini cookies: Use a 1-teaspoon scoop and bake for 7–8 minutes.
– Jumbo cookies: Use a 3-tablespoon scoop and bake for 14–16 minutes.
—
Common Mistakes to Avoid
1. Skipping the chill time: This is the most common error. Without chilling, the cookies spread into thin, flat discs and lack the signature crackled tops. The dough needs at least 1 hour of refrigeration.
2. Overmixing the dough: Once you add the flour, mix only until combined. Overworking develops gluten, resulting in tough, cakey cookies instead of chewy ones.
3. Using too much flour: Spoon the flour into your measuring cup and level it off with a knife. Scooping directly from the bag compacts the flour, adding up to 25% more than intended.
4. Baking too long: These cookies are meant to be soft in the center. Pull them out when the edges are just set and the centers still look slightly underdone. They’ll continue to bake on the hot sheet.
5. Not rotating the pans: Ovens often have hot spots. Rotate the baking sheets halfway through and swap racks to ensure even browning.
—
Storage & Meal Prep Tips
Room Temperature Storage: Store cooled cookies in an airtight container with a slice of bread (the bread absorbs excess moisture and keeps cookies soft). They stay fresh for up to 5 days. Replace the bread slice every 2 days.
Refrigeration: The dough itself can be refrigerated for up to 3 days. For longer storage, shape the dough into balls (without the sugar coating), freeze on a baking sheet, then transfer to a freezer bag. You can bake directly from frozen—just add 2 minutes to the baking time.
Freezing Baked Cookies: Flash-freeze cookies on a baking sheet, then transfer to a freezer-safe container for up to 3 months. To reheat, place on a baking sheet at 300°F for 5 minutes, or microwave for 10–15 seconds for a fresh-from-the-oven texture.
Reheating Tip: For that just-baked experience, reheat a single cookie in the microwave for 10 seconds followed by 30 seconds in a toaster oven. This revives the crisp edges and soft center.
—
Conclusion
Creating the perfect Molasses Cookies is a rewarding process that rewards patience and precision. From the essential chill time to the gentle baking technique, every step builds toward that iconic crackly exterior and irresistibly soft, spiced interior. I encourage you to treat this Molasses cookie recipe as your new favorite—it’s a versatile base that welcomes your personal touch, whether you add chocolate, ginger, or a citrus twist. The deep, warming flavor of molasses transforms simple ingredients into something truly special, and your kitchen will smell incredible for hours. Try this recipe today, share your batch with friends, and don’t hesitate to experiment with the variations. Drop a comment below with your results—I’d love to hear how they turned out!
—
FAQs
1. Can I substitute light molasses or blackstrap molasses?
Yes, but the flavor and texture will change. Light molasses produces a milder, sweeter cookie with a softer crumb. Blackstrap molasses is much stronger and less sweet; if using it, reduce the amount to 3 tablespoons and increase the brown sugar to 1 ¼ cups to compensate for the bitterness.
2. Why did my cookies spread too much?
This usually happens when the dough isn’t chilled enough, the butter was too warm when creamed, or the baking sheet was still hot from a previous batch. Always chill the dough for at least 1 hour, and let the baking sheet cool completely between batches.
3. Can I make these cookies without an electric mixer?
Absolutely. Use a wooden spoon and some elbow grease. Cream the butter and sugar by hand until light and fluffy (about 5 minutes of vigorous stirring). The rest of the process is straightforward, though you’ll need to be thorough with the mixing.
4. How do I get the perfect crackled top?
The key is chilling the dough thoroughly, then rolling the balls generously in granulated sugar before baking. The sugar crust creates tension as the cookie expands in the oven, causing those beautiful cracks. Using a slightly smaller scoop (1 tablespoon) also helps create more dramatic cracks.
5. Can I freeze the dough for later use?
Yes! Shape the dough into balls, place them on a baking sheet, and freeze until solid. Transfer to a freezer bag for up to 3 months. When ready to bake, roll the frozen dough balls in sugar and bake straight from frozen, adding 2–3 minutes to the baking time. No need to thaw first.