The Ultimate Baked Tilapia Recipe – Quick, Healthy & Delicious
Are you tired of dry, bland fish that falls apart on your plate? There’s nothing more disappointing than a promising dinner that ends up tasting like cardboard. But imagine a fillet that’s perfectly flaky, infused with lemon and butter, and ready in under 20 minutes. That’s exactly what this Baked Tilapia delivers. Preparing it at home not only saves you money but also gives you full control over freshness and seasoning. If you’re exploring tilapia recipes, this one will become your weeknight hero. It’s simple, nutritious, and foolproof even for beginner cooks.
Ingredients & Kitchen Tools
Ingredients
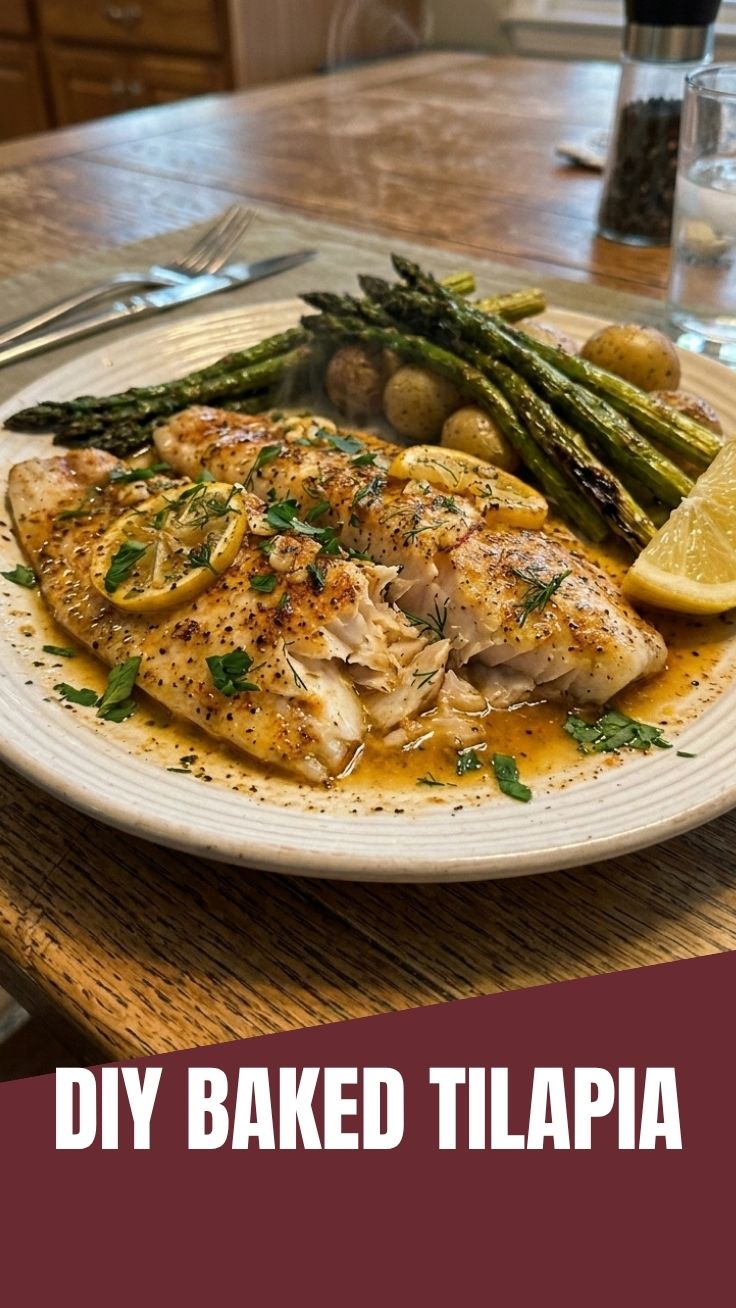
– 4 tilapia fillets (about 6 oz each) – mild, flaky white fish; choose fresh or thawed frozen
– 3 tbsp unsalted butter, melted – adds richness; substitute olive oil for dairy-free
– 2 cloves garlic, minced – for aromatic depth; use ½ tsp garlic powder if needed
– 1 tbsp fresh lemon juice – brightens flavor; bottled works in a pinch
– ½ tsp paprika – for color and mild smokiness
– Salt and black pepper to taste
– Fresh parsley or dill for garnish (optional)
Kitchen Tools
– 9×13-inch baking dish or rimmed sheet pan
– Parchment paper or aluminum foil (easy cleanup)
– Small bowl for mixing butter mixture
– Basting brush or spoon
– Instant-read thermometer (optional but helpful)
Substitutions
– Butter → avocado oil or ghee
– Tilapia → cod, haddock, or catfish
– Lemon juice → lime juice or white wine
Prep Time & Cooking Schedule

– Prep time: 5 minutes (pat fish dry, mix butter, arrange in dish)
– Cook time: 12–15 minutes at 400°F (200°C)
– Resting time: 2 minutes after baking (lets juices redistribute)
Why this schedule works: Tilapia is thin and cooks quickly. Overcooking turns it rubbery, so a short, hot blast in the oven guarantees moist results. Plan to serve immediately after resting.
Step-by-Step Instructions
1. Preheat and prep the fish. Set oven to 400°F (200°C). Line your baking dish with parchment or foil for easy cleanup. Pat the tilapia fillets dry with paper towels – moisture is the enemy of browning. Season both sides lightly with salt and pepper.
2. Make the lemon butter sauce. In a small bowl, combine melted butter, minced garlic, lemon juice, and paprika. Stir well.
3. Assemble and bake. Arrange the fillets in a single layer in the dish (do not overlap). Brush the lemon butter mixture generously over each fillet, reserving a little for after baking. Bake uncovered for 12–15 minutes. The fish is done when it flakes easily with a fork and reaches 145°F internal temperature. (Tip: If fillets are thicker, add 2–3 minutes.)
4. Finish and garnish. Remove from oven, brush with remaining butter sauce, and let rest 2 minutes. Sprinkle fresh parsley or dill on top. Serve immediately.
When you master this baked tilapia, you’ll feel confident exploring other tilapia recipes such as tacos or ceviche. The technique transfers beautifully.
Nutritional Benefits & Advantages
Tilapia is a lean source of high-quality protein (about 23g per fillet) with only 110 calories. It’s rich in selenium, B12, and niacin – nutrients that support thyroid function and energy metabolism. Cooking with butter and garlic adds healthy fats that aid absorption of fat-soluble vitamins. This dish is naturally low-carb and keto-friendly, making it a smart choice for weight management and muscle repair.
Tips Variations & Cooking Advice
– Flavor variations: Add a pinch of cayenne for heat, sprinkle Parmesan cheese in the last 2 minutes, or top with sliced almonds and a drizzle of honey.
– Cooking method swap: Air fry at 375°F for 8–10 minutes for extra crisp edges.
– Dietary adaptations: Use olive oil instead of butter for dairy-free; substitute tamari for a gluten-free soy sauce drizzle.
– Portion changes: For a crowd, double the recipe and use two baking dishes – avoid overcrowding.
Common Mistakes to Avoid
– Skipping the pat-dry step: Wet fillets steam instead of bake, resulting in soggy fish. Always blot dry with paper towels.
– Overcooking: Tilapia turns tough and dry after 15 minutes. Use a timer and check flakiness early.
– Using cold fish straight from the fridge: Let fillets sit at room temperature for 10 minutes before baking for even cooking.
– Forgetting to season the pan side: Salt only the top? The bottom stays bland. Season both sides lightly.
Storage & Meal Prep Tips
– Refrigerate: Store leftovers in an airtight container for up to 3 days.
– Freeze: Wrap cooled fillets individually in plastic wrap, then foil. Freeze for up to 3 months.
– Reheat: To maintain flakiness, reheat in a 300°F oven for 8–10 minutes, or in a skillet with a splash of water and cover. Avoid microwaving unless necessary – it can dry out the fish.
Conclusion
This simple, foolproof method transforms a humble fillet into a restaurant-quality meal in under 20 minutes. By mastering this baked tilapia, you unlock the door to endless tilapia recipes that are both healthy and satisfying. The key is using fresh ingredients, watching your cook time, and not being afraid to adjust seasonings to your taste. Give it a try tonight, and don’t forget to share your results – tag a friend who loves easy fish dinners!
FAQs
1. Can I use frozen tilapia without thawing?
Yes, but increase bake time by 5–7 minutes. Pat thawed fillets very dry before baking to avoid excess moisture.
2. What if I don’t have fresh lemon juice?
Bottled lemon juice works fine. You can also substitute lime juice or a splash of white wine vinegar for acidity.
3. How do I know when tilapia is fully cooked?
The flesh should be opaque and flake easily when pressed with a fork. An instant-read thermometer should read 145°F at the thickest part.
4. Can I make this recipe gluten-free?
Absolutely – the ingredients are naturally gluten-free. Just double-check any spice blends for hidden wheat if using pre-mixed seasonings.
5. Why did my tilapia come out watery?
Most likely the fillets weren’t patted dry, or the oven temperature was too low. Use high heat (400°F) and dry the fish thoroughly before baking.