Why the Classic BLT Sandwich Deserves a Spot in Your Weekly Rotation
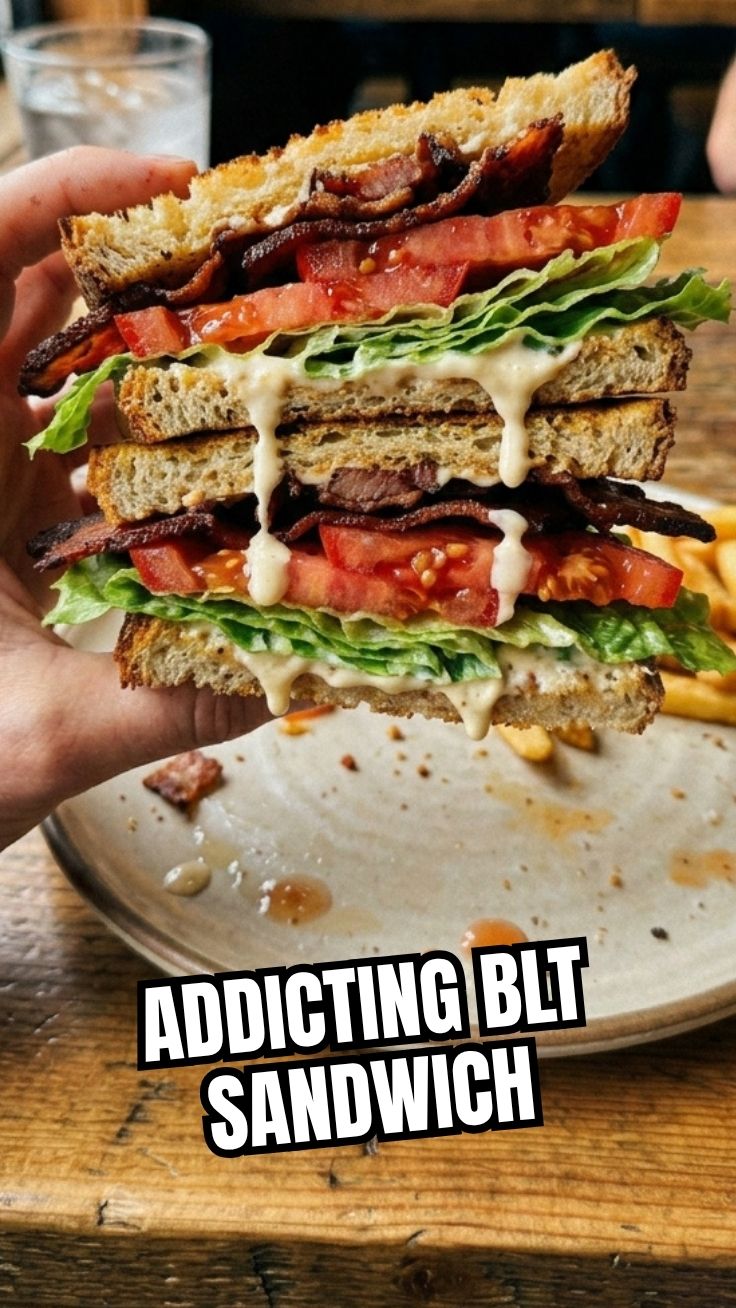
Have you ever bitten into a sandwich so perfect that time seemed to stand still? That’s the magic of a well-made BLT Sandwich—crisp bacon, juicy tomatoes, fresh lettuce, and creamy mayonnaise sandwiched between perfectly toasted bread. While it might seem simple, mastering this iconic dish at home not only saves you money but also guarantees you control over quality and freshness. Whether you’re craving a quick lunch or a satisfying dinner, this recipe delivers restaurant-worthy results without leaving your kitchen. In fact, many home cooks find that their homemade version surpasses even the most famous Club Sandwich from their favorite deli. Let’s dive into why making this at home is worth every crispy, savory bite.
—
Ingredients & Kitchen Tools
Essential Ingredients:
– 8 slices thick-cut bacon – Opt for applewood-smoked for deeper flavor
– 2 ripe tomatoes – Beefsteak or heirloom varieties work best when in season
– 4 leaves iceberg or romaine lettuce – Choose crisp, dark green leaves
– 8 slices sourdough or artisan bread – Day-old bread toasts better
– 3 tablespoons mayonnaise – Duke’s or Hellmann’s for authentic Southern-style
– Salt and freshly ground black pepper – To taste
Kitchen Tools:
– Cast iron skillet or heavy-bottomed pan – Even heat distribution for crispy bacon
– Tongs – For flipping bacon safely
– Sharp serrated knife – Clean tomato and bread slices
– Toaster or oven – For even browning
– Paper towels – Draining excess grease
– Cutting board – Food preparation surface
Optional Substitutions:
– Turkey bacon for less fat (though flavor changes)
– Gluten-free bread for dietary needs
– Avocado slices for creaminess
—
Prep Time & Cooking Schedule
| Phase | Time | Notes |
|——-|——|——-|
| Prep Time | 10 minutes | Wash lettuce, slice tomatoes, season |
| Cook Time | 12–15 minutes | Bacon renders perfectly |
| Assembly Time | 5 minutes | Toast bread while bacon rests |
| Total Time | ~30 minutes | Perfect for weekday lunch |
Timing Tip: Start toasting bread during the last 2–3 minutes of bacon cooking so everything finishes simultaneously. Rest cooked bacon on paper towels for 1 minute to allow it to crisp.
—
Step-by-Step Instructions
Step 1: Prepare Your Ingredients
Wash and thoroughly dry lettuce leaves. Slice tomatoes into ¼-inch thick rounds—season lightly with salt to draw out natural sweetness. Pat bread slices dry if using fresh bakery bread.
Step 2: Cook the Bacon
Place bacon strips in a cold cast iron skillet—never a preheated pan. Cook over medium heat for 6–8 minutes, flipping once with tongs when edges start curling. For extra-crispy results, press bacon gently with a spatula after flipping. Remove when deep golden brown and transfer to paper towels.
Step 3: Toast the Bread
While bacon rests, toast bread until golden—about 2 minutes per side. Brush lightly with reserved bacon fat for enhanced flavor, or use regular butter for a milder taste.
Step 4: Assemble Like a Pro
Spread 1½ tablespoons mayonnaise on each slice of warm toast. Layer ingredients in this order: bottom bread → lettuce (creates moisture barrier) → tomato slices → bacon (arranged in crisscross pattern) → top bread. Press gently but firmly.
Step 5: Cut and Serve
Slice diagonally with a serrated knife for classic presentation. Serve immediately while bacon is still crisp and bread warm. A well-made BLT Sandwich should have visible layers that stay intact—this version rivals any Club Sandwich from your favorite restaurant.
Pro Tips:
– Use room-temperature tomatoes for maximum flavor
– Salt tomatoes 5 minutes before assembly to enhance taste
– Never microwave bacon—it becomes rubbery
—
Nutritional Benefits & Advantages
A classic BLT provides surprising nutritional value:
– Bacon (moderate portions): Rich in protein (3g per slice) and B vitamins, especially B12
– Tomatoes: Excellent source of lycopene (powerful antioxidant) and vitamin C—cooking increases lycopene bioavailability
– Lettuce: Low-calorie fiber source with vitamins A and K
– Whole grain bread: Adds complex carbohydrates and fiber
Dietary Advantages:
– Balanced macros: ~350 calories per sandwich
– Customizable to keto (lettuce wraps) or high-protein diets
– No added sugars (check mayonnaise labels)
—
Tips Variations & Cooking Advice
Flavor Variations:
– Spicy BLT: Add sriracha mayonnaise (2 tsp sriracha + 3 tbsp mayo)
– Herb-Infused: Sprinkle fresh basil or dill on tomatoes
– Cheesy Twist: Add sharp cheddar slice during final bacon minute
Cooking Method Alternatives:
– Oven bacon: 400°F for 15–18 minutes on foil-lined sheet
– Air fryer bacon: 370°F for 8–10 minutes (less grease splatter)
Dietary Adaptations:
– Gluten-free: Use certified GF bread or lettuce wraps
– Dairy-free: Standard mayonnaise is naturally dairy-free, but check labels
– Low-fat: Substitute turkey bacon and Greek yogurt-based aioli
Storage Changes:
For meal prep: Store components separately and assemble fresh. Never pre-assemble BLTs—soggy bread awaits.
—
Common Mistakes to Avoid
| Mistake | Solution |
|———|———-|
| Soggy bread | Toast until deep golden; let bacon drain fully |
| Rubbery bacon | Cook slowly over medium heat, not high heat |
| Watery tomatoes | Salt slices 5 minutes pre-assembly |
| Greasy sandwich | Blot bacon twice with paper towels |
| Falling apart | Use sturdy bread; place lettuce on both bread sides |
Temperature Control: Maintain steady medium heat for bacon—rushing leads to burnt edges and undercooked centers.
—
Storage & Meal Prep Tips
Refrigeration:
– Store components separately in airtight containers
– Bacon keeps 5 days; sliced tomatoes 2 days (salted)
– Lettuce: Wash, dry thoroughly, wrap in paper towels inside plastic bag
Freezing:
– Cooked bacon freezes well for up to 3 months
– Never freeze assembled sandwiches
Reheating:
– Bacon: Reheat in oven at 350°F for 3–4 minutes
– Bread: Re-toast directly from frozen (adds 1 minute)
– Never microwave—creates steam that ruins crispness
Freshness Window: Assemble within 15 minutes of serving for optimal texture.
—
Conclusion
Creating the perfect BLT Sandwich at home transforms a simple lunch into a memorable meal. By following these data-driven techniques—from bacon rendering temperatures to strategic layering—you’ll achieve that elusive balance of crunch, juiciness, and savory satisfaction every time. Whether you’re feeding a crowd or enjoying a quiet afternoon treat, this recipe proves that the best things in life are often homemade. Remember, a great Club Sandwich starts with mastering the fundamentals we’ve covered here. Try this recipe this week and share your results—we’d love to see your crispy creations on social media!
—
FAQs
1. Can I use turkey bacon instead of regular bacon?
Yes, but reduce cooking time to 6–8 minutes at medium heat. Turkey bacon has less fat, so it crisps faster and has a milder flavor. The BLT Sandwich will be lighter but still satisfying.
2. What’s the best bread for a BLT?
Sourdough is ideal—it’s sturdy enough for heavy fillings and toasts beautifully. Artisan white or whole grain work well too. Avoid thin sandwich bread that becomes soggy quickly.
3. How do I prevent the sandwich from getting soggy if I’m meal prepping?
Store all components separately and assemble fresh. Pre-salted tomatoes can be stored in a strained container for up to 2 days. Place lettuce between bread and wet ingredients to create a moisture barrier.
4. Can I make this dairy-free?
Yes! Standard mayonnaise is typically dairy-free, but check ingredient labels. Use dairy-free bread options and ensure your bacon isn’t flavored with cheese powder.
5. Why is my bacon not getting crispy?
Your pan might be too crowded or heat too low. Cook in a single layer with small gaps between strips over medium heat. Pat bacon dry before cooking and avoid flipping too frequently.
Best way to grow a 4-Star BLT Sandwich garden at home
Ingredients
Equipment
Method
- Prepare your garden bed by enriching the soil with compost and ensuring good drainage; tomatoes thrive in well-drained, nutrient-rich soil.
- Plant tomato seeds indoors 6-8 weeks before the last frost, or purchase young tomato plants from a nursery, ensuring they are healthy and free from pests.
- Once the danger of frost has passed, transplant your tomato seedlings into the prepared garden bed, spacing them about 2-3 feet apart in rows.
- Install tomato cages or stakes at the time of planting to provide support as the plants grow, preventing them from sprawling and developing disease.
- Water regularly and deeply, especially during dry spells and fruit development, to ensure consistent moisture and prevent issues like blossom end rot.
- Choose a location with partial shade or provide shade cloth during hot summer months, as lettuce prefers cooler temperatures and can bolt in full sun.
- Prepare the soil by mixing in peat moss and ensuring it is loose and well-draining; lettuce grows best in consistently moist, fertile soil.
- Sow lettuce seeds directly into the prepared garden bed, planting them shallowly and spacing them according to the seed packet instructions.
- Keep the soil consistently moist by watering frequently but gently, and thin your seedlings once they have developed a few true leaves.
- Harvest outer leaves as needed, allowing the inner leaves to continue growing, or harvest the entire head once it reaches maturity.
- Combine curing salt, brown sugar, black pepper, and maple syrup to create your curing mixture, ensuring it is well-blended.
- Rub the curing mixture generously over all surfaces of the pork belly, making sure it is evenly coated, then place it in a large, sealable bag or container.
- Refrigerate the pork belly for 7-10 days, turning and massaging it daily to distribute the cure evenly and maximize flavor absorption.
- After curing, rinse the pork belly thoroughly under cold water to remove excess salt, then pat it dry with paper towels.
- Smoke the pork belly in a smoker at about 200°F (93°C) until the internal temperature reaches 150°F (65°C), or roast it in an oven at the same temperature until cooked through.
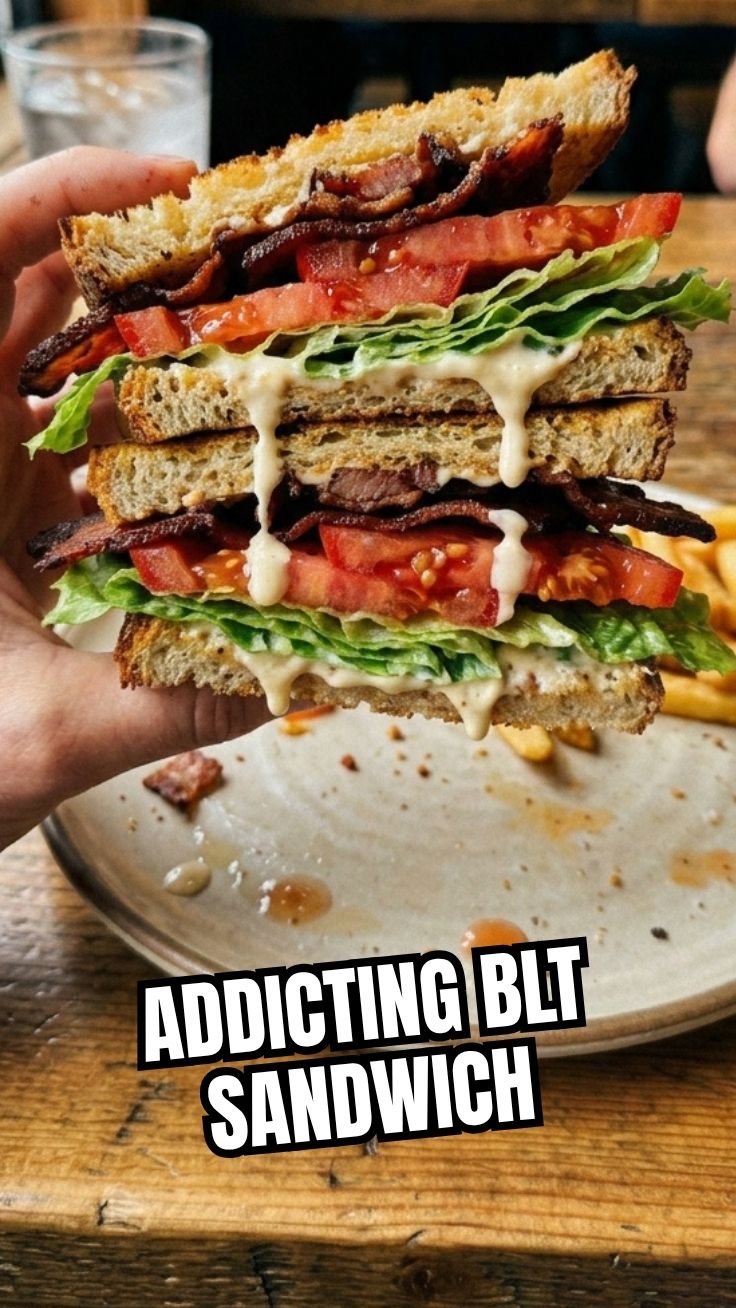
- Toast your favorite bread to a golden crisp, creating a sturdy base for your sandwich, then spread a generous layer of mayonnaise on one side of each slice.
- Layer slices of your freshly grown tomatoes and crisp lettuce, ensuring they are evenly distributed, for maximum flavor and texture.
- Add several slices of your homemade, cured, and cooked bacon, providing a smoky, savory counterpoint to the fresh vegetables.
- Top with the remaining slice of toast, pressing gently to secure the layers, and serve immediately to enjoy the ultimate homegrown BLT experience.