Unlock the Secrets to a Heavenly Cheesecake: Your Ultimate Homemade Journey
Ever dreamt of creating a show-stopping Cheesecake that rivals your favorite bakery, right in your own kitchen? There’s an undeniable magic in whipping up a truly sensational dessert from scratch. Beyond the delicious outcome, the process of crafting a homemade cheesecake allows for complete control over ingredients, ensuring freshness and tailoring flavors to perfection. This comprehensive guide will empower you to create a masterful cheesecake, transforming your culinary aspirations into a delightful reality. Get ready to impress your family and friends with a dessert that’s not just a treat, but an experience.
Ingredients & Kitchen Tools
Crafting a perfect cheesecake requires a modest but essential collection of pantry staples and kitchen equipment. Each item plays a crucial role in achieving that creamy texture and delightful flavor profile.
- For the Crust:
2 cups Graham Cracker Crumbs: Provides a buttery, sweet, and slightly crunchy base. Substitute with digestive biscuits or ginger snaps for a flavor twist.*
* 1/2 cup Unsalted Butter, melted: Binds the crumbs together, ensuring a firm crust.
* 1/4 cup Granulated Sugar: Enhances the sweetness of the crust.
- For the Filling:
24 oz Cream Cheese, full-fat, softened: The star ingredient, essential for that rich, tangy, and creamy cheesecake consistency. Ensure it’s at room temperature for a smooth blend, no lumps allowed!*
* 1 1/2 cups Granulated Sugar: Sweetens the filling.
* 1/4 cup All-Purpose Flour: A secret ingredient that helps prevent cracking and adds structure.
1 tsp Vanilla Extract: Adds a warm, aromatic depth of flavor. Use a good quality pure vanilla extract for best results.*
1/2 cup Sour Cream, full-fat: Adds a subtle tang and helps achieve an ultra-creamy texture. Greek yogurt can be a lighter substitute.*
* Optional: 1/4 cup Heavy Cream: For an even richer, softer filling.
3 large Eggs, room temperature: Acts as a binder and contributes to the custard-like texture. Room temperature eggs blend more evenly.*
- Kitchen Tools:
* 9-inch Springform Pan: Crucial for easy removal of the cheesecake without damage.
* Large Mixing Bowls: For combining crust and filling ingredients.
* Electric Mixer (stand or hand-held): Essential for creaming the cheese and sugar until light and fluffy.
* Rubber Spatula: For scraping down bowls and folding ingredients gently.
* Measuring Cups and Spoons: For accurate ingredient proportions.
* Parchment Paper: For lining the bottom of the springform pan to prevent sticking.
* Aluminum Foil: For wrapping the springform pan if using a water bath.
Prep Time & Cooking Schedule
Planning is key for a perfect cheesecake! This timeline ensures optimal texture and flavor development.
- Prep Time: 25 minutes
- Bake Time: 60-75 minutes (or until edges are set and center jiggles slightly)
- Cooling Time (Room Temp): 1-2 hours
- Chilling Time (Refrigerator): Minimum 6 hours, ideally overnight
Remember, patience is a virtue when making cheesecake. The extended chilling time is absolutely critical for the cheesecake to fully set, develop its rich flavor, and achieve that iconic, firm yet creamy texture. Don’t rush this step!
Step-by-Step Instructions
Follow these clear, detailed steps to create a flawless Cheesecake. Precision and technique are your allies in crafting this delightful dessert.
1. Preheat & Prep Pan: Preheat your oven to 325°F (160°C). Lightly grease a 9-inch springform pan. Cut a circle of parchment paper to fit the bottom of the pan and place it inside. If using a water bath (recommended for crack-free results), wrap the outside of the springform pan tightly with heavy-duty aluminum foil, ensuring no water can seep in.
2. Make the Crust: In a medium bowl, combine the graham cracker crumbs, melted butter, and 1/4 cup granulated sugar. Mix until well combined and the crumbs resemble wet sand. Press the mixture firmly and evenly into the bottom of the prepared springform pan. You can use the bottom of a glass or your knuckles. Bake for 10-12 minutes, then remove from the oven and let cool slightly on a wire rack.
3. Prepare the Filling: In a large mixing bowl, using an electric mixer on medium speed, beat the softened cream cheese and 1 1/2 cups granulated sugar until smooth and creamy, about 3-4 minutes. Scrape down the sides of the bowl often.
4. Add Remaining Ingredients: Beat in the all-purpose flour until just combined. Then, add the vanilla extract, sour cream, and optional heavy cream, mixing on low speed until smooth.
5. Incorporate Eggs: Add the eggs one at a time, beating on low speed just until combined after each addition. Avoid overmixing at this stage, as too much air can cause cracks during baking. The batter should be smooth and creamy.
6. Pour & Bake: Pour the cheesecake batter over the cooled crust in the springform pan. If using a water bath, carefully place the foil-wrapped springform pan into a larger roasting pan. Pour hot water into the roasting pan until it comes halfway up the sides of the springform pan.
7. Bake the Cheesecake: Bake for 60-75 minutes, or until the edges are set and slightly puffed, but the center 2-3 inches still jiggles slightly when gently shaken. This delicate jiggle confirms perfect doneness for your creamy dessert.
8. Cool Gradually: Turn off the oven, crack the oven door open slightly, and let the cheesecake cool inside the oven for 1 hour. This slow cooling prevents sudden temperature changes that can lead to cracking.
9. Chill Thoroughly: Remove the cheesecake from the oven and the water bath (if used). Carefully remove the foil. Let it cool completely on a wire rack at room temperature for 1-2 hours. Once cooled, cover loosely with plastic wrap and refrigerate for a minimum of 6 hours, or ideally overnight, before serving.
Nutritional Benefits & Advantages
While a classic cheesecake is undoubtedly an indulgent dessert, it offers some surprising benefits when enjoyed in moderation. Cream cheese, its primary ingredient, is a good source of calcium, contributing to bone health. It also provides vitamin A, important for vision and immune function. Eggs add a boost of protein and essential vitamins like B12 and D. Homemade versions, like this recipe, allow you to control sugar levels and avoid artificial preservatives often found in store-bought options. Plus, the sheer joy of creating a delicious treat at home offers a significant mental well-being boost!
Tips, Variations & Cooking Advice
- Flavor Variations:
* Lemon Cheesecake: Add 2 tablespoons lemon zest and 1/4 cup fresh lemon juice to the filling.
* Chocolate Swirl: Melt 4 oz semi-sweet chocolate, cool slightly, and swirl into the batter with a knife before baking.
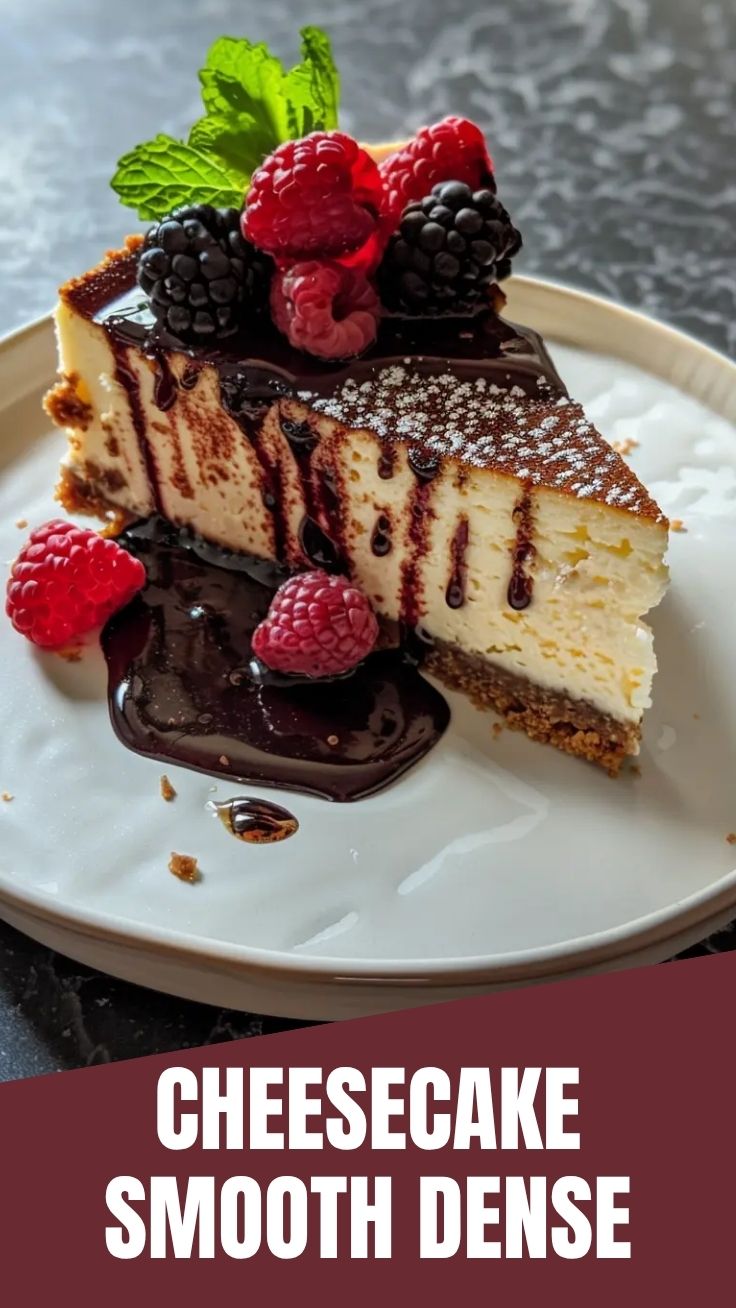
* Fruit Toppings: Serve with fresh berries, a fruit compote, or a tangy lemon curd for added freshness and color.
- Ingredients Swaps:
* Crust: Experiment with crushed oreos, biscoff cookies, or even gluten-free cookies for dietary needs.
* Sweetener: You can slightly reduce the sugar in the filling if you prefer a less sweet dessert, or for a richer flavor, consider using brown sugar or a blend of both.
- Baking Advice: The water bath is your best friend for a crack-free cheesecake. It creates a humid environment, ensuring even baking and preventing the top from drying out and splitting. If you opt not to use a water bath, you might see small cracks, but the flavor will still be fantastic!
Common Mistakes to Avoid
- Overmixing the Filling: Especially after adding the eggs. This incorporates too much air, which expands during baking and contracts during cooling, leading to cracks.
- Using Cold Cream Cheese/Eggs: Clod ingredients don’t emulsify properly, resulting in a lumpy filling. Always ensure they are at room temperature.
- Opening the Oven Door Frequently: This causes temperature fluctuations, which can lead to uneven baking and cracks. Resist the urge to peek!
- Rushing the Cooling/Chilling: The gradual cooling and extended chilling are non-negotiable for a properly set cheesecake. Impatience here will result in a runny or crumbly texture.
- Improper Springform Pan Prep: Without a good seal (parchment and tight foil for water bath), you risk a soggy crust.
Storage & Meal Prep Tips
Proper storage is crucial to maintain the freshness and creamy texture of your homemade cheesecake.
- Refrigeration: Store leftover cheesecake tightly covered in an airtight container or wrapped snugly with plastic wrap in the refrigerator for up to 5-7 days.
- Freezing: For longer storage, slice the cheesecake into individual portions. Place them on a baking sheet and freeze until firm (about 2 hours). Then, wrap each slice individually in plastic wrap, followed by a layer of aluminum foil. Store in an airtight freezer-safe container or bag for up to 1-2 months.
- Reheating: Thaw frozen slices in the refrigerator overnight. Cheesecake is always served chilled, so no reheating is necessary.
- Meal Prep: Cheesecake is an excellent make-ahead dessert. Prepare it a day or two in advance of when you plan to serve it. This allows ample chilling time and also frees up your time on the day of your event.
Conclusion
Mastering a homemade cheesecake is a rewarding culinary achievement, transforming simple ingredients into an extraordinary dessert that will delight everyone. By following these detailed steps, understanding the nuances of temperature and technique, and avoiding common pitfalls, you can consistently achieve that coveted creamy texture and rich flavor. Don’t be intimidated; your perfect Cheesecake awaits! We encourage you to try this recipe and share your delectable results. What are your favorite toppings for a classic dessert like this?
FAQs
Q1: My cheesecake cracked! What went wrong?
A1: Cracks are usually caused by overmixing the batter (incorporating too much air), or a sudden change in temperature during cooling. Using a water bath and slow, gradual cooling can help prevent this.
Q2: Can I make this cheesecake gluten-free?
A2: Absolutely! Simply substitute the graham cracker crumbs with your favorite gluten-free cookie crumbs (e.g., gluten-free vanilla wafers or gingersnaps) for the crust.
Q3: How do I know when my cheesecake is perfectly baked?
A3: The edges should appear set and slightly puffed, but the center (about 2-3 inches in diameter) should still have a slight jiggle like gelatin. It will continue to set as it cools.
Q4: Can I use low-fat cream cheese or sour cream?
A4: While technically possible, using full-fat cream cheese and sour cream is highly recommended for the best flavor and texture. Low-fat alternatives may result in a less creamy, sometimes watery, consistency.
Q5: How far in advance can I make this cheesecake?
A5: You can prepare and bake the cheesecake up to 2-3 days in advance. Ensure it’s properly chilled and stored in the refrigerator, covered.

Best way to grow the ultimate 7-layer cheesecakeCheesecake
Ingredients
Equipment
Method
- Preheat oven to 350°F (175°C). Combine graham cracker crumbs, melted butter, and sugar then press the mixture into the bottom of a 9-inch springform pan to form the crust.
- In a large bowl, beat softened cream cheese and sugar until smooth, then beat in eggs one at a time. Stir in sour cream and vanilla extract until just combined. Pour the filling over the crust in the springform pan.
- Bake for 60-75 minutes, or until the edges are set and the center is slightly jiggly. Turn off the oven, crack the door open, and let the cheesecake cool in the oven for 1 hour.
- Remove the cheesecake from the oven and let it cool completely on a wire rack, then refrigerate for at least 4 hours, or preferably overnight, before serving.
- Once chilled, remove the cheesecake from the springform pan. Drizzle with chocolate syrup and caramel sauce.
- Top with whipped cream and fresh berries. Garnish with chocolate shavings and mint leaves if desired.