Why Homemade Ground Beef Tacos Beat Takeout Every Time
Have you ever wondered why taco night at your favorite restaurant tastes so irresistible, yet replicating that magic at home often falls flat? The secret isn’t complicated ingredients or a professional kitchen—it’s mastering a few foundational techniques. Preparing this classic dish from scratch puts you in total control of flavor, freshness, and nutrition. When you learn to build bold layers with simple pantry staples, you’ll never reach for a boxed kit again. The foundation of any great taco starts with perfectly seasoned protein, and that begins with knowing how to make Ground Beef Tacos that are juicy, aromatic, and packed with authentic taste. Pair that with a well-balanced ground beef taco seasoning, and you unlock a dinner that’s faster, healthier, and far more satisfying than delivery.
—
Ingredients & Kitchen Tools
For the Filling
– 1 lb ground beef (80/20 preferred) – The fat ratio ensures juiciness without greasiness. Leaner blends work but may require extra oil.
– 1 medium yellow onion, finely diced – Adds sweetness and texture. White or red onion can substitute.
– 3 garlic cloves, minced – Fresh is best; use 1 tsp garlic powder in a pinch.
– 2 tbsp tomato paste – Deepens umami and helps the seasoning cling to the meat.
– ½ cup beef broth or water – Creates a light sauce; use low-sodium broth to control salt.
– 2 tbsp vegetable or avocado oil – For sautéing the aromatics.
For the Seasoning Blend
– 1 tbsp chili powder – The backbone of the spice profile.
– 1 tsp cumin – Adds warmth and earthiness.
– 1 tsp smoked paprika – For a subtle smoky depth.
– ½ tsp oregano (Mexican oregano if available) – Brightens the mix.
– ½ tsp garlic powder – Reinforces fresh garlic.
– ½ tsp onion powder – Complements the fresh onion.
– ¼ tsp cayenne pepper (optional) – Adjust for heat preference.
– Salt and black pepper to taste – Start with ½ tsp salt; adjust at the end.
For Serving
– 8–10 small corn or flour tortillas – Warm them on a dry skillet or directly over a gas flame for best texture.
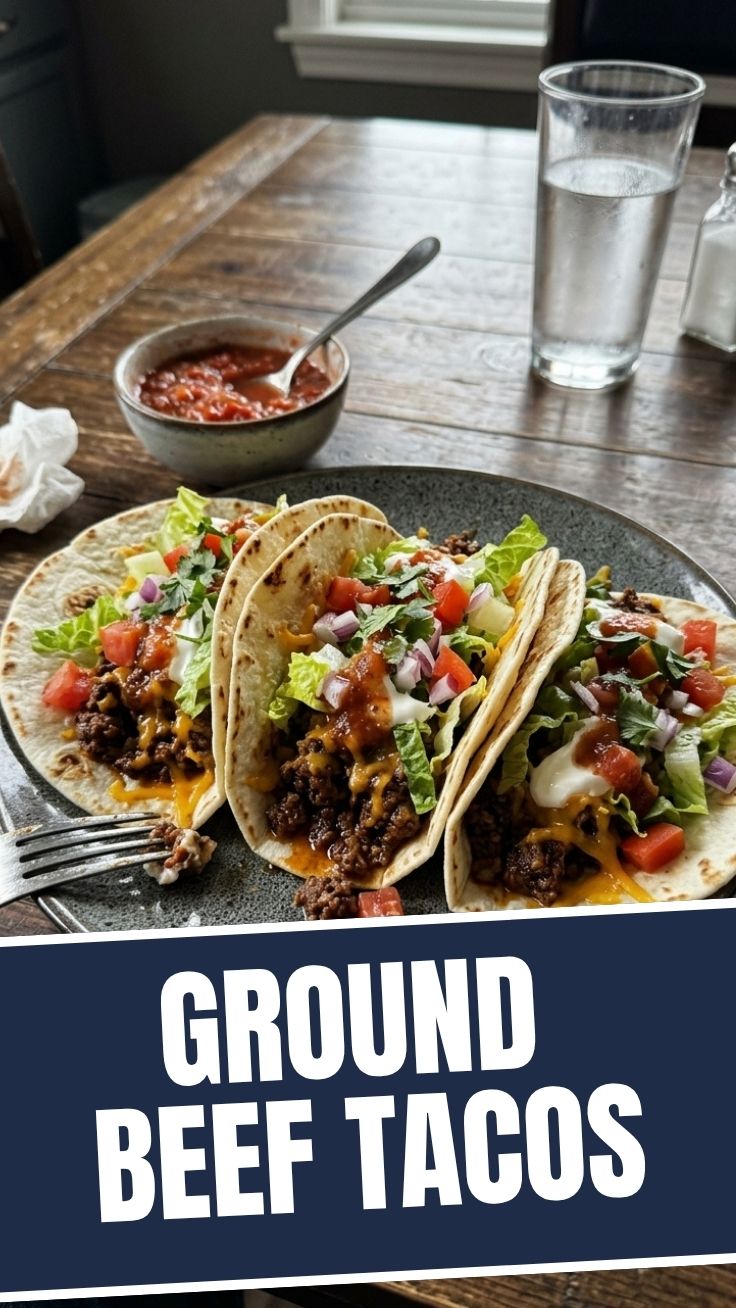
– Toppings: shredded lettuce, diced tomatoes, shredded cheese, sour cream, salsa, fresh cilantro, lime wedges
Kitchen Tools
– Large skillet or cast-iron pan (12-inch recommended)
– Wooden spoon or spatula
– Chef’s knife
– Cutting board
– Small bowl for seasoning mix
– Measuring spoons
Optional Substitutions
– Ground turkey or chicken – Use 93/7 lean and add 1 tbsp oil.
– Vegetarian option – Substitute with crumbled firm tofu or cooked lentils; increase cumin and paprika.
– Gluten-free – Use corn tortillas and ensure broth is certified gluten-free.
– Low-sodium – Reduce salt in seasoning and use unsalted broth.
—
Prep Time & Cooking Schedule
| Task | Time |
|——|——|
| Prep ingredients (dice onion, mince garlic, measure spices) | 10 minutes |
| Cook the filling | 15 minutes |
| Warm tortillas and prep toppings | 5 minutes |
| Total | 30 minutes |
This recipe comes together in under 30 minutes with no inactive time—no marinating, resting, or slow-cooking required. The entire process is active, so you stay engaged and in control of texture and seasoning.
—
Step-by-Step Instructions
1. Toast the Spices (Optional but Recommended)
In a small bowl, combine chili powder, cumin, smoked paprika, oregano, garlic powder, onion powder, cayenne, salt, and pepper. If you have extra 30 seconds, toast the spices in a dry skillet over medium heat for 20 seconds until fragrant—this deepens their flavor significantly.
2. Sauté the Aromatics
Heat 2 tbsp oil in a large skillet over medium-high heat. Add the diced onion and cook for 3–4 minutes until translucent. Add the minced garlic and cook for 30 seconds, stirring constantly to avoid burning.
3. Brown the Beef
Add the ground beef to the skillet. Break it apart with a wooden spoon and cook without moving it too much initially—let it develop a brown crust, about 4–5 minutes. Stir occasionally until no pink remains. Do not drain all the fat; leave about 1 tablespoon for flavor.
4. Build the Flavor Base
Reduce heat to medium. Push the beef to one side of the pan and add the tomato paste to the empty side. Cook the paste for 1 minute, stirring constantly, until it darkens slightly. This step removes raw acidity and concentrates sweetness.
5. Season and Simmer
Sprinkle the prepared ground beef taco seasoning evenly over the beef. Stir to coat every piece. Pour in ½ cup beef broth and scrape up any browned bits from the pan bottom. Let the mixture simmer for 5–7 minutes, stirring occasionally, until the liquid reduces to a thick, clingy sauce. The final texture should be moist but not soupy.
6. Taste and Adjust
Taste a small spoonful. If it needs more salt, add a pinch. If you want more heat, add a dash of cayenne or a few dashes of hot sauce. For brightness, stir in a squeeze of fresh lime juice at the end.
7. Assemble Your Tacos
Warm tortillas one at a time in a dry skillet over medium heat for about 30 seconds per side, or directly over a gas flame for a slight char. Fill each tortilla with 2–3 tablespoons of the beef mixture. Top with shredded lettuce, diced tomatoes, cheese, sour cream, and a squeeze of lime. Serve immediately while the filling is hot.
At this stage, you’ve created beautifully seasoned Ground Beef Tacos that rival any restaurant version.
—
Nutritional Benefits & Advantages
This dish offers a balanced macronutrient profile while being highly customizable. Per serving (two tacos with filling and basic toppings):
| Nutrient | Amount |
|———-|——–|
| Calories | ~350–400 |
| Protein | 28–32g |
| Fat | 18–22g |
| Carbohydrates | 22–26g |
| Fiber | 4–6g |
| Iron | 20% DV |
| Zinc | 35% DV |
– High-quality protein from beef supports muscle repair and keeps you full.
– Iron and B12 in red meat aid energy metabolism and red blood cell production.
– Customizable fiber – Use corn tortillas and load up on lettuce, tomatoes, and salsa to increase fiber intake.
– Lower sodium than restaurant versions – You control the salt.
– Naturally gluten-free when using corn tortillas and verified ingredients.
—
Tips, Variations & Cooking Advice
Flavor Variations
– Zesty Lime-Cilantro: Stir 2 tbsp fresh cilantro and 1 tsp lime zest into the finished beef.
– Smoky Chipotle: Add 1 minced chipotle pepper in adobo sauce along with the broth.
– Breakfast Tacos: Use the same filling but serve with scrambled eggs and crispy potatoes.
Dietary Adaptations
– Dairy-free: Omit cheese and sour cream; use avocado or dairy-free yogurt.
– Keto-friendly: Serve in lettuce wraps or low-carb tortillas.
– Higher heat: Double the cayenne or add fresh chopped jalapeño with the onion.
Cooking Method Swaps
– Slow cooker: Brown beef and aromatics first, then transfer to slow cooker with seasoning and ¼ cup broth. Cook on low for 4 hours.
– Instant Pot: Use sauté function to brown, then pressure cook on high for 5 minutes with ½ cup broth.
Portion Changes
– For larger gatherings, double the recipe easily. The seasoning mix scales perfectly.
– Meal-preppers can cook the beef in bulk and use it throughout the week for tacos, salads, burrito bowls, or nachos.
—
Common Mistakes to Avoid
| Mistake | Solution |
|———|———-|
| Overcrowding the pan | Cook beef in a single layer so it browns rather than steams. Use a large skillet or cook in batches. |
| Skipping the simmer | The 5–7 minute simmer allows flavors to meld and the sauce to thicken. Rushing this step leads to bland, watery filling. |
| Draining all the fat | Some fat is needed to carry the seasoning and keep meat moist. Leave about 1 tbsp in the pan. |
| Using cold tortillas | Warm tortillas are pliable and less likely to crack. Always heat them just before serving. |
| Overfilling tortillas | Two tablespoons of filling per taco is ideal. Overstuffing leads to messy eating and broken shells. |
—
Storage & Meal Prep Tips
Refrigerating
– Store cooked beef in an airtight container for up to 4 days.
– Keep tortillas separate to prevent sogginess.
– Reheat beef in a skillet over medium-low heat with 1–2 tbsp of water or broth to restore moisture.
Freezing
– The beef mixture freezes well for up to 3 months.
– Cool completely, transfer to a freezer-safe bag, flatten for even thawing, and label with date.
– Thaw overnight in the refrigerator. Reheat gently in a skillet.
Prep Ahead Strategy
– Seasoning mix: Prepare the spice blend up to 1 month ahead and store in a sealed jar.
– Diced onion: Can be chopped 1 day ahead and stored in an airtight container in the fridge.
– Toppings: Shred lettuce, dice tomatoes, and grate cheese the morning of serving.
Reheating Notes
– Microwave: Heat beef in 30-second bursts, stirring in between. Add a splash of water to prevent drying.
– Skillet: Best method – reheat over medium heat with a tablespoon of water, covered for 2 minutes, then uncovered for 1 minute.
– Avoid high heat – It dries out the meat and can scorch the spices.
—
Conclusion
Mastering Ground Beef Tacos at home with a thoughtfully crafted ground beef taco seasoning transforms a simple weeknight dinner into something truly special. You’ve learned how to toast spices for depth, brown meat for texture, and simmer for that perfect saucy consistency. The beauty of this recipe lies in its flexibility—swap proteins, dial up the heat, or load it with fresh toppings to make it your own. Now it’s your turn: fire up that skillet, taste as you go, and discover how easy it is to create taco night magic from scratch. Made this recipe? Share your creations in the comments or tag us on social media. And if you loved these, check out our guide to smoky black bean tacos for another meatless Monday win.
—
FAQs
1. Can I use a store-bought seasoning packet instead of making my own?
Yes, though the flavor won’t be as fresh or customizable. If using a packet, reduce or skip salt added elsewhere, as packets often contain high sodium. For best results, use the packet’s seasoning amount as a guide and supplement with extra cumin and smoked paprika to restore depth.
2. My ground beef turned out dry—what went wrong?
Dryness usually comes from two sources: cooking the beef on too high heat until all moisture evaporates, or using extra-lean meat (93/7 or 96/4) without adding extra oil. For leaner options, add 1–2 tbsp of oil and reduce simmering time by half. Always keep the sauce consistency slightly loose when you finish cooking.
3. How do I make this recipe dairy-free?
Simple: skip the cheese and sour cream. Replace sour cream with sliced avocado or a dairy-free yogurt. Most tortillas are naturally dairy-free (check labels for processed flour tortillas). The beef filling itself contains no dairy.
4. Can I make these tacos spicy without overpowering the other flavors?
Absolutely. Add the cayenne slowly—start with ¼ teaspoon and taste before adding more. Alternatively, serve pickled jalapeños or a spicy salsa on the side so each person controls their heat level. The spice in the base recipe is mild enough for kids.
5. What’s the best way to reheat leftover taco shells?
Hard corn shells – Bake at 350°F for 5 minutes. Soft tortillas – Warm in a dry skillet for 30 seconds per side or in a microwave between damp paper towels for 20 seconds. Never reheat shells in a toaster oven unwatched—they burn quickly.
6. The mixture tasted too tomatoey—how can I fix it next time?
Tomato paste intensity varies by brand. Start with 1½ tablespoons instead of 2, or use ½ of a diced fresh Roma tomato cooked down with the aromatics. If your batch is already finished, balance acidity with a pinch of sugar and extra cumin.

5-Star Ground Beef Tacos
Ingredients
Equipment
Method
- Brown the ground beef in a large skillet over medium heat, breaking it into crumbles as it cooks. Drain any excess grease from the skillet.
- Stir in the taco seasoning and water, then bring the mixture to a simmer. Reduce heat and cook for 5-7 minutes, or until the liquid has mostly evaporated and the meat is well-seasoned.
- While the meat is simmering, warm your taco shells or tortillas according to package directions. Prepare your desired taco toppings, such as shredding lettuce, dicing tomatoes, and grating cheese.
- Fill each warmed taco shell or tortilla with the seasoned ground beef. Top with lettuce, tomatoes, cheese, sour cream, salsa, or any other favorite taco toppings. Serve immediately and enjoy your delicious tacos!