The Ultimate Guide to the Perfect New York Cheesecake
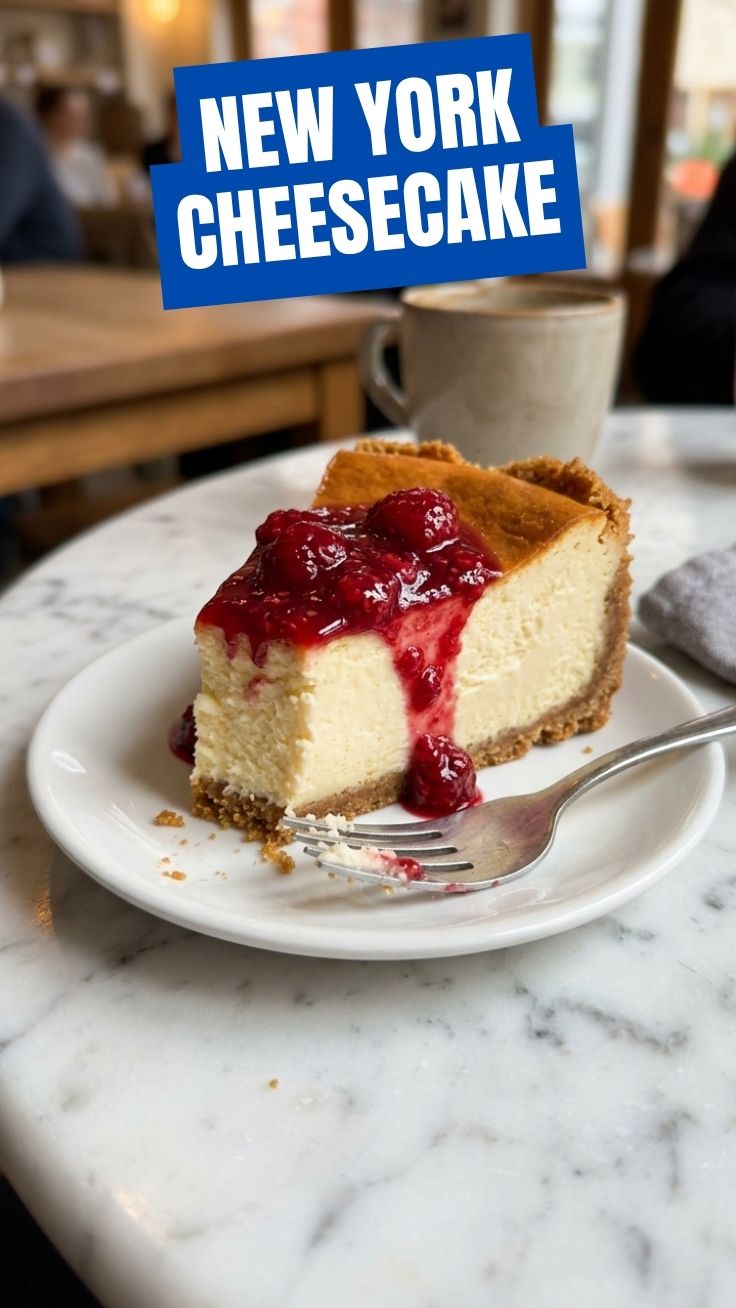
Have you ever wondered what separates a good cheesecake from a truly unforgettable one? The answer often lies in the contrast between two iconic styles. While many love the lighter, fluffier texture of a Philadelphia Cheesecake, the dense, velvety, and intensely rich profile of a classic New York Cheesecake represents the gold standard for purists. Preparing this iconic dessert at home might seem daunting, but it is incredibly valuable—not only does it allow you to control every ingredient for superior flavor, but it also fills your kitchen with an irresistible aroma and gives you that profound satisfaction of mastering a true culinary classic. The journey to a flawless slice starts with understanding the fundamentals.
Ingredients & Kitchen Tools
For the Crust:
– 1 ½ cups graham cracker crumbs: Provides a buttery, slightly sweet base. Substitution: Use vanilla wafers or shortbread cookies for a different flavor profile.
– ¼ cup granulated sugar: Adds sweetness and helps the crust bind.
– 6 tablespoons unsalted butter, melted: The binding agent. Clarification: Use melted, not softened, butter for even distribution.
For the Filling:
– 32 oz (four 8-oz blocks) full-fat cream cheese: The non-negotiable star. Must be at room temperature for a lump-free filling. Substitution: Neufchâtel cheese for lower fat, though texture will be less dense.
– 1 cup granulated sugar: For sweetness and structural integrity.
– 1 cup full-fat sour cream: Adds tanginess and a silky texture. Substitution: Full-fat Greek yogurt works in a pinch.
– 1 teaspoon vanilla extract: Pure, not imitation, for depth of flavor.
– 4 large eggs, at room temperature: Provides structure and richness.
Essential Kitchen Tools:
– 9-inch springform pan: Crucial for easy removal.
– Electric hand mixer or stand mixer: Avoids overworking the batter by hand.
– Large roasting pan (for water bath): Prevents cracking.
– Heavy-duty aluminum foil: For waterproofing the pan.
– Offset spatula: For smoothing the top.
Prep Time & Cooking Schedule
– Prep Time: 25 minutes
– Bake Time: 55-65 minutes
– Cool Time (in oven): 1 hour
– Chill Time (refrigeration): Minimum 4 hours (ideally overnight)
– Total Time: ~6 hours 30 minutes (including refrigeration)
Context to Plan: The overnight chill is not optional—it is essential for the cream cheese filling to set properly and develop its signature silky texture. Start this recipe in the morning or early afternoon if you plan to serve it for dessert later that day, but for best results, prepare it a full day ahead.
Step-by-Step Instructions
1. Prep the Pan: Preheat your oven to 350°F (175°C). Wrap the outside of your springform pan with two layers of heavy-duty aluminum foil, ensuring it goes up the sides to prevent water from seeping in during the water bath.
2. Make the Crust: In a medium bowl, combine graham cracker crumbs and sugar. Pour in melted butter and mix until the texture resembles wet sand. Press this mixture firmly into the bottom of the prepared pan. Use the bottom of a measuring cup to create an even layer. Bake for 10 minutes, then set aside to cool.
3. Prepare the Water Bath: Bring a full kettle of water to a boil. You will need enough to go halfway up the sides of the springform pan.
4. Make the Filling: In a large bowl using a hand mixer on medium speed (or in a stand mixer with the paddle attachment), beat the room-temperature cream cheese until completely smooth and free of lumps, about 2 minutes. This is the most critical step for a classic New York Cheesecake—any lumps will ruin its signature velvety texture.
5. Add Sugar & Sour Cream: Gradually add the sugar and beat until combined. Scrape down the bowl. Add the sour cream and vanilla extract; beat on low until just incorporated.
6. Add Eggs One at a Time: Crack each egg into a small bowl first (to catch shell bits), then add it to the batter. Beat on low speed only until the yolk disappears. Overmixing at this stage traps too much air, causing cracks. For a lighter, fluffier result akin to a Philadelphia Cheesecake, you could gently fold the last egg by hand, but for this dense recipe, low-speed mixing is key.
7. Assemble & Bake: Pour the filling over the cooled crust. Place the foil-wrapped pan into the large roasting pan. Carefully pour the hot water from the kettle into the roasting pan until it reaches halfway up the sides of the springform pan. Bake for 55-65 minutes. The edges should be set, and the center should still jiggle slightly.
8. Cool Slowly: Turn off the oven, crack the oven door open, and let the cheesecake cool inside for 1 hour. This gradual cooling prevents sudden temperature shock. Remove from the water bath, discard foil, and cool completely on a wire rack.
9. Chill: Refrigerate uncovered for at least 4 hours (overnight is best). Cover with plastic wrap after 2 hours.
Nutritional Benefits & Advantages
While cheesecake is a decadent treat, it offers surprising benefits when enjoyed in moderation. The main ingredient, cream cheese, provides a good source of calcium (about 10% of your daily value per slice) for bone health and contains high-quality protein. The eggs contribute essential amino acids and choline, which supports brain function. Full-fat dairy contains conjugated linoleic acid (CLA), which some studies suggest may aid in metabolic health. The sour cream adds probiotics, beneficial for gut flora. Making it at home also allows you to eliminate artificial preservatives and hydrogenated oils found in store-bought versions.
Tips Variations & Cooking Advice
– Flavor Variations:
– Lemon Swirl: Add 2 tablespoons of lemon zest and 3 tablespoons of lemon juice to the filling, then swirl in a ¼ cup of lemon curd.
– Chocolate New York: Replace ¼ cup of the sugar with ½ cup of melted bittersweet chocolate.
– Dietary Adaptations:
– Gluten-Free: Use gluten-free graham crackers or almond flour for the crust.
– Dairy-Free: Substitute with vegan cream cheese and coconut cream for the sour cream.
– Alternative Methods: If you are nervous about the water bath, place a shallow pan of water on the rack below the cheesecake. It will create steam to prevent cracking.
– Portion Changes: For mini cheesecakes, use a muffin tin with liners. Reduce bake time to 18-22 minutes.
Common Mistakes to Avoid
– Mistake #1: Using Cold Ingredients. Cold cream cheese and eggs create a lumpy, grainy batter. Always bring them to room temperature for 1-2 hours.
– Mistake #2: Overmixing the Batter. Overmixing incorporates excess air, which expands in the oven and then collapses, causing deep cracks. Stop mixing as soon as each ingredient is incorporated.
– Mistake #3: Skipping the Water Bath. Many think this step is optional. It is not. The water bath ensures gentle, even heat distribution, which is the single best defense against a cracked top.
– Mistake #4: Opening the Oven Door. Resisting the urge to peek is hard, but doing so lets cold air in, shocking the delicate custard and causing it to fall.
Storage & Meal Prep Tips
– Storing Leftovers: Store the cheesecake in the refrigerator, tightly covered with plastic wrap or in an airtight container. It will stay fresh for up to 5 days. For the best flavor, consume it within 3 days.
– Freezing: Cheesecake freezes beautifully. Place the completely chilled cheesecake in the freezer for 1 hour (unwrapped) to firm the surface. Then wrap it in two layers of plastic wrap followed by a layer of aluminum foil. It will keep for up to 3 months.
– Reheating: Do not microwave the entire slice to warm it. For a warm slice, place it on a baking sheet in a 300°F oven for 5-7 minutes, or simply allow it to sit at room temperature for 20 minutes before serving for the best creamy texture.
– Meal Prep: Because it needs at least 4 hours to set, this is the perfect make-ahead dessert for dinner parties or holidays. Prepare it the day before your event.
Conclusion
Mastering the dense, creamy richness of a homemade New York Cheesecake is easier than you think when you follow the foundational steps of a water bath and room-temperature ingredients. While it takes patience, the reward is a flawless, decadent centerpiece for any gathering. Whether you prefer this indulgent classic or the lighter, airier notes of a Philadelphia Cheesecake, the key is always in the technique. We encourage you to try this recipe, share your golden, crack-free slices on social media, and explore our other baking guides for more crowd-pleasing desserts.
FAQs
1. Why did my cheesecake crack on top?
Cracks are usually caused by overmixing the batter, overbaking, or a sudden temperature change. Use the water bath, bake until the center just barely jiggles, and cool slowly in the oven with the door cracked open.
2. Can I use low-fat cream cheese?
Technically yes, but the results will be noticeably different—the texture will be less creamy, denser, and more prone to cracking. For the best texture, stick with full-fat blocks.
3. How do I know when it’s done baking?
The cheesecake is done when the edges are set and puffed slightly, but the center (about 2 inches in diameter) still jiggles like firm Jell-O when you gently shake the pan. It will continue to set as it cools.
4. My cheesecake is too dense and heavy. What went wrong?
This often happens when the cream cheese was overmixed initially (incorporating too much air that then deflates) or if you used a reduced-fat cheese that had too much water. Ensure you beat the cream cheese alone until smooth before adding other ingredients.
5. Can I skip the sour cream and use heavy cream instead?
While heavy cream can be used, it changes the tangy profile of the original recipe. Sour cream is not just for moisture; it provides a distinct tang that balances the sweetness and enhances the cream cheese flavor. For a closer substitute, use full-fat plain yogurt.
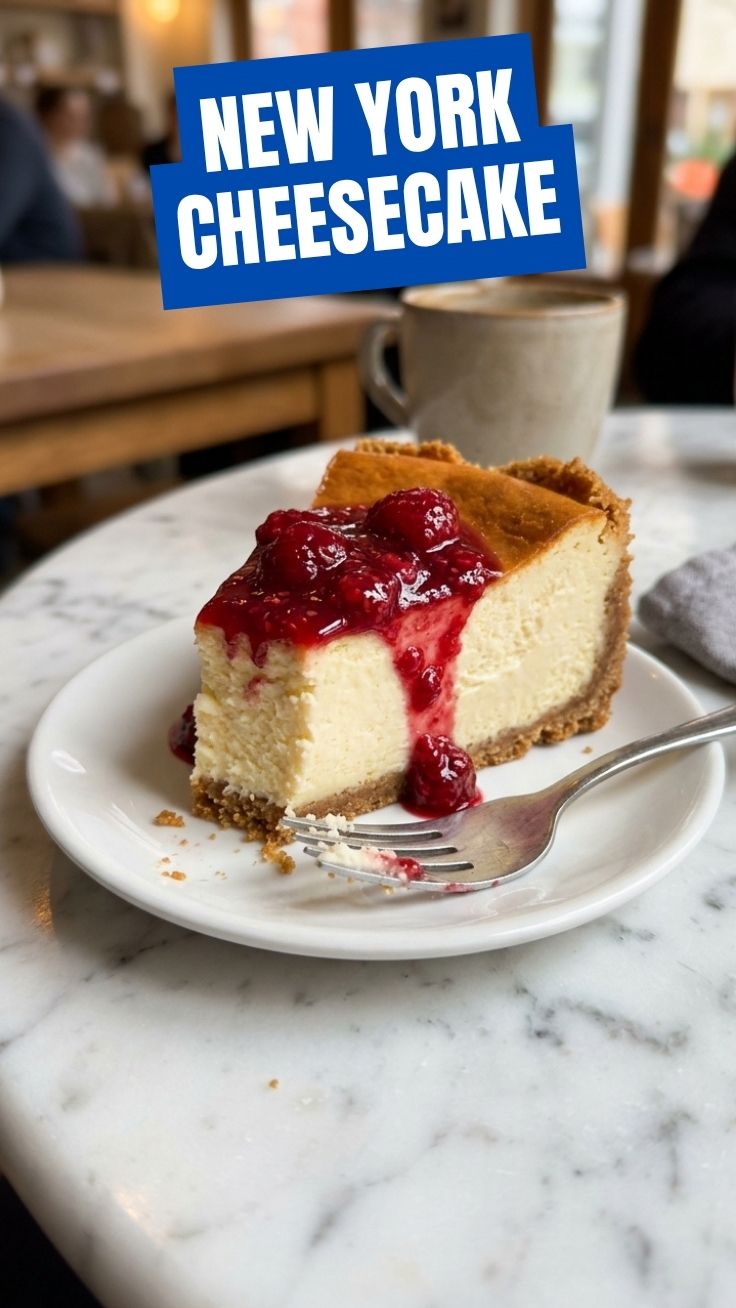
Proven way to grow 7-layer New York Cheesecake
Ingredients
Equipment
Method
- Preheat your oven to 350°F (175°C) and lightly grease a 9-inch springform pan.
- In a medium bowl, combine graham cracker crumbs, sugar, and melted butter, mixing until well combined.
- Press the mixture firmly into the bottom of the prepared springform pan; set aside.
- In a large bowl, using an electric mixer, beat the softened cream cheese on medium speed until smooth and creamy.
- Gradually add the granulated sugar, beating until fully incorporated, then mix in the all-purpose flour.
- Stir in the sour cream, heavy cream, and vanilla extract until just combined.
- Add the eggs one at a time, beating on low speed after each addition until just incorporated, then slowly mix in the egg yolk.
- Pour the cheesecake filling over the crust into the springform pan and gently tap to remove air bubbles.
- Bake for 1 hour to 1 hour and 15 minutes, or until the edges are set and the center still slightly jiggles.
- Turn off the oven, prop the door open slightly, and leave the cheesecake inside for 1 hour to cool gradually.
- Remove the cheesecake from the oven and refrigerate for at least 4 hours, or preferably overnight, until thoroughly chilled and set.
- In a small bowl, whisk together the sour cream, sugar, and vanilla extract until smooth.
- Spread the topping evenly over the chilled cheesecake.
- Refrigerate for another 30 minutes to allow the topping to set.
- Carefully remove the cheesecake from the springform pan and garnish with fresh berries, if desired.
- Slice and serve this decadent 7-layer New York Cheesecake.