The Ultimate Guide to Perfect No-Bake Peanut Butter Bars: A Quick, Healthy Snack Solution
Have you ever craved a sweet, satisfying treat but didn’t want to turn on the oven or spend hours in the kitchen? You’re not alone. Enter the No-Bake Peanut Butter Bars—a game-changer for busy families, fitness enthusiasts, and dessert lovers alike. These bars are not only incredibly easy to make but also pack a punch of protein and healthy fats, making them a perfect school snack or post-workout bite. In this comprehensive guide, we’ll walk you through every step to create these indulgent yet wholesome bars at home. Whether you’re a seasoned baker or a complete beginner, you’ll find value in preparing this recipe from scratch—saving money, controlling ingredients, and avoiding preservatives. Let’s dive into the world of No-Bake Dessert Recipes that are as nutritious as they are delicious.
Ingredients & Kitchen Tools
Required Ingredients
– 1 cup creamy peanut butter (natural, no added sugar preferred for better texture and health)
– 1/2 cup honey or maple syrup (acts as a natural binder and sweetener)
– 2 cups rolled oats (use gluten-free certified oats if needed)
– 1/2 cup dark chocolate chips (70% cocoa or higher for antioxidants)
– 1/4 cup coconut oil (helps set the bars and adds a subtle flavor)
– 1 teaspoon vanilla extract (enhances overall taste)
– Pinch of sea salt (balances sweetness)
Kitchen Tools
– 8×8 inch baking dish or square pan
– Parchment paper (for easy removal)
– Mixing bowls (medium and small)
– Spatula or wooden spoon
– Microwave-safe bowl or small saucepan (for melting chocolate)
– Measuring cups and spoons
Optional Substitutions
– Almond butter or sunflower seed butter for a nut-free version
– Agave nectar instead of honey for vegan option
– Crushed pretzels or coconut flakes for added crunch
– Protein powder (1 scoop) mixed with oats for extra protein boost
Prep Time & Cooking Schedule
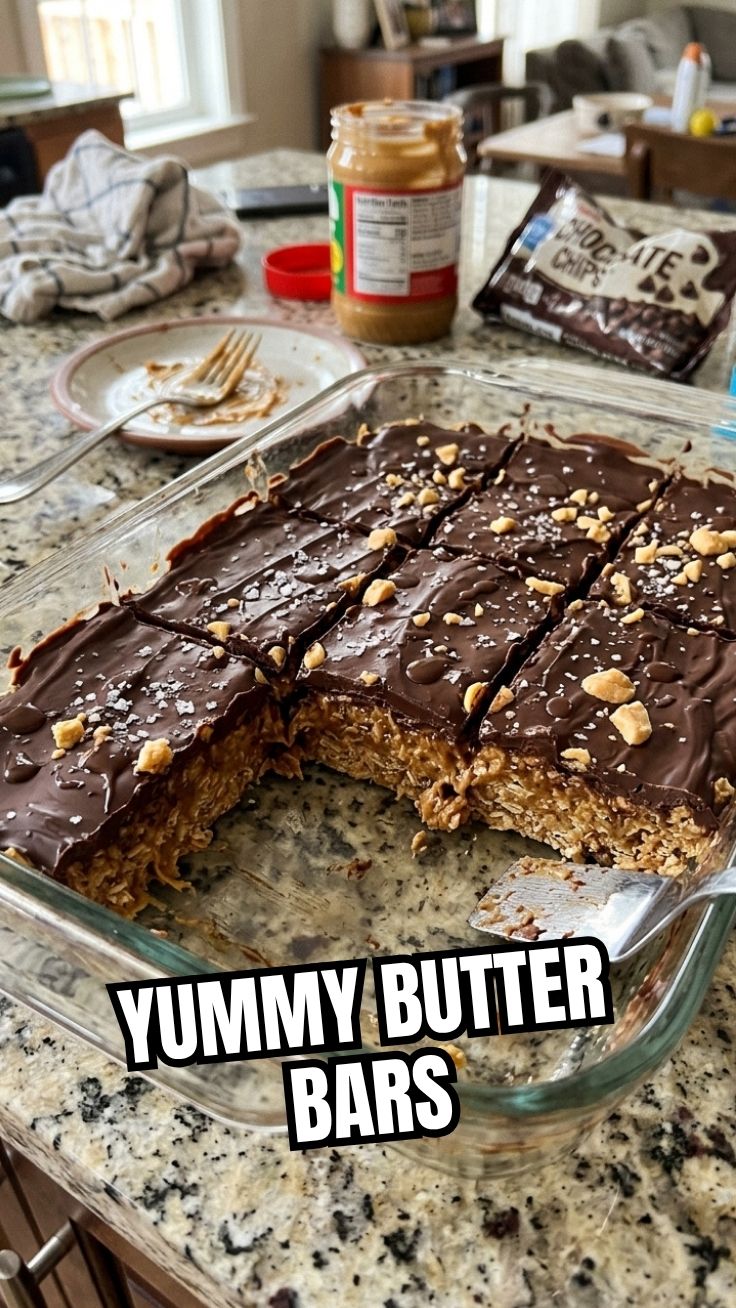
– Prep Time: 15 minutes
– Chill Time: 2 hours (minimum) to 4 hours (for a firmer set)
– Total Time: 2 hours 15 minutes
Why schedule matters: These bars require patience for the chilling process, but it’s mostly hands-off time. Prepare them in the morning, and they’ll be ready by lunchtime—or make them the night before for an after-school snack. The resting period allows the oats to absorb moisture and the chocolate layer to firm, ensuring perfect slicing without crumbling.
Step-by-Step Instructions
1. Prepare the pan: Line an 8×8 inch dish with parchment paper, leaving overhang on two sides for easy lifting. Lightly grease with coconut oil to prevent sticking.
2. Mix the base: In a medium bowl, combine peanut butter, honey (or maple syrup), and vanilla extract. Stir until smooth—if using natural peanut butter that’s separated, warm it slightly first for easier mixing.
3. Incorporate dry ingredients: Fold in rolled oats and a pinch of sea salt. Stir vigorously until every oat is coated. The mixture should hold together when pressed. If too dry, add 1 tablespoon warm water; if too wet, add 1 tablespoon more oats.
4. Press into pan: Transfer the oat mixture into the prepared pan. Use a spatula or your hands to press down firmly and evenly. Pro tip: Cover with plastic wrap and use a flat-bottomed glass to get a uniform surface.
5. Melt chocolate layer: In a microwave-safe bowl, combine dark chocolate chips and coconut oil. Microwave in 20-second intervals, stirring each time, until fully melted and glossy. Alternatively, use a double boiler for precision.
6. Spread chocolate: Pour melted chocolate over the pressed oat base. Spread evenly with a spatula, reaching all corners. For a decorative touch, swirl a knife through the chocolate to create ripples.
7. Chill: Place the pan in the refrigerator for at least 2 hours, or until the chocolate is completely set. For quicker results, freeze for 30-40 minutes (monitor to avoid cracking).
8. Slice and serve: Once firm, lift the entire block using parchment overhang. Place on a cutting board and use a sharp knife to cut into 16 squares or 12 bars. For clean cuts, warm the knife under hot water and wipe dry between slices.
Note on keyword integration: These No-Bake Peanut Butter Bars are a staple in healthy No-Bake Dessert Recipes because they require zero oven time while delivering maximum flavor—perfect for hot days or busy schedules.
Nutritional Benefits & Advantages
These bars aren’t just tasty—they’re packed with nutrition. Peanut butter provides protein and healthy monounsaturated fats, supporting muscle repair and satiety. Oats are a rich source of fiber and complex carbohydrates, offering sustained energy without blood sugar spikes. Dark chocolate contributes antioxidants (flavonoids) that support heart health and reduce inflammation. Additionally, using honey over refined sugar adds natural enzymes and vitamins. One bar (based on 16 servings) contains approximately 180 calories, 8g protein, 15g carbs, and 10g fat—making it a balanced snack that fuels your body.
Tips Variations & Cooking Advice
– Flavor Variations: Add 1/4 cup chopped almonds or walnuts for crunch; mix in 2 tablespoons cocoa powder to the base for double-chocolate bars; top with flaky sea salt before chilling for a salted caramel vibe.
– Dietary Adaptations:
– Vegan: Use maple syrup or agave, ensure chocolate chips are dairy-free (most dark brands are).
– Gluten-Free: Use certified gluten-free oats and check chocolate labels.
– Low-Sugar: Swap honey for 3 tablespoons monk fruit sweetener and use sugar-free chocolate chips.
– Portion Changes: For thinner bars, use a 9×13 inch pan (reduce chill time to 1 hour); for thicker bars, halve the recipe in an 8×4 inch loaf pan.
– No-Fridge Method: If serving immediately, freeze for 15 minutes—though they’ll be softer and best eaten within an hour.
Common Mistakes to Avoid
– Pressing too lightly: Loose bars crumble when sliced. Press with authority—use a second piece of parchment and a heavy book for even weight.
– Overheating chocolate: Burnt chocolate becomes grainy and bitter. Always use low heat and stir frequently.
– Skipping the salt: Even a pinch balances sweetness and enhances peanut flavor. Don’t omit it.
– Cutting too early: If the chocolate isn’t fully set, bars will fall apart. Wait the full 2 hours or test with a toothpick—if it comes out clean, you’re ready.
– Using old oats: Stale oats lack binding power. Always use fresh rolled oats (not quick-cooking for best texture).
Storage & Meal Prep Tips
– Refrigeration: Store bars in an airtight container in the fridge for up to 1 week. Separate layers with parchment to prevent sticking.
– Freezing: Wrap individual bars in plastic wrap, then place in a freezer bag. They’ll last up to 3 months. Thaw in the fridge for 30 minutes or eat frozen (firmer texture like a granola bar).
– Reheating: These are meant to be eaten cold or at room temperature. If you prefer a softer texture, let sit at room temperature for 10 minutes before serving.
– Meal Prep: Double the recipe and freeze half. Pack in lunch boxes straight from the freezer—they’ll thaw by snack time. Perfect for busy school mornings or on-the-go convenience.
Conclusion
In summary, these No-Bake Peanut Butter Bars are a foolproof solution for anyone seeking a quick, healthy, and utterly satisfying treat. From their minimal prep time to their customizable nature, this recipe proves that wholesome No-Bake Dessert Recipes can fit any lifestyle—whether you’re a parent packing school lunches or an athlete refueling after training. We encourage you to try this recipe today, share your results with friends, and explore more no-bake creations on our site. Remember: great food doesn’t require an oven—just a little creativity and the right ingredients.
FAQs
1. Can I use crunchy peanut butter instead of creamy?
Yes! Crunchy adds extra texture. However, creamy blends more evenly for a smoother base, so mix thoroughly if using crunchy.
2. How do I make these bars vegan?
Substitute honey with maple syrup or agave, use dairy-free chocolate chips, and ensure your oats are certified vegan (most are).
3. My bars are too crumbly—what went wrong?
This usually means the mixture was too dry. Next time, add 1-2 tablespoons more honey or a splash of almond milk to bind better. Also, press down very firmly.
4. Can I use quick-cooking oats instead of rolled oats?
Yes, but the texture will be softer and less chewy. Rolled oats are preferred for their hearty bite.
5. How long do these bars last at room temperature?
They’re best stored in the fridge. At room temperature (below 70°F), they last up to 2 days, but the chocolate may soften and bars might get sticky. Always refrigerate for longer freshness.
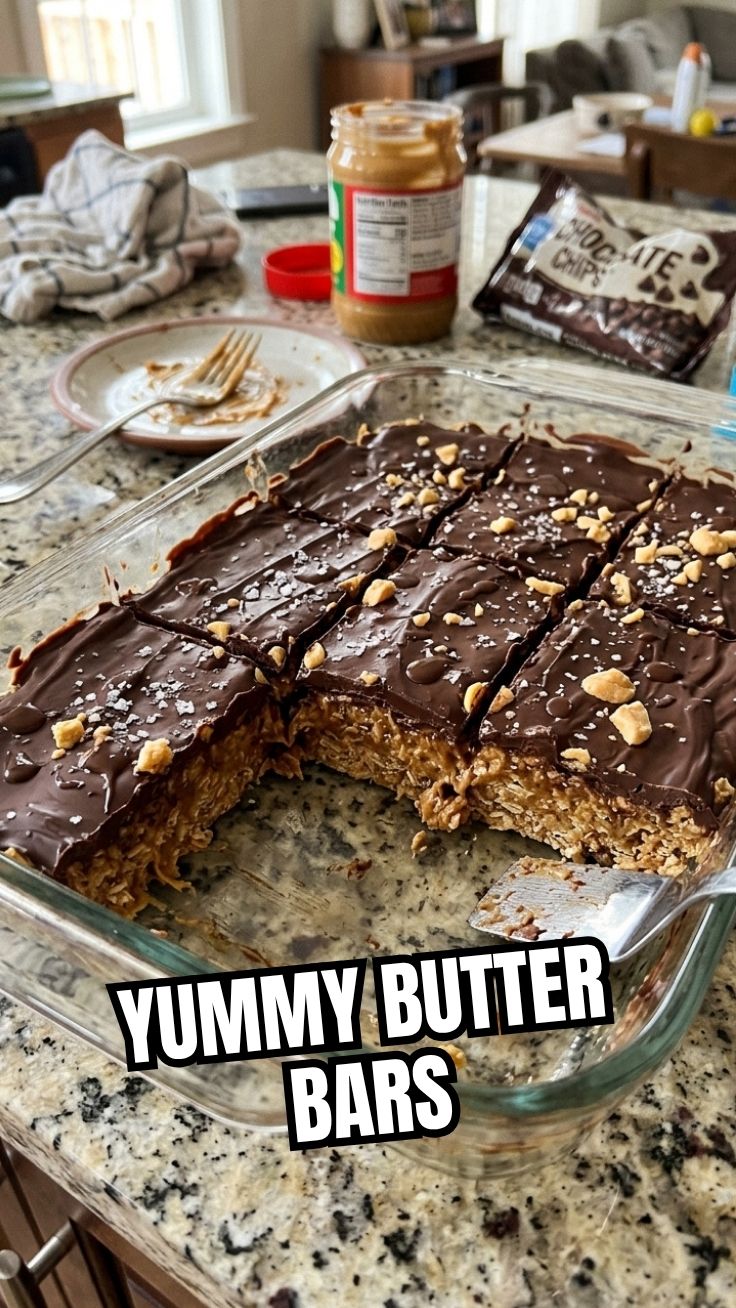
Quick way to grow No-Bake Peanut Butter Bars
Ingredients
Equipment
Method
- Line an 8x8 inch baking pan with parchment paper, leaving an overhang on the sides for easy removal.
- In a large bowl, combine the graham cracker crumbs, powdered sugar, peanut butter, and melted butter. Mix until well combined and a dough-like consistency is formed.
- Press the mixture evenly into the prepared baking pan, ensuring it is compact and smooth.
- Melt the chocolate chips in a microwave-safe bowl or over a double boiler until smooth.
- Pour the melted chocolate over the peanut butter base and spread evenly with an offset spatula or the back of a spoon.
- Refrigerate for at least 45 minutes, or until the chocolate is set.
- Once chilled, use the parchment paper overhang to lift the bars out of the pan.
- Cut the bars into squares or rectangles and serve.