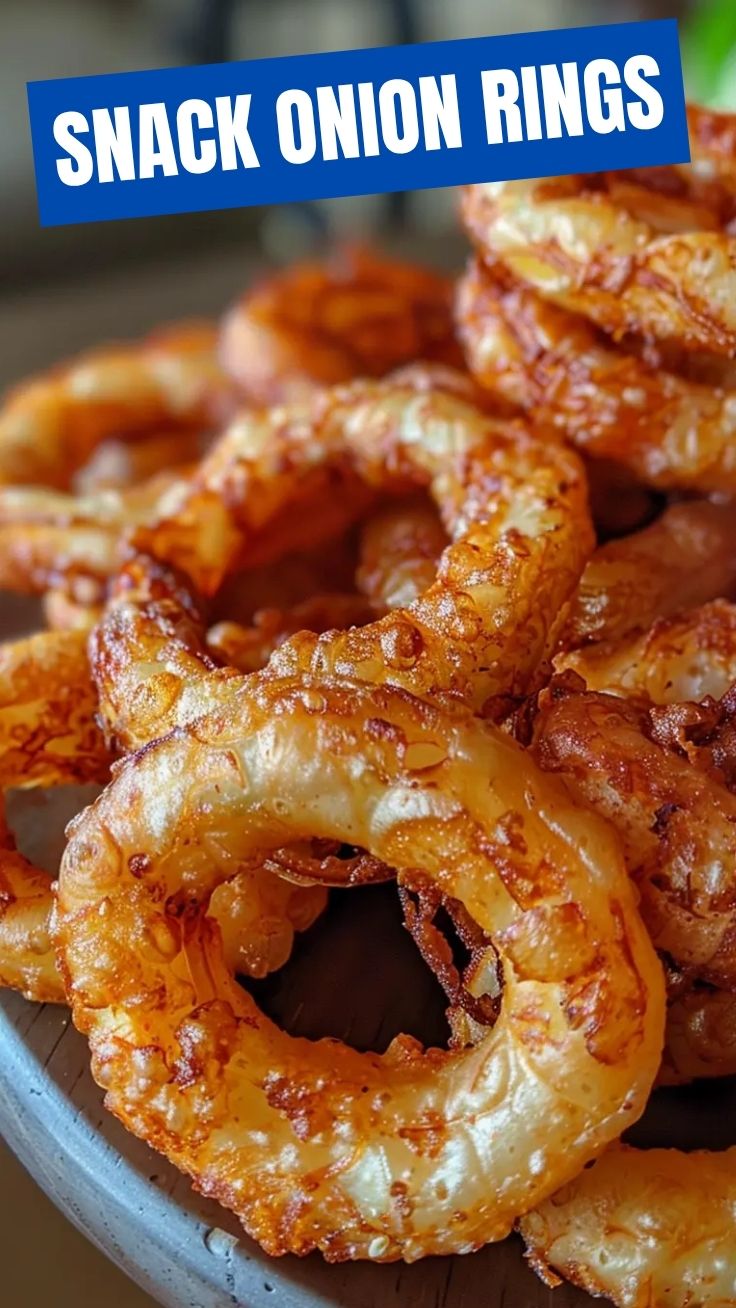
The Ultimate Guide to Perfectly Crispy Onion Rings
There’s nothing quite like the golden crunch of a well-made onion ring, but achieving that perfect texture at home often feels like a mystery. Are you tired of soggy, greasy, or bland results? Whether you’re craving the classic deep-fried version or a lighter alternative, mastering the technique is easier than you think. In this guide, we’ll walk you through everything you need to create restaurant-quality Onion Rings (Crispy) and explore the healthier, equally satisfying option of Air Fryer Onion Rings. Homemade rings let you control the seasoning, oil quality, and texture, making every bite worth the effort.
Ingredients & Kitchen Tools
For the Onion Rings (yields 4 servings):
– 2 large yellow onions – Sweet and mild; Vidalia works great. Slice into ½-inch rings.
– 1 cup all-purpose flour – Forms the base coating; substitute with gluten-free blend if needed.
– ½ cup cornstarch – Adds extra crispness; crucial for that shatter-crunch.
– 1 cup buttermilk – Tangy base for the wet batter; mix milk with 1 tbsp vinegar as a quick swap.
– 1 large egg – Binds the batter; use flax egg for vegan version.
– 1½ cups panko breadcrumbs – Light, flaky coating; regular breadcrumbs work, but panko gives superior crunch.
– 1 tsp paprika – Smoky color and mild heat.
– ½ tsp garlic powder – Enhances savory notes.
– Salt and black pepper – To taste.
– Neutral oil for frying – Canola or vegetable; about 2 inches deep in a pot. For air frying, use cooking spray.
Essential Tools: Large mixing bowls, whisk, slotted spoon, wire rack, deep-fry thermometer (optional), and an air fryer if making the lighter version.
Prep Time & Cooking Schedule
– Prep Time: 15 minutes (slicing, batter, breading)
– Resting Time: 10 minutes (chill breaded rings on a tray)
– Cook Time: 8–12 minutes (deep-fry) or 10–14 minutes (air fry)
– Total Time: ~35 minutes
Resting the breaded rings in the fridge helps the coating adhere firmly, preventing it from sliding off during cooking. For deep-frying, maintain oil at 350°F (175°C). For air frying, preheat to 375°F (190°C). Plan to serve immediately for maximum crispness.
Step-by-Step Instructions
1. Prepare the onions: Peel and slice onions into ½-inch thick rounds. Separate the rings; use only the outer 3–4 layers for even cooking. Reserve smaller inner rings for another use.
2. Set up the breading station: In one bowl, whisk flour, cornstarch, paprika, garlic powder, 1 tsp salt, and ½ tsp pepper. In a second bowl, whisk buttermilk and egg until smooth. Place panko in a third bowl.
3. Coat the rings: Dip each ring first into the dry flour mixture, shaking off excess. Then dip into the buttermilk mixture, letting excess drip. Finally, press into panko, coating evenly. Transfer to a parchment-lined tray. Repeat with all rings.
4. Chill: Refrigerate the breaded rings for 10 minutes. This step is non-negotiable for achieving truly Onion Rings (Crispy) that stay intact.
5. Cook your preferred way:
– Deep-fry: Heat 2 inches of oil to 350°F. Fry rings in batches (don’t overcrowd) for 2–3 minutes per side until deep golden. Drain on wire rack.
– Air fry: Lightly spray rings with oil. Arrange in a single layer in the air fryer basket. Cook at 375°F for 10–14 minutes, flipping halfway, until golden and crunchy. This method produces fantastic Air Fryer Onion Rings with 70% less fat.
6. Season immediately: Sprinkle with salt right after cooking. Serve with ranch, ketchup, or aioli.
Temperature tip: If the coating browns too quickly, the oil is too hot; lower it to 330°F. For air fryers, check at 10 minutes and adjust time based on your model.
Nutritional Benefits & Advantages
Onion rings are often dismissed as indulgent, but when made with whole ingredients, they offer surprising benefits. Onions are rich in quercetin, a powerful antioxidant that supports heart health and reduces inflammation. Using the air-fryer method cuts calories by roughly 40% and eliminates trans fats from reused frying oil. Pairing rings with a yogurt-based dip adds protein and probiotics. For a lighter meal, serve alongside a fresh green salad to balance the crunch.
Tips Variations & Cooking Advice
– Spicy version: Add ½ tsp cayenne pepper and 1 tsp smoked paprika to the dry mix.
– Gluten-free: Replace flour with rice flour and use gluten-free panko. The cornstarch remains a safe option.
– Dairy-free buttermilk: Mix unsweetened almond milk with 1 tbsp lemon juice; let sit 5 minutes.
– Alternative cooking: Try baking at 425°F for 15–18 minutes, flipping once. Texture will be less crisp than fried or air-fried.
– Double dredge: For extra-thick crunch, repeat the wet-dry step (dip again in buttermilk, then panko) before chilling.
Common Mistakes to Avoid
– Soggy coating: Skipping the chill step causes the breading to fall off and absorb oil. Always rest rings.
– Overcrowding: Frying too many rings at once drops oil temperature, leading to greasy results. Cook in small batches.
– Uneven slicing: Rings thicker than ½ inch cook unevenly—centers remain raw or coating burns.
– Old onions: Use fresh, firm onions. Soft spots release excess moisture, ruining the crunch.
– Skipping cornstarch: This starch is the secret weapon for a shatteringly crisp surface. Don’t omit it.
Storage & Meal Prep Tips
Leftover rings can be stored in an airtight container lined with paper towels. Refrigerate for up to 3 days. To reheat, avoid the microwave—it turns them soggy. Instead, place in a single layer on a baking sheet in a 400°F oven for 5–7 minutes, or air fry at 375°F for 3–4 minutes. For meal prep, bread the rings up to 12 hours ahead and refrigerate uncovered on a tray. Cook just before serving. Freezing is not recommended because the texture degrades significantly upon thawing.
Conclusion
Creating perfect onion rings at home is all about technique, from the double coating to temperature control. Whether you prefer the indulgent crunch of deep-fried Onion Rings (Crispy) or the lighter, guilt-free satisfaction of Air Fryer Onion Rings, this recipe delivers consistent results every time. The key takeaways: use a blend of flour and cornstarch, chill the breaded rings, and cook at the right temperature. Now it’s your turn—give this recipe a try, tag your crispy creations, and share your favorite dipping sauce in the comments below!
FAQs
1. Can I use sweet onions like Vidalia?
Absolutely. Sweet onions caramelize slightly during cooking, adding a mild, sweet flavor that pairs beautifully with the savory coating.
2. Why did my batter slide off the rings?
This usually happens when the onion slices are too moist or the flour coating wasn’t applied evenly. Pat onion rings dry with a paper towel before dredging, and make sure the first dry coat fully covers the surface.
3. Can I make these without buttermilk?
Yes. Mix 1 cup of whole milk with 1 tablespoon of white vinegar or lemon juice. Let it sit for 5 minutes to curdle—it works exactly like buttermilk.
4. How do I keep onion rings crispy if I’m making a large batch?
Place cooked rings on a wire rack set over a baking sheet in a 200°F oven. Avoid stacking them, and do not cover with foil, which traps steam and softens the coating.
5. My air fryer onion rings came out dry. What went wrong?
You may have cooked them too long or used too little oil spray. Lightly mist the breaded rings with oil and check at the 10-minute mark. Each air fryer runs slightly differently, so adjust time accordingly.

Quick way to grow 7 Onion Rings (Crispy)
Ingredients
Equipment
Method
- Slice the large onion into 1/4-inch thick rings and separate them.
- Prepare three shallow bowls: one with flour, one with whisked milk and egg, and one with bread crumbs seasoned with salt and pepper.
- Dip each onion ring first in flour, then in the milk-egg mixture, and finally coat thoroughly with bread crumbs.
- Heat vegetable oil in a deep pan or Dutch oven to 350°F (175°C).
- Carefully place a few onion rings into the hot oil, ensuring not to overcrowd the pan.
- Fry for 2-3 minutes per side, or until they are golden brown and crispy.
- Remove the fried onion rings and place them on a wire rack lined with paper towels to drain excess oil.
- Serve the crispy onion rings immediately with your favorite dipping sauce.