The Ultimate Guide to Perfectly Glazed Teriyaki Chicken at Home
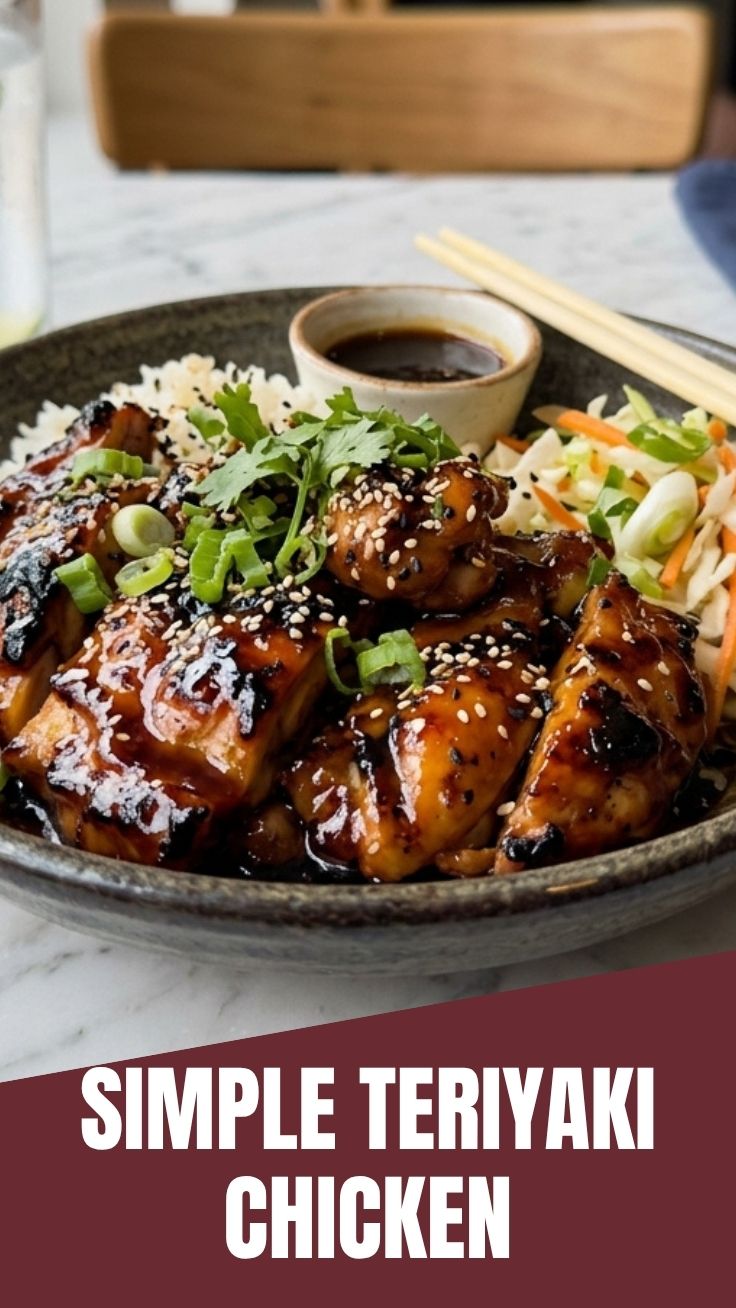
Have you ever wondered why restaurant-quality Teriyaki Chicken always has that glossy, finger-licking glaze that seems impossible to replicate at home? The secret isn’t a complicated technique—it’s understanding how to balance the sweet and savory elements of the Teriyaki Sauce while nailing the caramelization process. Preparing this iconic Japanese-inspired dish from scratch not only saves you money but also gives you complete control over sodium levels, sugar content, and ingredient quality. Whether you’re a busy parent looking for a quick weeknight dinner or a meal prep enthusiast, this recipe delivers restaurant-grade results with minimal effort.
Ingredients & Kitchen Tools
Essential Ingredients
– Boneless, skinless chicken thighs (1.5 lbs) – Thighs stay juicier than breasts; trim excess fat
– Soy sauce (½ cup) – Use low-sodium for better salt control
– Mirin (¼ cup) – Japanese sweet rice wine; substitute with ¼ cup dry sherry + 1 tbsp sugar
– Brown sugar (3 tbsp) – Light or dark works; dark adds deeper molasses notes
– Fresh garlic (3 cloves, minced) – Pre-minced jars lack pungency
– Fresh ginger (1 tbsp, grated) – Bottled ginger paste works in a pinch
– Rice vinegar (1 tbsp) – Adds acidity; apple cider vinegar is acceptable
– Cornstarch (1 tbsp + 1 tbsp water) – Creates the signature glossy Teriyaki Sauce consistency
– Sesame oil (1 tsp) – For finishing; toasted version delivers best aroma
Kitchen Tools
– Large non-stick skillet or wok – Prevents sticking and ensures even caramelization
– Microplane or ginger grater – Essential for that fine ginger paste without strings
– Small bowl – For mixing cornstarch slurry
– Tongs – For flipping chicken without piercing
– Instant-read thermometer – Guarantees safe internal temperature (165°F for chicken)
– Sharp knife + cutting board – For trimming fat and slicing
Optional Substitutions
– Gluten-free: Use tamari or coconut aminos instead of soy sauce
– Low-sugar: Replace brown sugar with monk fruit sweetener or erythritol
– Protein swap: Tofu, salmon, or beef strips work beautifully with this Teriyaki Sauce
Prep Time & Cooking Schedule
| Phase | Time | Notes |
|——-|——|——-|
| Prep time | 10 minutes | Mince garlic, grate ginger, mix sauce ingredients |
| Marinating | 15–30 minutes | Optional but recommended for deeper flavor penetration |
| Cooking | 12–15 minutes | 5–6 min per side for thighs |
| Resting | 5 minutes | Tent with foil; prevents juice loss |
| Total | ~40 minutes | Active cooking time is only 15 minutes |
Planning tip: Marinate the chicken while you prep other meal components like steamed rice (20 minutes) or stir-fried vegetables (10 minutes). If you’re meal prepping, double the Teriyaki Sauce batch—it keeps refrigerated for up to 2 weeks.
Step-by-Step Instructions
Step 1: Prepare the Teriyaki Sauce base – In a small bowl, whisk together ½ cup soy sauce, ¼ cup mirin, 3 tbsp brown sugar, minced garlic, grated ginger, and 1 tbsp rice vinegar. This forms the flavor foundation.
Step 2: Sear the chicken – Pat chicken thighs completely dry with paper towels (moisture prevents browning). Heat 1 tbsp vegetable oil in your skillet over medium-high heat (375°F surface temperature). Place thighs skin-side down if using skin-on; otherwise, present the smooth side first. Cook undisturbed for 5–6 minutes until deep golden brown. Flip and cook another 4 minutes. Internal temperature should reach 160°F (it will rise to 165°F during resting).
Step 3: Create the glaze – Reduce heat to medium-low. Pour the prepared sauce mixture into the skillet around (not over) the chicken to avoid washing off the seared crust. Simmer gently for 2 minutes, occasionally spooning sauce over the chicken.
Step 4: Thicken the sauce – Push chicken to one side. Whisk cornstarch slurry (1 tbsp cornstarch + 1 tbsp water) into the simmering liquid. Stir continuously for 45–60 seconds until the Teriyaki Sauce transforms from watery to a glossy, syrupy consistency that coats the back of a spoon. This Teriyaki Chicken achieves its signature shine through proper starch hydration and controlled heat.
Step 5: Finish and rest – Toss chicken in the thickened sauce, drizzle with sesame oil, and sprinkle sesame seeds. Transfer to a cutting board, tent with foil, and rest 5 minutes before slicing against the grain into ½-inch strips. The Teriyaki Sauce should cling to each slice like a glaze, not pool underneath.
Temperature control tip: If sauce thickens too quickly, add 1–2 tbsp water. If it remains thin, increase heat to medium and cook 30 more seconds while stirring.
Nutritional Benefits & Advantages
| Nutrient | Per Serving (4 oz) |
|———-|——————-|
| Calories | ~285 |
| Protein | 28g |
| Fat | 12g (30% from healthy unsaturated) |
| Carbohydrates | 14g |
| Sugar | 10g (naturally occurring + added) |
| Sodium | 680mg (30% DV) |
Key advantages: Chicken thighs provide high-quality complete protein (containing all essential amino acids) plus selenium (immune support) and phosphorus (bone health). Ginger used in the Teriyaki Sauce contains gingerol—a potent anti-inflammatory compound shown to reduce muscle soreness post-exercise. By making this dish at home, you control sodium levels: restaurant versions often contain 1,200–1,800mg per serving.
Tips Variations & Cooking Advice
Flavor variations:
– Spicy Teriyaki: Add 1 tbsp sriracha + ½ tsp red pepper flakes to the sauce
– Pineapple Teriyaki: Replace mirin with 3 tbsp pineapple juice + 1 tbsp brown sugar
– Garlic-Sesame: Double garlic and add 1 tsp black sesame seeds
Cooking method alternatives:
– Oven-baked: Sear chicken in oven-safe skillet; add sauce and bake at 400°F for 15 minutes
– Grilled: Marinate 1 hour; grill 6–7 min per side; brush with separate sauce batch
– Slow cooker: Place raw chicken + sauce in crockpot; cook LOW 4 hours; thicken with slurry on stovetop
Dietary adaptations:
– Gluten-free: Use tamari or coconut aminos; verify mirin is gluten-free (Eden brand is safe)
– Dairy-free: Already dairy-free; no modifications needed
– Keto: Use 2 tbsp allulose + 1 tbsp monk fruit instead of brown sugar; replace mirin with ¼ cup sake + ½ tsp vinegar
Common Mistakes to Avoid
Mistake #1: Skipping the drying step – Wet chicken creates steam, preventing the Maillard reaction (browning). Solution: Pat thighs with paper towels 2–3 times before searing.
Mistake #2: Overcrowding the pan – Too many pieces drops pan temperature, causing chicken to stew rather than sear. Solution: Cook in batches if needed (leave 1-inch space between pieces).
Mistake #3: Adding sauce too early – Pouring sauce while chicken is still raw dilutes flavors and prevents caramelization. Solution: Sear chicken fully first (step 2), then add sauce (step 3).
Mistake #4: Over-thickening sauce – Cornstarch slurry continues thickening as it cools. Solution: Remove from heat when sauce coats a spoon but still flows slightly—it will set further off-heat.
Mistake #5: Skipping resting time – Slicing immediately causes all juices to run out, leaving dry meat. Solution: Rest 5 minutes exactly; use this time to steam rice or microwave vegetables.
Storage & Meal Prep Tips
Refrigeration:
– Store sliced chicken + sauce in an airtight container
– Keeps 4 days max (freshness declines after day 3)
– Separate rice and vegetables to prevent sogginess
Freezing:
– Cool completely; place in freezer-safe bags with all sauce (glaze protects moisture)
– Thaws best overnight in refrigerator
– Freezes up to 3 months (label with date)
Reheating:
– Skillet (best): Medium heat, add 1 tbsp water, cover, 3–4 minutes. Baste with accumulated sauce. The Teriyaki Sauce re-emulsifies beautifully.
– Microwave: 70% power, 90-second intervals, stirring between. Add a damp paper towel to prevent drying.
– Avoid high heat—it toughens the chicken and breaks the sauce emulsion.
Meal prep strategy: Cook double batches on Sunday; portion into containers with steamed broccoli and jasmine rice for grab-and-go lunches.
Conclusion
Perfecting Teriyaki Chicken at home transforms an ordinary weeknight dinner into a satisfying culinary experience—one where you control every ingredient, flavor dimension, and texture. The magic lies in balancing that sweet-savory Teriyaki Sauce with proper searing technique, creating glossy, caramelized edges that rival any takeout. Whether you’re meal prepping for a busy week or impressing dinner guests, this recipe delivers consistent, crave-worthy results. Try this recipe tonight, snap a photo of your glossy creation, and share your results in the comments below—or check out our stir-fry and sushi bowl guides for more Japanese-inspired dinners!
FAQs
Q1: Can I use chicken breast instead of thighs?
Yes, but halve the cooking time and use an instant-read thermometer. Sear 3–4 minutes per side at high heat (400°F), then reduce heat to medium and cook 2–3 additional minutes. Thinly slice against the grain to prevent chewiness.
Q2: Why is my Teriyaki Sauce grainy instead of smooth?
Graininess occurs when cornstarch is added directly to hot liquid without first creating a slurry (cornstarch + cold water). Always whisk the slurry in a separate bowl before adding to the pan. Additionally, ensure your brown sugar is fully dissolved before thickening.
Q3: How do I fix sauce that’s too salty?
Add 1 tbsp rice vinegar + 1 tsp sugar to balance saltiness. For severe cases, remove chicken, add ¼ cup unsalted chicken broth to dilute the sauce, then reduce it until thickened again. Avoid adding more water as it breaks the emulsification.
Q4: Can I make this recipe without mirin?
Absolutely. Mix ¼ cup dry sherry (or sake) with 1 tbsp sugar as a direct substitute. Alternatively, use ¼ cup apple juice + 1 tsp rice vinegar for a non-alcoholic version. The flavor profile changes slightly but remains delicious.
Q5: My chicken skin never got crispy—what went wrong?
Three culprits: (1) pan wasn’t hot enough (use medium-high, not medium), (2) chicken wasn’t dry (pat with paper towels 2x), or (3) you moved the chicken too early (let it sear 5–6 minutes without touching—skin releases naturally when ready).
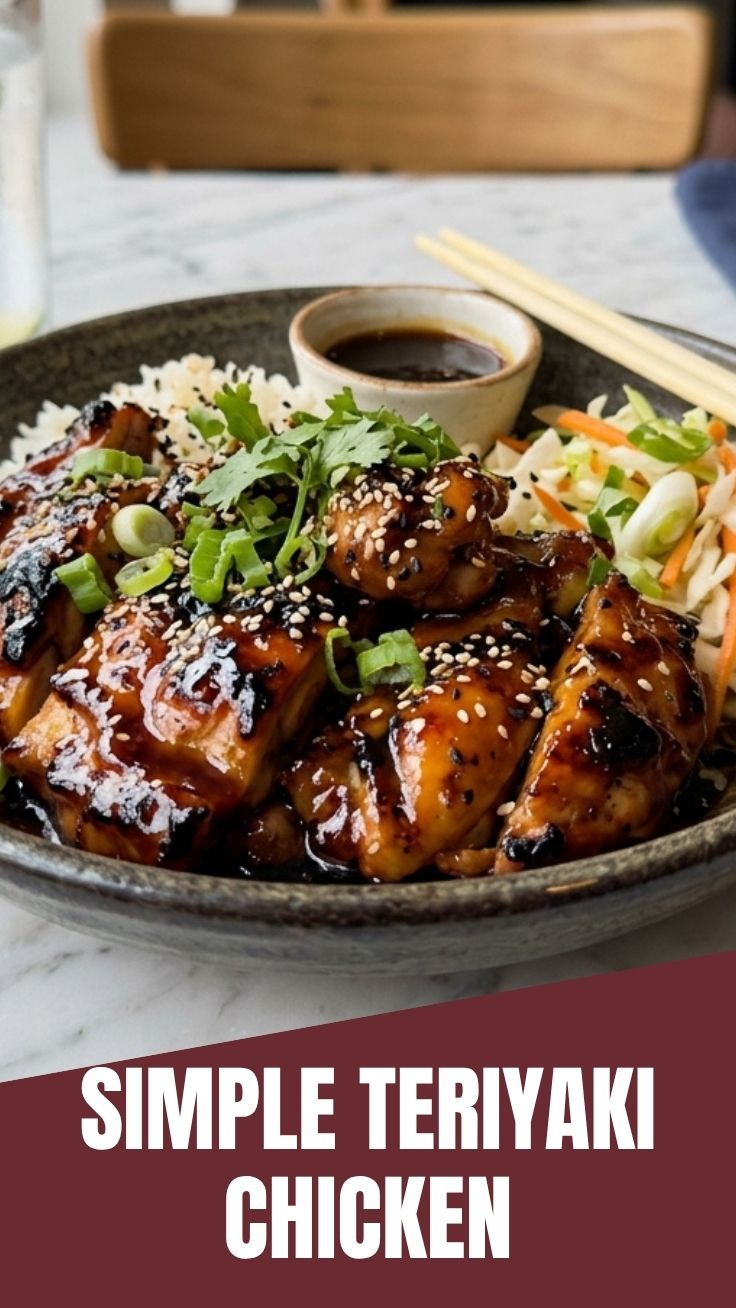
Quick way to grow 4 Teriyaki Chicken recipes
Ingredients
Equipment
Method
- Whisk together soy sauce, mirin, sake, sugar, grated ginger, and minced garlic in a bowl to create the teriyaki sauce.
- Cut chicken thighs into 1-inch pieces and marinate them in half of the teriyaki sauce for at least 10 minutes.
- Heat oil in a large skillet over medium-high heat, then add the chicken and cook for 5-7 minutes until browned.
- Pour in the remaining teriyaki sauce and simmer for another 5-7 minutes, stirring occasionally, until the sauce thickens and coats the chicken.
- Serve the classic teriyaki chicken over steamed rice and garnish with sesame seeds and chopped green onions.
- For a spicy variation, add a teaspoon of sriracha or red pepper flakes to the sauce.
- To make it citrusy, squeeze in a tablespoon of orange or lime juice at the end of cooking.
- For a sweet and savory option, add a tablespoon of honey or maple syrup to the sauce while simmering.