Why This Honey Garlic Shrimp Will Become Your Go-to Weeknight Dinner
Have you ever craved a restaurant-quality meal that comes together in under 15 minutes? That’s exactly what this Honey Garlic Shrimp delivers. Juicy, succulent shrimp coated in a glossy, sticky glaze that balances sweetness and savory depth—it’s the kind of dish that feels like a cheat code for busy home cooks. Preparing it at home not only saves you money but also gives you full control over ingredient quality and seasoning. In this guide, you’ll learn how to master a honey garlic shrimp recipe that’s foolproof, flexible, and packed with flavor. Let’s dive in.
Ingredients & Kitchen Tools
For the Shrimp
– 1 lb large shrimp (peeled and deveined) – Use fresh or thawed frozen; keep tails on for presentation or off for easy eating.
– 3 tbsp honey – Raw or organic works best; maple syrup or agave are fine substitutes.
– 4 cloves garlic (minced) – Fresh is non-negotiable for that punch; jarred minced garlic can be used in a pinch.
– 2 tbsp soy sauce – Low-sodium preferred; tamari or coconut aminos for gluten-free.
– 1 tbsp rice vinegar – Balances sweetness; apple cider vinegar works too.
– 1 tsp sesame oil – Adds nutty depth; omit if unavailable.
– 1 tbsp butter – For finishing richness; use ghee or vegan butter for dairy-free.
– 2 green onions (sliced) – Garnish; optional but recommended.
– Sesame seeds – Optional garnish.
Kitchen Tools
– Large skillet or non-stick pan (12-inch)
– Mixing bowl
– Whisk or fork
– Spatula or tongs
– Measuring spoons
– Paper towels (for patting shrimp dry)
Prep Time & Cooking Schedule

– Prep time: 10 minutes (mince garlic, whisk sauce, pat shrimp dry)
– Cook time: 6–8 minutes total
– Resting time: 2 minutes (let glaze set after cooking)
– Total time: ~20 minutes
This dish is designed for speed. Plan to have your rice or noodles ready before you start cooking; the shrimp come together faster than takeout delivery.
Step-by-Step Instructions
1. Prepare the glaze. In a small bowl, whisk together honey, soy sauce, rice vinegar, and sesame oil. Set aside.
2. Season the shrimp. Pat shrimp completely dry with paper towels. Lightly season with salt and pepper. Dry shrimp = better sear.
3. Sear the shrimp. Heat 1 tbsp oil in a large skillet over medium-high heat until shimmering. Add shrimp in a single layer (cook in batches if needed). Sear 1–2 minutes per side until pink and lightly charred. Remove shrimp to a plate.
4. Cook the garlic. Reduce heat to medium. Add a splash of oil and the minced garlic. Cook 30 seconds until fragrant, stirring constantly—don’t let it burn.
5. Combine and glaze. Pour the honey mixture into the skillet. Let it bubble for 1–2 minutes until slightly thickened. Return shrimp to the pan, add butter, and toss to coat. Cook another 30–45 seconds until the sauce clings. Remove from heat immediately.
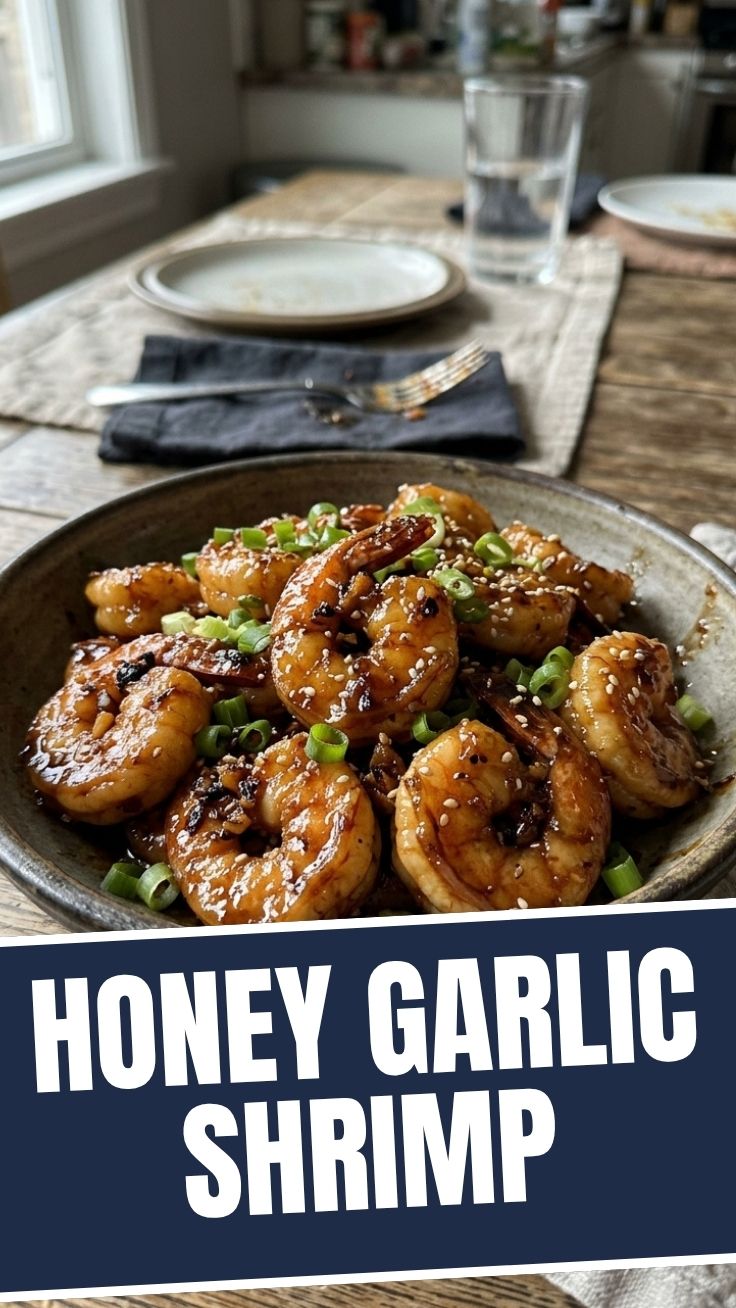
6. Garnish and serve. Sprinkle with green onions and sesame seeds. Serve over rice, noodles, or steamed veggies.
Pro tip: To achieve that restaurant-level shine, avoid overcooking the shrimp. They’re done when they curl into a loose “C” shape. This particular Honey Garlic Shrimp method ensures every bite is juicy. For a twist on presentation, try the honey garlic shrimp recipe as a bowl with rice, avocado, and cucumber for a complete meal.
Nutritional Benefits & Advantages
Shrimp is an excellent source of lean protein, providing about 20 grams per 3-ounce serving with only 84 calories. It’s also rich in selenium, vitamin B12, and omega-3 fatty acids. Honey offers natural antioxidants and antimicrobial properties, while garlic supports immune function and heart health. This dish is naturally low in carbs (if served without rice) and can be adapted for keto by reducing honey slightly and using a sugar substitute. The quick cooking method preserves nutrients and avoids heavy oils.
Tips Variations & Cooking Advice
– Spicy version: Add 1/2 tsp red pepper flakes or sriracha to the glaze.
– Citrus twist: Replace rice vinegar with fresh lime juice and add lime zest.
– Low-sodium: Use low-sodium soy sauce and reduce salt.
– Dairy-free: Replace butter with coconut oil or an extra tablespoon of olive oil.
– Air fryer method: Toss shrimp with 1 tbsp oil and 1 tbsp glaze, air fry at 400°F for 5 minutes, then toss with remaining glaze.
– Meal prep-friendly: Double the recipe and freeze cooked shrimp in sauce for up to 2 months.
Common Mistakes to Avoid
– Overcrowding the pan. This lowers the temperature and steams the shrimp instead of searing. Cook in batches.
– Skipping the drying step. Wet shrimp produce steam, not a sear. Pat them thoroughly.
– Burning the garlic. Garlic cooks fast; add it only after removing the shrimp and lower the heat.
– Overcooking the shrimp. Shrimp go from tender to rubbery in seconds. Remove when just opaque.
– Adding butter too early. Butter should go in at the very end to emulsify the sauce, not to cook the shrimp.
Storage & Meal Prep Tips
– Refrigeration: Store cooked shrimp in an airtight container in the fridge for up to 3 days.
– Freezing: Let cool completely, then transfer to a freezer-safe bag. Squeeze out air and freeze for up to 2 months. Thaw overnight in the fridge.
– Reheating: Reheat gently in a skillet over medium-low heat with a splash of water or chicken broth to loosen the glaze. Microwave in 30-second bursts at 50% power to avoid rubbery texture.
– Meal prep: Cook shrimp, portion into containers with pre-cooked rice and steamed broccoli, and refrigerate. Reheat next day for lunch.
Conclusion
If you’re looking for a crowd-pleasing dish that’s fast, flavorful, and forgiving, this Honey Garlic Shrimp delivers every time. The sweet-savory balance satisfies without feeling heavy, and the technique is simple enough for a Tuesday night yet impressive enough for guests. Whether you serve it as a main or use the honey garlic shrimp recipe to build bowls, you’ll appreciate how easily it comes together. Give it a try, share your results with friends, and don’t forget to explore other quick seafood recipes on this blog. Happy cooking!
FAQs
1. Can I use frozen shrimp without thawing first?
Yes, but increase cooking time by 1–2 minutes per side and pat dry after thawing. For best texture, thaw in cold water for 10 minutes first.
2. What if my sauce is too thin?
Let it simmer an extra 30–45 seconds before adding shrimp. If still thin, stir in 1/2 tsp cornstarch mixed with 1 tbsp water.
3. Can I make this with chicken or tofu?
Absolutely. For chicken, use boneless thighs cut into bite-sized pieces; cook 5–7 minutes. For tofu, press and cube extra-firm, then pan-fry until golden before adding sauce.
4. How do I prevent the shrimp from being salty?
Use low-sodium soy sauce and taste before adding extra salt. The soy sauce and honey provide enough flavor.
5. Is this recipe gluten-free?
It can be. Use tamari or coconut aminos instead of soy sauce, and ensure your rice vinegar is gluten-free (most are). Serve with rice or quinoa.
Quick way to grow honey garlic shrimp 5 ways
Ingredients
Equipment
Method
- In a medium bowl, whisk together the honey, minced garlic, soy sauce, olive oil, and red pepper flakes if using.
- Add the peeled and deveined shrimp to the honey garlic mixture, ensuring they are well coated. Marinate for at least 10-15 minutes at room temperature, or up to 30 minutes in the refrigerator.
- Heat a large skillet over medium-high heat. Once hot, add the marinated shrimp in a single layer.
- Cook for 1-2 minutes per side, until the shrimp turn pink and opaque and are cooked through. Do not overcrowd the pan; cook in batches if necessary.
- **Lemon-Garlic Shrimp:** After cooking, stir in 1 tablespoon of fresh lemon juice.
- **Sesame-Ginger Shrimp:** Add 1 teaspoon of sesame oil and 1 teaspoon of grated fresh ginger to the marinade. Garnish with sesame seeds.
- **Spicy-Lime Shrimp:** Add 1 tablespoon of lime juice and 2 tablespoons of chopped fresh cilantro after cooking.
- **Buttery-Herb Shrimp:** Sauté the shrimp with 1 tablespoon of butter in addition to the olive oil. Stir in 2 tablespoons of chopped fresh parsley at the end.
- **Tropical Honey Garlic Shrimp:** Add 2 tablespoons of pineapple juice and 1 tablespoon of coconut flakes to the marinade.