The Ultimate No Bake Cheesecake: A Creamy Dream You Can Make Without Turning on the Oven
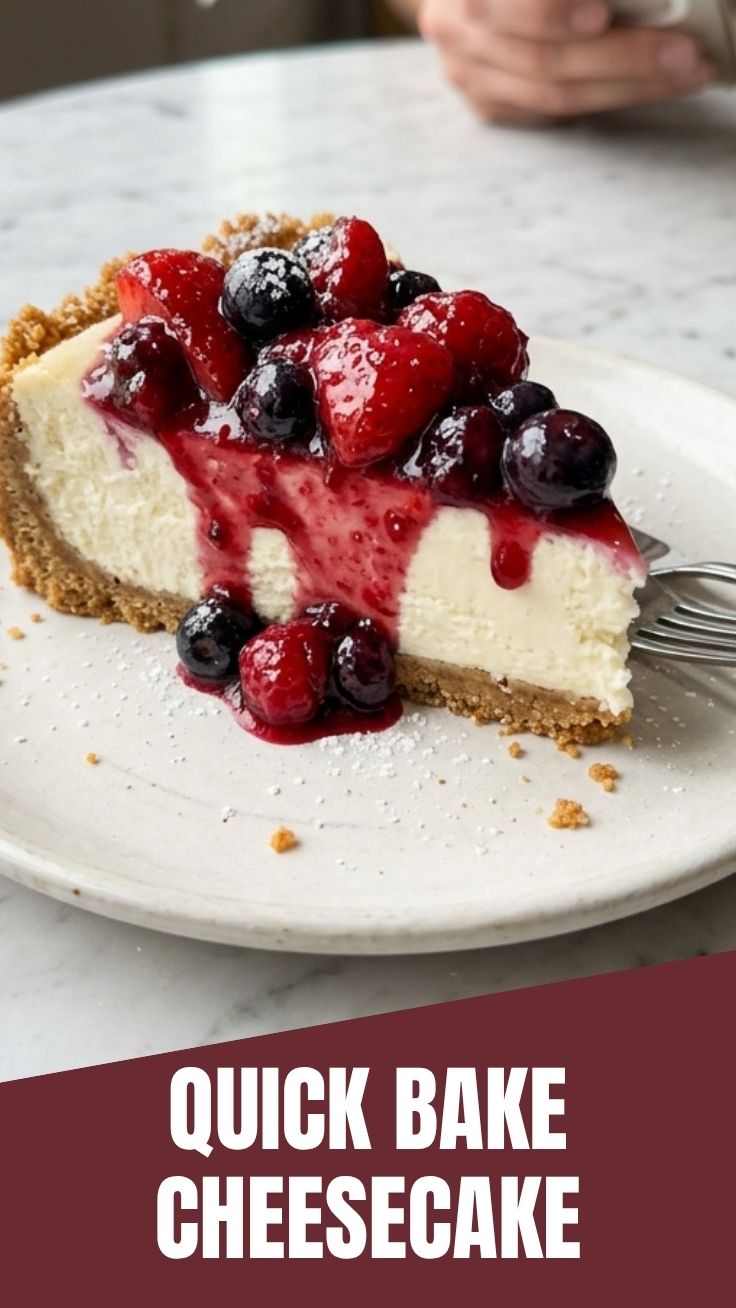
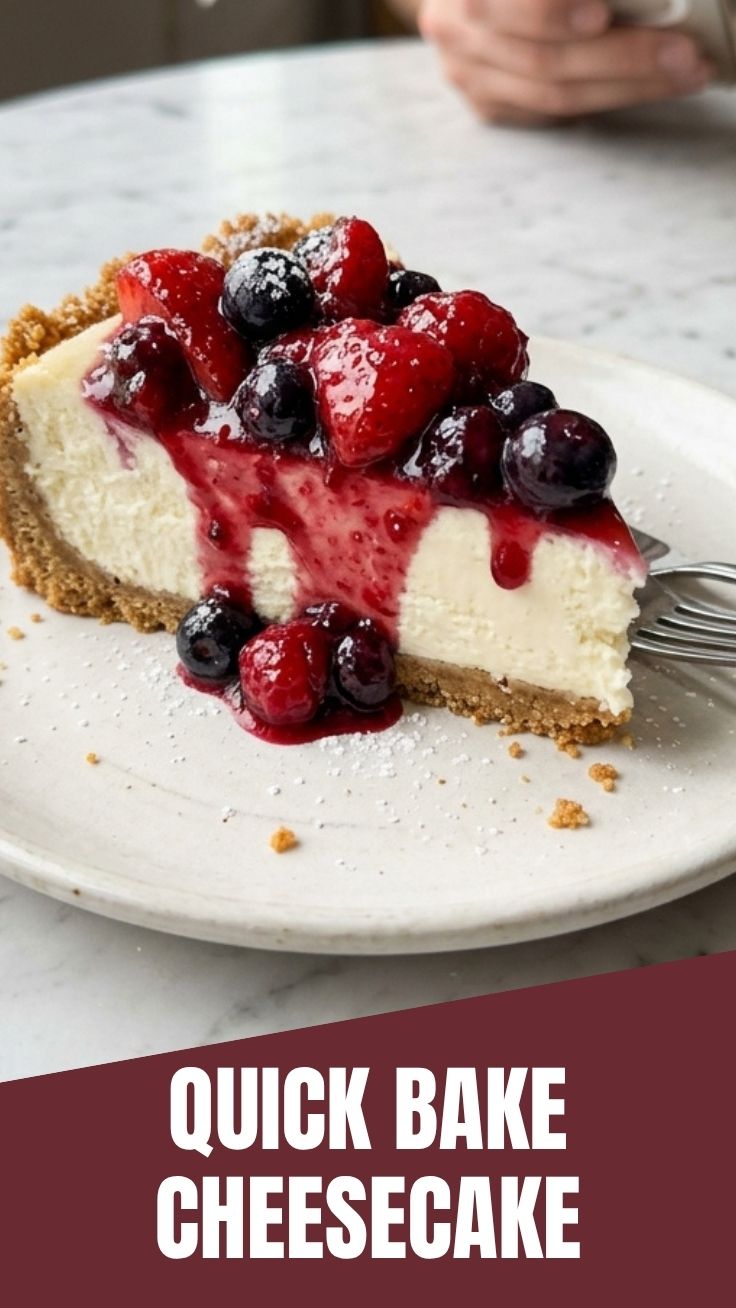
Have you ever craved a silky, decadent cheesecake but felt intimidated by the water baths, cracked tops, and precise oven temperatures? You’re not alone. That’s exactly why we’re diving into the world of the No Bake Cheesecake today. Preparing this dessert at home isn’t just about saving time; it’s about gaining complete control over the ingredients, ensuring a fresher, creamier result that rivals any bakery. By mastering this Easy Cheesecake technique, you unlock a dessert that requires zero oven time but delivers 100% flavor—perfect for summer gatherings, busy weeknights, or when you simply want a foolproof treat.
This guide will walk you through every detail, from the exact ingredients you need to the common pitfalls that can turn a perfect cheesecake into a soupy mess. Let’s get started on your new favorite dessert.
—
Ingredients & Kitchen Tools
Essential Ingredients
– 2 cups (200g) graham cracker crumbs – The classic buttery base. Substitute with digestive biscuits or crushed shortbread.
– 1/2 cup (115g) unsalted butter, melted – Binds the crust. Use a dairy-free butter alternative if needed.
– 2 tablespoons granulated sugar – Adds a touch of sweetness to the crust. Optional.
– 16 oz (450g) full-fat cream cheese, softened – The heart of the filling. Full-fat is crucial for texture; reduced-fat can result in a thinner set.
– 1 cup (240ml) heavy whipping cream (36%+ fat) – Whipped to stiff peaks, this provides the airy, mousse-like texture.
– 1/2 cup (100g) granulated sugar – Sweetens the filling.
– 1 teaspoon vanilla extract – Enhances flavor. Use vanilla bean paste for specks.
– 1 tablespoon fresh lemon juice – Adds acidity to cut through the richness and helps the filling set.
– Pinch of salt – Balances sweetness.
Kitchen Tools
– 9-inch springform pan
– Microwave-safe bowl or small saucepan
– Electric hand mixer or stand mixer with whisk attachment
– Rubber spatula
– Mixing bowls (large and medium)
– Measuring cups and spoons
– Plastic wrap or foil
Optional Substitutions
– Gluten-free: Use certified gluten-free graham crackers or almond flour crust.
– Dairy-free: Use vegan cream cheese (like Kite Hill) and coconut cream (chilled, solid part only). The texture will be slightly softer.
—
Prep Time & Cooking Schedule
Total Active Time: 20–25 minutes
Chilling Time: Minimum 6 hours (overnight is best for a firm, sliceable result)
Total Time: 6 hours 20 minutes to 8 hours
Why the long chill? Unlike baked cheesecakes that rely on eggs and heat to set, a No Bake Cheesecake uses cold, fat, and aeration to stabilize. The cream cheese needs time to re-firm after being softened, and the whipped cream must fully coalesce with the cheese. Rushing this step leads to a soft, spoonable dessert rather than a sliceable cheesecake. Plan ahead: make it the night before you plan to serve.
—
Step-by-Step Instructions
Step 1: Prepare the Crust
In a medium bowl, combine graham cracker crumbs, 2 tablespoons sugar, and melted butter. Stir until the mixture resembles wet sand and holds together when pinched. Press firmly into the bottom of a 9-inch springform pan. Use the bottom of a measuring cup to create an even, compact layer. Place in the refrigerator while you make the filling.
Step 2: Whip the Cream
In a large, chilled bowl, add the heavy cream and 1/4 cup (50g) of the sugar. Using an electric mixer on medium-high speed, whip to stiff peaks. Be careful not to over-whip, which can turn the cream into butter. Set aside.
Step 3: Beat the Cream Cheese
In a separate large bowl, beat the softened cream cheese, remaining 1/4 cup sugar, vanilla extract, lemon juice, and salt on medium speed until smooth and completely lump-free—about 2-3 minutes. Scrape the bottom and sides of the bowl with a spatula.
Step 4: Fold the Two Together
Take about 1/3 of the whipped cream and gently fold it into the cream cheese mixture using a rubber spatula. This “lightens” the cream cheese, making it easier to incorporate the rest. Once combined, fold in the remaining whipped cream in two additions. Fold gently until no white streaks remain. Overmixing can deflate the air and cause the filling to become dense.
Pro Tip: The final mixture should be thick, glossy, and voluminous. If it looks runny, your cream cheese wasn’t cold enough, or your whipped cream was under-whipped. This is the critical texture cue for a successful Easy Cheesecake.
Step 5: Assemble and Chill
Pour the filling onto the chilled crust. Smooth the top with an offset spatula. Cover the pan with plastic wrap and refrigerate for at least 6 hours, but preferably overnight. For clean slices, chill for 8+ hours.
—
Nutritional Benefits & Advantages
This No Bake Cheesecake offers several dietary advantages over its baked counterpart:
– No heat damage to dairy: High temperatures can degrade the beneficial fats and proteins in cream cheese and heavy cream. This cold-set method preserves the integrity of the dairy, making it easier to digest for some.
– Calcium-rich: A standard slice provides about 8-10% of your daily calcium intake from the cream cheese and heavy cream.
– Lower glycemic impact: By using fresh lemon juice and vanilla to balance sweetness, you can reduce the sugar by up to 25% without losing flavor.
– Portion control: Because it’s rich and creamy, one slice is genuinely satisfying, helping prevent over-snacking.
—
Tips Variations & Cooking Advice
Flavor Variations
– Chocolate: Add 4 oz melted dark chocolate to the cream cheese mixture before folding in the cream.
– Strawberry: Swirl 1/2 cup pureed strawberries into the filling just before chilling.
– Lemon: Increase lemon juice to 2 tablespoons and add 1 tablespoon lemon zest.
Cooking Advice
– Temperature is everything: Ensure the cream cheese is at room temperature (65-70°F) before mixing, but the heavy cream must be ice-cold. Chill your bowl and beaters for 10 minutes before whipping cream.
– No springform pan? Use a 9×9-inch glass dish and serve it as a “cheesecake bar.”
– Dairy-free adaptation: Chill a can of full-fat coconut milk overnight. Scoop out the solid cream and whip it. Use chilled coconut cream instead of dairy cream. The texture will be slightly softer but delicious.
—
Common Mistakes to Avoid
| Mistake | Why It Happens | Solution |
| :— | :— | :— |
| Soggy crust | Wet crumbs not pressed firmly; filling too warm. | Press crust firmly with a glass. Chill crust for 30 minutes before adding filling. |
| Filling won’t set | Cream cheese too warm; cream not whipped enough. | Use room-temperature cream cheese but cold cream. Whip cream to stiff peaks. |
| Grainy texture | Cream cheese not fully softened or beaten. | Beat cream cheese until perfectly smooth. Let it sit out for 30 minutes. |
| Cracks on top | Overmixing after folding; too much air trapped. | Fold gently. Tap the pan on the counter to release large air bubbles. |
| Lumpy filling | Cold cream cheese beaten with wet ingredients. | Always soften cream cheese first. Microwave for 10-15 seconds if needed. |
—
Storage & Meal Prep Tips
Storage
– Refrigeration: Cover the cheesecake tightly with plastic wrap or store in an airtight container. It will stay fresh for 4-5 days.
– Freezing: This cheesecake freezes beautifully! Freeze the whole cheesecake (or individual slices) on a baking sheet for 2 hours, then wrap tightly in plastic wrap and foil. Freeze for up to 2 months.
Reheating & Serving
– From fridge: Serve straight from the fridge for the firmest texture. Let it sit at room temperature for 10 minutes for a creamier mouthfeel.
– From freezer: Thaw in the refrigerator overnight. Do not microwave, as this will ruin the texture.
Meal Prep
Make the crust and filling up to 24 hours in advance. Assemble and chill overnight. This is an ideal make-ahead dessert for holidays or dinner parties.
—
Conclusion
Creating a stunning, restaurant-quality dessert at home doesn’t require a culinary degree or a hot oven. This No Bake Cheesecake proves that with the right technique—properly whipped cream, softened cream cheese, and enough chill time—you can produce a silky, sliceable masterpiece every time. It’s the ultimate Easy Cheesecake for anyone who wants to impress without the stress. The key takeaways: use full-fat dairy, don’t rush the chill, and fold gently to preserve the airy texture.
Now, I’d love to see your results! Try this recipe, snap a photo, and share it in the comments below or tag us on social media. Don’t forget to check out our related recipes if you love no-bake desserts. Happy cooking!
—
FAQs
1. Can I use low-fat cream cheese?
Technically, yes, but the texture will be significantly softer and may not hold a clean slice. Full-fat cream cheese provides the necessary structure. If you must use low-fat, reduce the heavy cream by 1/4 cup.
2. My cheesecake is still soft after 6 hours. What do I do?
Don’t panic. Refrigerate it for another 2-4 hours. If it’s still too soft, you may have under-whipped the cream. To salvage, spoon it into serving cups as a cheesecake mousse and serve with a spoon.
3. Can I use a springform pan, or is a regular pie dish fine?
A springform pan is ideal for clean, tall slices. A pie dish or tart pan works perfectly too, but you’ll have shorter, thicker slices. Adjust serving sizes accordingly.
4. How do I get perfect, clean slices?
Use a long, sharp knife. Run it under hot water, wipe it dry, and slice. Clean the knife between each cut. For the cleanest results, freeze the cheesecake for 30 minutes before slicing.
5. Can I add fruit to the filling directly?
Yes, but avoid watery fruits that release juice (like fresh berries). Instead, fold in freeze-dried fruit powder or swirl in a thick fruit compote that has been reduced on the stove.
No Bake Cheesecake
Ingredients
Equipment
Method
- Combine graham cracker crumbs and melted butter, then press the mixture into the bottom of a 9-inch pie plate.
- In a large bowl, beat softened cream cheese and granulated sugar until smooth and creamy.
- In a separate bowl, whip heavy cream until stiff peaks form, then gently fold the whipped cream into the cream cheese mixture.
- Pour the cream cheese filling over the crust and spread evenly.
- Refrigerate for at least 4 hours, or until firm, before serving.