The Ultimate Guide to Perfecting Your Homemade Apple Pie: A Step-by-Step Baking Masterclass
Have you ever wondered why store-bought pies never quite capture that nostalgic, heartwarming flavor of grandma’s kitchen? The secret lies not in complexity, but in understanding the science behind Baking a truly exceptional apple pie. Preparing this classic dessert at home isn’t just about following a recipe—it’s about creating memories, controlling quality, and mastering a skill that impresses every time. Whether you’re a novice or a seasoned home cook, this data-driven guide will transform your approach to apple pie and elevate your Baking game to professional levels.
Ingredients & Kitchen Tools
Essential Ingredients
– 6-7 medium Granny Smith apples (tart, firm, hold shape well during baking)
– 2 cups all-purpose flour (for a tender, flaky crust)
– 1 cup unsalted butter, cold and cubed (creates steam pockets for flakiness)
– ¾ cup granulated sugar (balances apple tartness)
– ¼ cup brown sugar (adds depth and moisture)
– 2 tablespoons lemon juice (prevents browning and brightens flavor)
– 1 teaspoon cinnamon (classic warming spice)
– ½ teaspoon nutmeg (earthy undertone)
– ¼ teaspoon salt (enhances sweetness)
– 1 egg + 1 tablespoon water (for egg wash, golden crust)
Kitchen Tools
– 9-inch pie dish (glass or ceramic for even heat distribution)
– Rolling pin (marble or wooden preferred)
– Pastry cutter or food processor (for butter incorporation)
– Sharp chef’s knife and cutting board
– Mixing bowls (stainless steel or glass)
– Pastry brush (for egg wash application)
– Cooling rack (prevents soggy bottom)
Optional Substitutions
– Gluten-free: Use 1:1 gluten-free flour blend with xanthan gum
– Dairy-free: Substitute butter with cold coconut oil or vegan butter sticks
– Sugar-free: Replace with erythritol or monk fruit sweetener (adjust liquid slightly)
Prep Time & Cooking Schedule
Total Time: 3 hours 15 minutes (includes resting)
– Prep Time: 45 minutes (peeling, slicing, making dough)
– Chill Time: 1 hour (dough resting in refrigerator)
– Bake Time: 50-60 minutes (until golden and bubbling)
– Cool Time: 30 minutes (essential for set filling)
Pro Tip: Start your dough first—the resting period allows gluten to relax, ensuring a tender crust. Plan your baking so the pie finishes at least 2 hours before serving for optimal texture.
Step-by-Step Instructions
1. Prepare the Pie Dough
In a large bowl, whisk together 2 cups flour and ¼ teaspoon salt. Add 1 cup cold cubed butter. Using a pastry cutter or your fingertips, work the butter into the flour until pea-sized crumbs form. Drizzle 6-8 tablespoons ice water, one at a time, mixing until dough just holds together. Divide in half, flatten into discs, wrap in plastic, and refrigerate for 1 hour.
2. Make the Apple Filling
Peel, core, and slice apples into ¼-inch thick pieces (uniform thickness ensures even cooking). In a large bowl, toss apples with lemon juice, ¾ cup granulated sugar, ¼ cup brown sugar, 1 teaspoon cinnamon, ½ teaspoon nutmeg, and 2 tablespoons flour. Let sit for 15 minutes—this draws out moisture and concentrates flavor.
3. Assemble the Pie
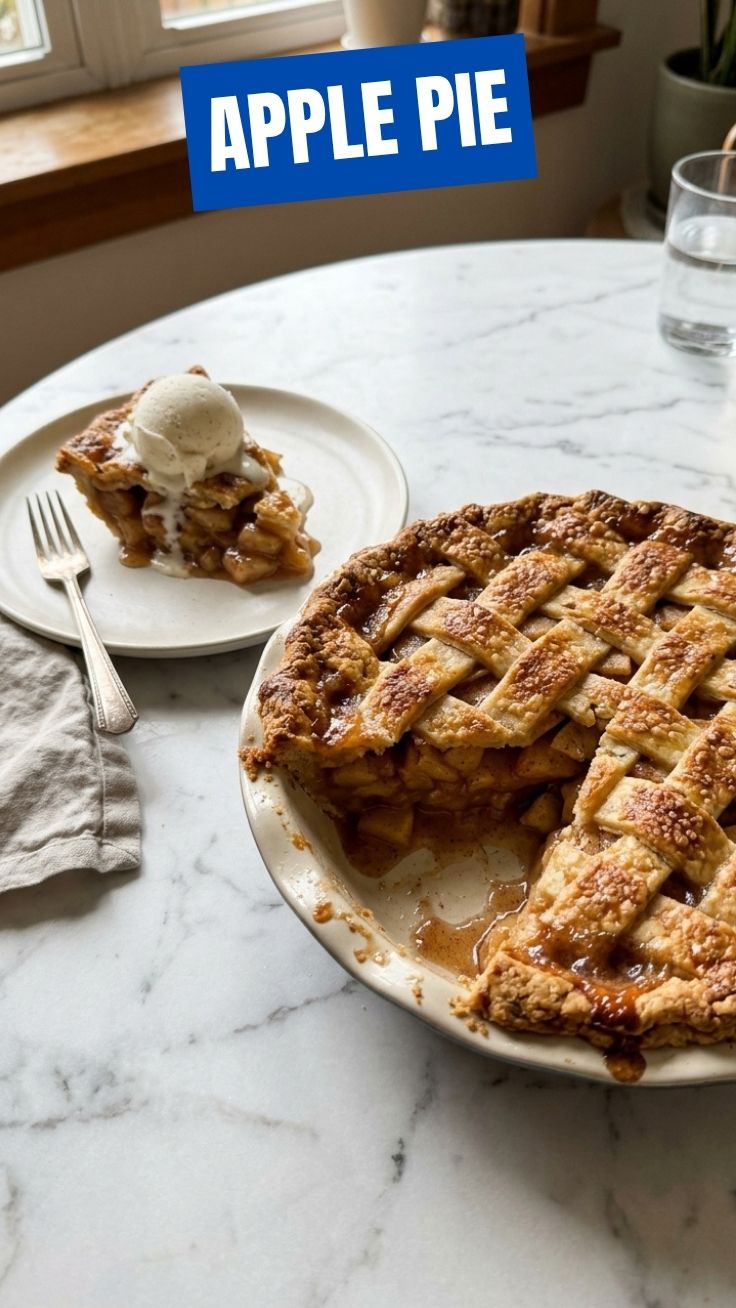
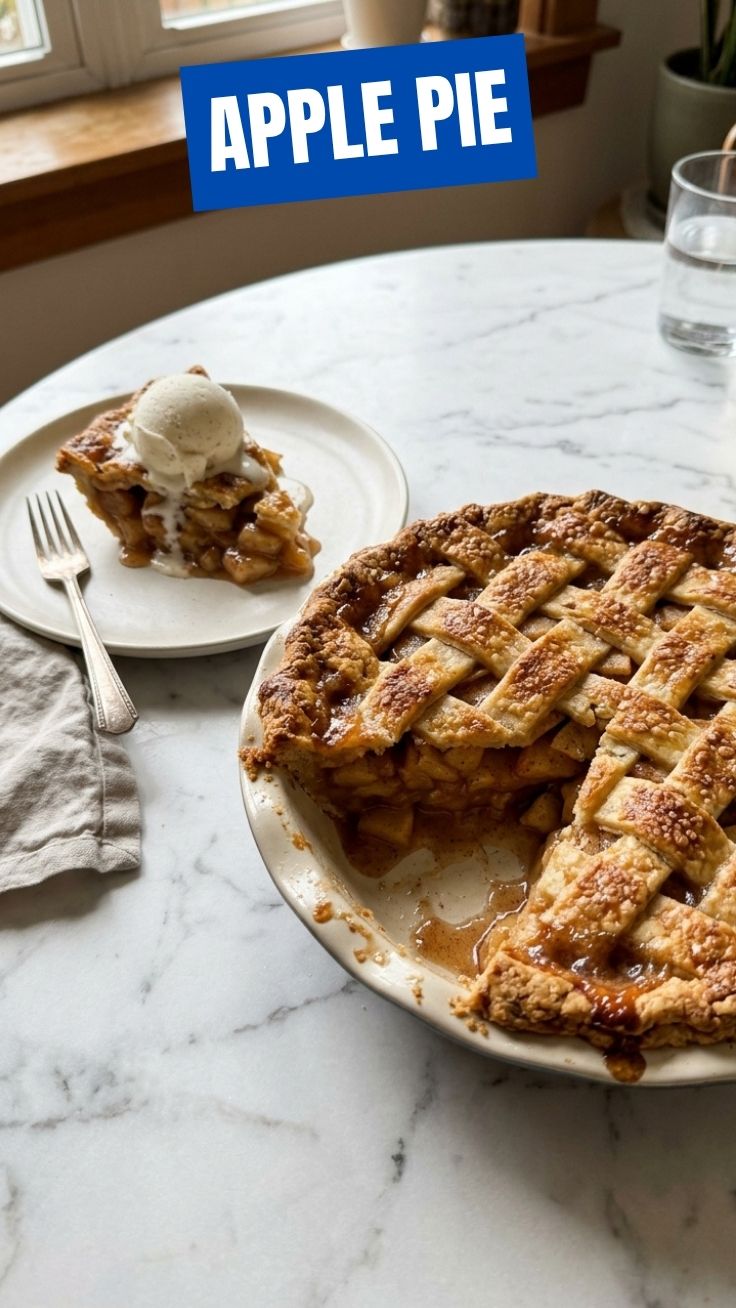
Preheat oven to 425°F (220°C). Roll one dough disc to 12-inch circle on floured surface. Transfer to pie dish, pressing gently into corners. Pour apple filling into crust, mounding slightly in center. Dot with 2 tablespoons butter cubes. Roll second dough disc, cut into strips for lattice or place whole with slits. Crimp edges decoratively. Brush with egg wash and sprinkle with coarse sugar.
4. Bake to Perfection
Place pie on baking sheet (catches drips). Bake at 425°F for 15 minutes, then reduce to 375°F (190°C) for 35-45 minutes. Temperature control is critical—the initial high heat creates steam for flaky layers, while lower temperature prevents burning. Look for texture cues: golden-brown crust and bubbling filling visible through vents. If edges brown too quickly, cover with foil strips.
Ingredient handling tip: Cold butter is non-negotiable for flaky crust. If your kitchen is warm, chill the flour and bowl too. For the filling, avoid overmixing—gentle tossing preserves apple structure.
This is where your apple pie truly shines, and mastering these Baking techniques ensures consistent, bakery-quality results every time.
Nutritional Benefits & Advantages
A slice of homemade apple pie (1/8 of 9-inch pie) offers:
– Calories: ~350-400 (varies with sugar and butter)
– Fiber: 3-4g from apples (supports digestive health)
– Vitamin C: 8-10% DV (immune support)
– Antioxidants: Apples contain quercetin, linked to reduced inflammation
– Customizable: Control sugar, fat, and sodium levels compared to store-bought
Health advantage: Using whole apples provides natural pectin, which may help regulate blood sugar when paired with fiber. The cinnamon in this recipe has been studied for its anti-inflammatory properties.
Tips, Variations & Cooking Advice
Flavor Variations
– Caramel Apple: Drizzle ¼ cup caramel sauce over filling before top crust
– Spiced Apple: Add ¼ teaspoon cardamom and ⅛ teaspoon cloves
– Apple Cranberry: Replace 1 cup apples with fresh cranberries
Alternative Methods
– Air Fryer: Bake at 350°F for 25-30 minutes (smaller 6-inch pies)
– Slow Cooker: Cook filling on low for 4 hours, serve with biscuits
– No-Bake: Use pre-baked graham cracker crust and stovetop filling
Dietary Adaptations
– Gluten-free: Use almond flour crust (add 1 egg for binding)
– Dairy-free: Coconut oil crust + vegan butter in filling
– Low-sugar: Reduce sugar to ½ cup total, add 1 tablespoon maple syrup
Common Mistakes to Avoid
| Mistake | Solution |
|———|———-|
| Soggy bottom crust | Pre-bake bottom crust for 10 minutes at 400°F before adding filling |
| Runny filling | Toss apples with 2 tablespoons flour or cornstarch before baking |
| Tough crust | Don’t overwork dough; stop mixing when butter is pea-sized |
| Burnt edges | Use pie shield or foil strips after 20 minutes of baking |
| Filling too tart | Increase sugar by 2 tablespoons or use sweeter apple varieties |
Storage & Meal Prep Tips
Refrigeration
– Store covered at room temperature for 2 days, or refrigerate for up to 5 days
– Reheat individual slices in microwave for 20 seconds or oven at 350°F for 10 minutes
Freezing
– Unbaked pie: Assemble completely, wrap tightly in plastic + foil, freeze up to 3 months. Bake directly from frozen, adding 15-20 minutes to bake time.
– Baked pie: Cool completely, wrap, freeze up to 2 months. Thaw overnight in refrigerator, reheat at 350°F for 15 minutes.
Texture tip: To maintain flaky crust when reheating, use an oven rather than microwave. For frozen unbaked pies, brush with egg wash just before baking.
Conclusion
Mastering this apple pie recipe transforms a simple dessert into a celebration of seasonal flavors and Baking craftsmanship. From selecting the perfect apples to achieving that golden, flaky crust, every step builds confidence in the kitchen. The beauty of homemade pie lies in its adaptability—whether you prefer classic cinnamon notes or adventurous caramel twists, this foundation supports endless creativity. We encourage you to try this recipe, share your golden-brown masterpiece on social media, and explore our other seasonal dessert guides. Your perfect slice awaits!
FAQs
1. Can I use pre-made pie crust instead of homemade?
Absolutely! While homemade offers superior flakiness, high-quality refrigerated crusts work well. Blind-bake the bottom crust for 10 minutes to prevent sogginess.
2. How do I prevent my apple pie from overflowing?
Use a deep-dish pie plate, mound filling slightly, and cut decorative vents in top crust. Placing a baking sheet underneath catches drips.
3. What’s the best apple variety for pie?
Granny Smith is ideal for its tartness and firm texture. Honeycrisp, Braeburn, or Jonagold also work well. Avoid Red Delicious—they turn mushy.
4. Why is my pie crust shrinking during baking?
Overworking the dough develops too much gluten. Handle minimally, chill thoroughly, and avoid stretching dough into the pan—drape it gently.
5. Can I make this apple pie gluten-free?
Yes! Substitute all-purpose flour with a 1:1 gluten-free baking blend. Add ½ teaspoon xanthan gum if your blend doesn’t include it. The crust will be slightly more delicate.
Best way to grow Apple Pie from scratchApple Pie
Ingredients
Equipment
Method
- In a large bowl, whisk together the flour and salt. Cut in the cold butter until the mixture resembles coarse crumbs.
- Gradually add ice water, mixing until the dough just comes together. Divide the dough into two disks, wrap them, and refrigerate for at least 30 minutes.
- In a large bowl, combine the sliced apples with granulated sugar, brown sugar, flour, cinnamon, nutmeg, and lemon juice. Toss gently to coat.
- Preheat your oven to 400°F (200°C). On a floured surface, roll out one disk of dough and place it into a 9-inch pie dish.
- Pour the apple filling into the crust and dot with the cubed butter. Roll out the second dough disk and place it over the filling, crimping the edges to seal.
- Cut several slits in the top crust for ventilation.
- Bake for 15 minutes at 400°F (200°C), then reduce the oven temperature to 375°F (190°C) and bake for an additional 45-50 minutes, or until the crust is golden brown and the filling is bubbly.
- Let the pie cool on a wire rack for at least 30 minutes before slicing and serving. This allows the filling to set properly.