The Ultimate Guide to Making Perfect Chex Mix at Home
Have you ever wondered why store-bought Chex Mix never quite matches the irresistible crunch and flavor of homemade? The secret isn’t just in the ingredients—it’s in the technique. Preparing this classic snack mix from scratch allows you to control seasoning, customize textures, and avoid preservatives. Today, we’re diving deep into a foolproof recipe for Chex Mix that delivers restaurant-quality results every time. Whether you’re hosting a party, preparing game-day snacks, or simply craving a savory treat, this guide will transform your approach to homemade munchies.
Ingredients & Kitchen Tools
Essential Ingredients
– 9 cups assorted Chex cereal (corn, rice, and wheat varieties) – The base of any great Chex Mix; using multiple types adds textural complexity
– 1 cup mixed nuts (peanuts, cashews, almonds) – Provides protein and satisfying crunch
– 1 cup pretzel sticks – Adds saltiness and visual contrast; broken into bite-sized pieces
– 1 cup bagel chips or rye chips – For extra heartiness; garlic-flavored chips work beautifully
– 6 tablespoons unsalted butter – The fat carrier for seasonings; salted butter requires reducing added salt
– 2 tablespoons Worcestershire sauce – Deepens umami notes; vegetarian versions are available
– 1 tablespoon seasoned salt (like Lawry’s) – A flavor shortcut that balances savory profiles
– 1 teaspoon garlic powder – Provides aromatic depth without burning
– ½ teaspoon onion powder – Rounds out the savory flavor profile
– ½ teaspoon smoked paprika – Adds subtle smokiness; regular paprika works too
Kitchen Tools
– Large roasting pan or rimmed baking sheet (at least 17×12 inches) – Ensures even heat distribution
– Parchment paper or aluminum foil – For easy cleanup
– Large mixing bowl – For combining dry ingredients before baking
– Small saucepan or microwave-safe bowl – For melting butter and mixing seasoning
– Wooden spoon or silicone spatula – For gentle stirring without crushing cereal
– Cooling rack – Prevents steam buildup that would soften the snack mix
Optional Substitutions
– Gluten-free: Use gluten-free pretzels and ensure Worcestershire sauce is certified gluten-free
– Low-sodium: Use unsalted nuts and low-sodium seasoned salt
– Vegan: Substitute butter with vegan butter or coconut oil
Prep Time & Cooking Schedule
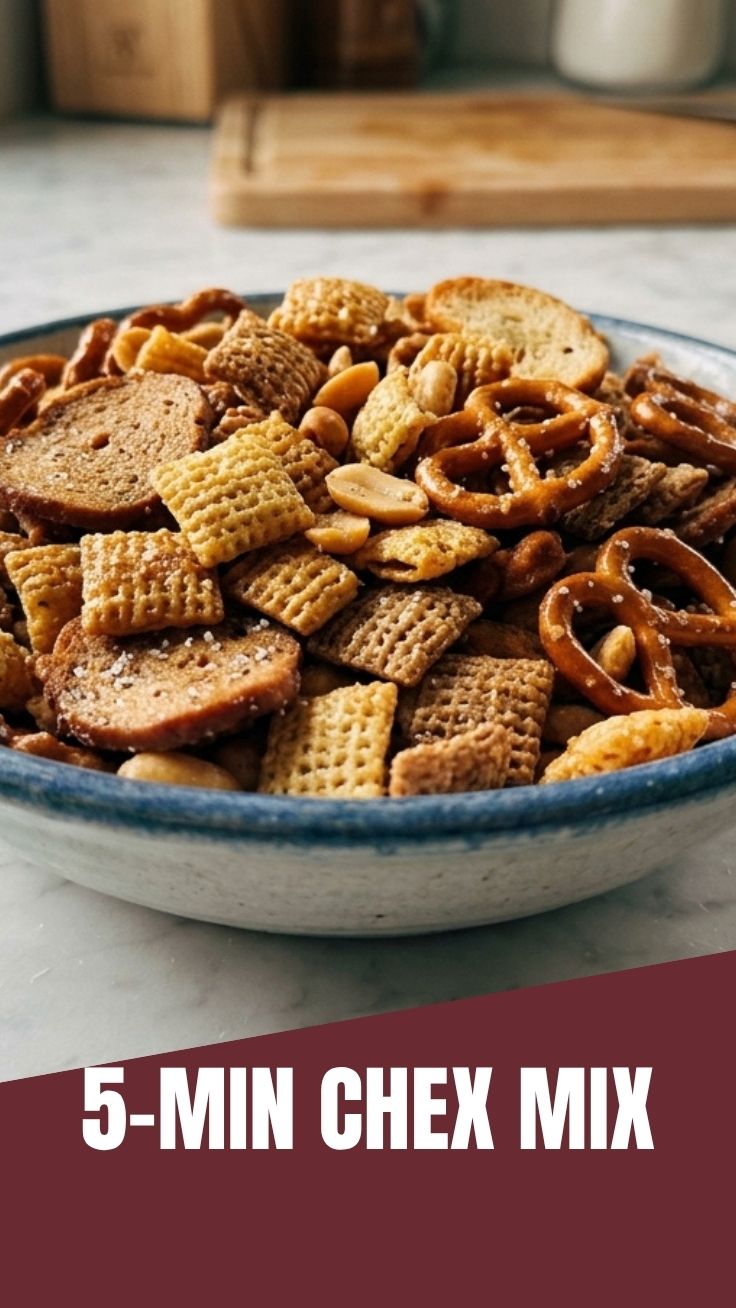
Total Time: 1 hour 15 minutes
– Prep Time: 15 minutes (measuring ingredients, preheating oven)
– Bake Time: 45 minutes (with stirring every 15 minutes)
– Resting Time: 15 minutes (cooling completely after baking)
– Storage Time: Up to 2 weeks in an airtight container
Planning Tip: This recipe yields approximately 12 cups of snack mix, making it perfect for batch preparation. The extended bake time at low temperature (250°F) is crucial—it dehydrates the ingredients gradually, ensuring maximum crunch without burning the seasonings.
Step-by-Step Instructions
Step 1: Preheat and Prepare
Preheat your oven to 250°F (120°C). Line your large roasting pan with parchment paper. This low temperature is essential—higher heat will burn the butter and seasonings before the cereal fully crisps.
Step 2: Combine Dry Ingredients
In your large roasting pan, gently combine 9 cups of Chex Mix cereals, 1 cup mixed nuts, 1 cup pretzel sticks, and 1 cup bagel chips. Use your hands or a wooden spoon to distribute evenly. Avoid crushing the cereal—gentle folding is key.
Step 3: Prepare the Seasoning Mixture
In a small saucepan over low heat (or microwave in 30-second intervals), melt 6 tablespoons butter. Stir in 2 tablespoons Worcestershire sauce, 1 tablespoon seasoned salt, 1 teaspoon garlic powder, ½ teaspoon onion powder, and ½ teaspoon smoked paprika. Whisk until fully combined and aromatic.
Step 4: Coat and Stir
Pour the warm butter mixture over the dry ingredients in the pan. Using a silicone spatula, gently fold the mixture until every piece is evenly coated. This ensures consistent flavor throughout your snack mix without clumping.
Step 5: Bake and Stir
Place the pan in the preheated oven. Bake for 45 minutes, stirring every 15 minutes with a wooden spoon. Pro tip: When stirring, scrape the edges and bottom of the pan where seasonings tend to accumulate. The cereal should turn a light golden brown and feel dry to the touch.
Step 6: Cool Completely
Remove the pan from the oven and spread the Chex Mix onto a cooling rack in a single layer. Allow it to cool completely—at least 15 minutes. During this stage, the coating continues to set, creating that signature crunchy texture.
Nutritional Benefits & Advantages
This homemade Chex Mix offers several nutritional advantages over store-bought versions. The whole-grain Chex cereals provide complex carbohydrates and dietary fiber (approximately 3g per serving), supporting digestive health. Mixed nuts contribute heart-healthy monounsaturated fats and protein (about 5g per serving), helping with satiety. Using real butter instead of hydrogenated oils eliminates trans fats commonly found in commercial snack bags. Additionally, controlling sodium allows you to reduce it by up to 40% compared to packaged alternatives. The Worcestershire sauce adds B vitamins from its molasses content, while the garlic and onion powders offer small amounts of antioxidants.
Tips Variations & Cooking Advice
Flavor Variations
– Spicy Version: Add 1 teaspoon cayenne pepper and ½ teaspoon chipotle powder to the butter mixture
– Sweet & Savory: Replace Worcestershire with maple syrup and add 1 tablespoon brown sugar
– Ranch Style: Substitute seasoned salt with ranch seasoning mix and add dried dill
Dietary Adaptations
– Gluten-Free: Confirm all cereals, pretzels, and Worcestershire sauce are certified gluten-free
– Dairy-Free: Use plant-based butter (melted coconut oil works surprisingly well)
– Low-Carb: Replace Chex cereals with a mix of almonds, cheese crisps, and pork rinds
Cooking Method Alternatives
– Air Fryer: Cook at 300°F for 10-12 minutes, shaking halfway through
– Slow Cooker: Cook on Low for 2-3 hours, stirring every 30 minutes
– Dehydrator: Spread thin on trays and dehydrate at 135°F for 4-6 hours
Common Mistakes to Avoid
Mistake #1: Overloading the Pan
Using too much cereal in one pan prevents even heat distribution. Solution: Use a large roasting pan or divide between two baking sheets.
Mistake #2: Skipping the Stirring
Forgetting to stir allows the bottom layer to burn while the top remains soggy. Solution: Set a timer for every 15 minutes and stir thoroughly.
Mistake #3: Adding Too Much Butter
Excess butter creates a greasy snack mix that never crisps properly. Solution: Stick to the 6-tablespoon measurement—more isn’t better.
Mistake #4: Cooling in the Pan
Leaving the mixture in the hot pan creates steam, softening the crunch. Solution: Always transfer to a cooling rack immediately after baking.
Mistake #5: Storing While Warm
Sealing warm Chex Mix traps moisture, leading to sogginess within hours. Solution: Wait until completely cool before storing in an airtight container.
Storage & Meal Prep Tips
Refrigeration: Store in an airtight container at room temperature for up to 2 weeks. Do not refrigerate—moisture will soften the cereal.
Freezing: For longer storage, place the completely cooled Chex Mix in a freezer-safe bag or container. Freeze for up to 3 months. Thaw at room temperature for 30 minutes before serving.
Reheating: If the snack mix loses its crunch over time, spread on a baking sheet and reheat at 250°F for 5-7 minutes. Cool completely before sealing.
Meal Prep Strategy: Double the recipe and freeze half in portion-sized bags. This makes ideal grab-and-go snacks for road trips, lunchboxes, or last-minute entertaining.
Conclusion
Mastering Chex Mix at home is about understanding the delicate balance between heat, timing, and seasoning. By following this guide, you’ll achieve that perfect crunch with every batch—far superior to anything from a bag. Remember, the key is low-and-slow baking, thorough stirring, and complete cooling before storage. This homemade snack mix isn’t just a recipe; it’s a customizable canvas for your favorite flavors. Try this method once, and you’ll never go back to store-bought. Share your results in the comments below—we’d love to see your flavor variations!
FAQs
1. Can I use different cereals besides Chex?
Yes! Crispix, Crisp Rice cereal, or even corn flakes work well. Avoid puffed cereals—they absorb too much moisture and become soggy.
2. Why did my Chex Mix turn out soggy?
Most likely causes are: oven temperature too low (below 250°F), insufficient baking time, or storing before completely cool. Re-crisp by reheating at 250°F for 10 minutes.
3. Can I make this spicy Chex Mix without cayenne?
Absolutely. Substitute smoked paprika with chipotle powder for smoky heat, or add ½ teaspoon red pepper flakes during mixing.
4. How do I prevent nuts from burning?
Nuts burn faster than cereal because of their fat content. Stir more frequently (every 10 minutes) if using many nuts, or add them halfway through baking.
5. What’s the best way to double this recipe?
Use two separate baking pans on different oven racks. Swap their positions halfway through baking to ensure even cooking. Do not overfill one pan.
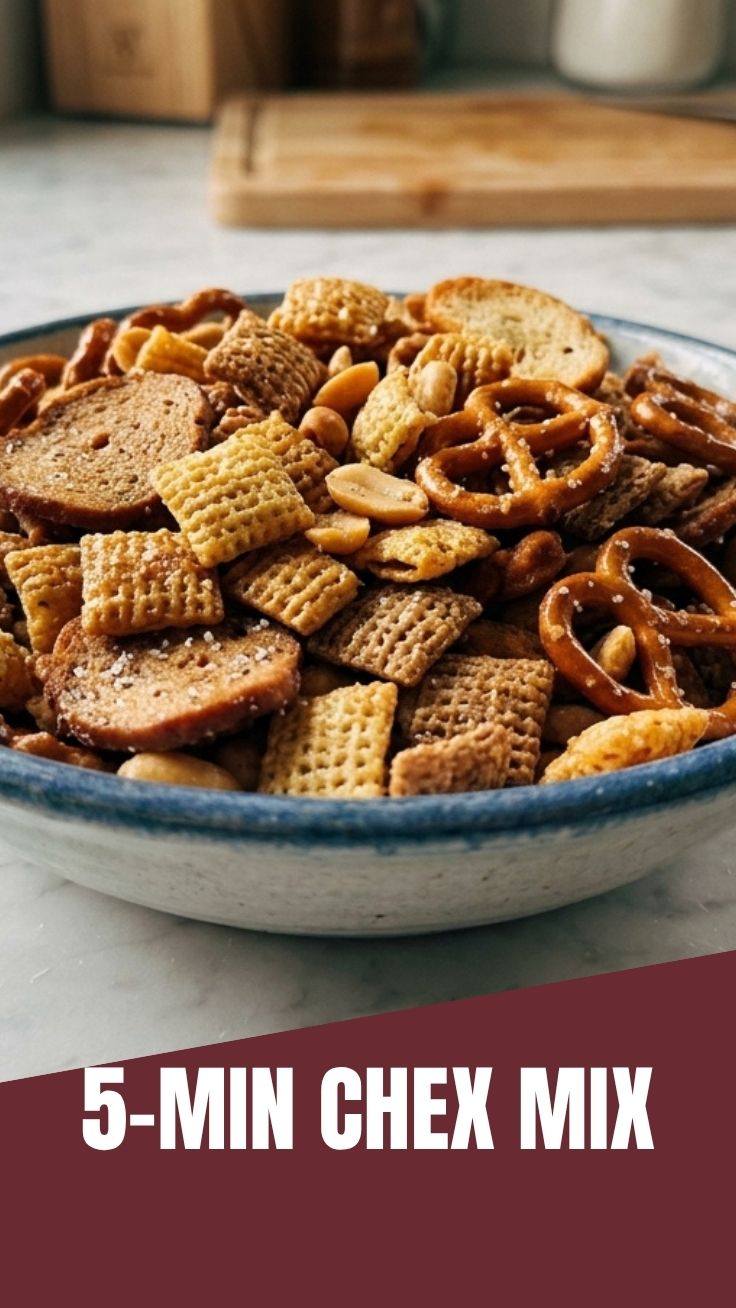
Quick way to grow Chex Mix sales by 45% Chex Mix
Ingredients
Equipment
Method
- Preheat your oven to 250°F (120°C) and combine the cereals, pretzels, and nuts in a large roasting pan.
- Melt the butter in a small microwave-safe bowl, then stir in the Worcestershire sauce, seasoned salt, garlic powder, and onion powder.
- Pour the seasoned butter over the dry mixture in the roasting pan and toss gently to ensure everything is evenly coated.
- Bake the Chex Mix for 1 hour, stirring every 15 minutes to prevent burning and ensure even crisping.
- Once baked, spread the mixture onto a paper towel-lined surface to cool completely.
- Store the cooled Chex Mix in an airtight container to maintain freshness.