Crispy, Juicy, and Absolutely Irresistible: Mastering the Ultimate Chicken Sandwich at Home
Have you ever craved that perfect bite—a golden, crunchy exterior giving way to tender, juicy chicken, all cradled in a soft bun with just the right balance of tangy pickles and creamy sauce? While fast-food versions are convenient, nothing beats the satisfaction of crafting your own Chicken Sandwich from scratch. You control the quality, the spice level, and the freshness. Plus, it’s surprisingly straightforward once you know the techniques. Whether you’re after a classic buttermilk version or crave the fiery kick of a Nashville Hot Chicken Sandwich, this guide will walk you through every step to achieve restaurant-quality results in your own kitchen.
Ingredients & Kitchen Tools
For the Chicken Marinade & Breading:
– 2 boneless, skinless chicken breasts (halved horizontally or pounded to even thickness)
– 1 cup buttermilk (or 1 cup milk + 1 tbsp lemon juice, let sit 5 min)
– 1 large egg
– 1 cup all-purpose flour (for gluten-free: use 1:1 gluten-free flour blend)
– ½ cup cornstarch (adds extra crunch)
– 1 tsp paprika, 1 tsp garlic powder, 1 tsp onion powder, ½ tsp cayenne (adjust for heat)
– Salt and black pepper to taste
For Assembly:
– 4 soft brioche or potato buns, split and lightly toasted
– Pickle slices (dill or bread-and-butter)
– Shredded lettuce, sliced tomato (optional)
– Sauce of choice: mayonnaise, spicy aioli, or honey mustard
Kitchen Tools:
– Large mixing bowl
– Whisk
– Deep skillet or heavy-bottomed pot (for shallow frying)
– Instant-read thermometer
– Wire rack set over baking sheet (to keep cooked chicken crispy)
– Tongs
Prep Time & Cooking Schedule
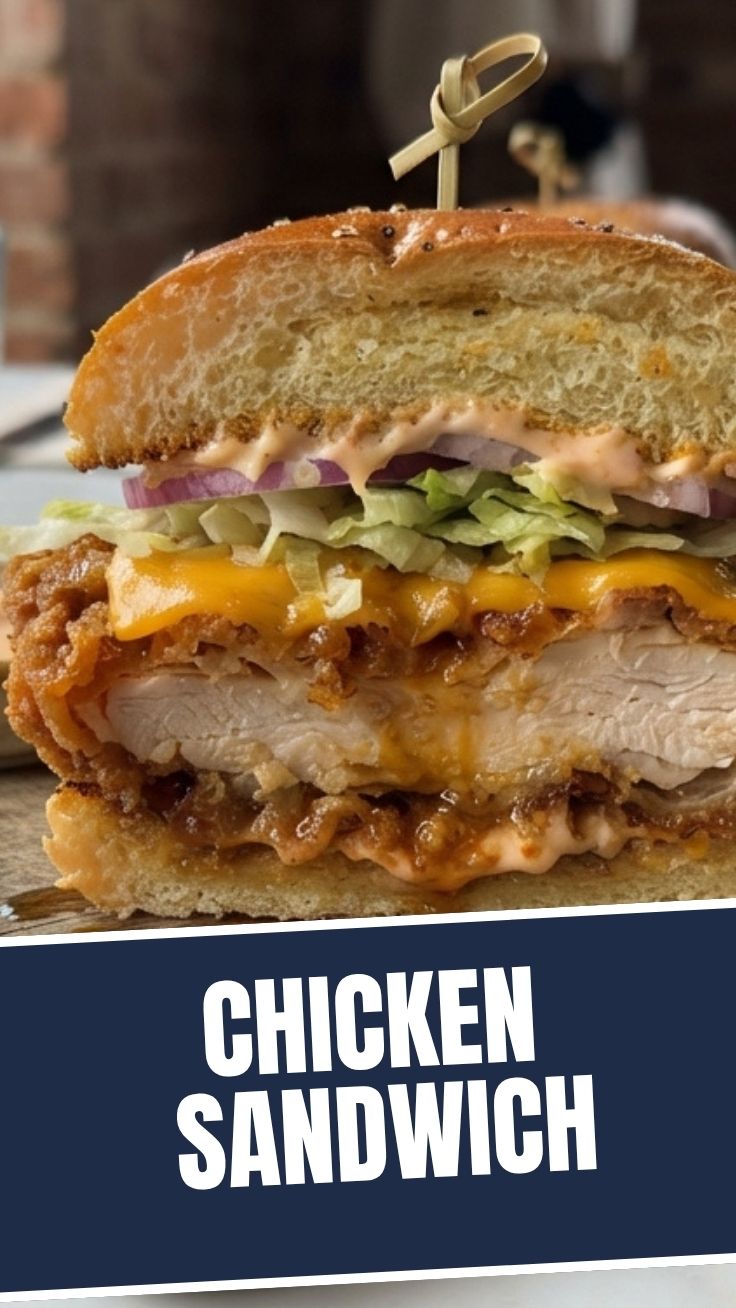
Total time: ~45 minutes active + 30 minutes marinating (inactive)
– Marinate: 30 minutes (or up to 8 hours for deeper flavor)
– Prep ingredients: 10 minutes
– Fry: 12–14 minutes (two batches)
– Rest: 5 minutes on wire rack
Plan ahead: The buttermilk marinade not only flavors the chicken but also tenderizes it. If you’re short on time, skip the egg in the marinade and just use buttermilk—still delicious.
Step-by-Step Instructions
1. Prepare the chicken: Slice each breast horizontally into two thin cutlets (or pound to ½-inch thickness). Season lightly with salt and pepper.
2. Make the wet mixture: In a bowl, whisk together buttermilk and egg. Submerge the chicken pieces, cover, and refrigerate for at least 30 minutes.
3. Combine dry ingredients: In a separate shallow dish, mix flour, cornstarch, paprika, garlic powder, onion powder, cayenne, 1 tsp salt, and ½ tsp black pepper.
4. Dredge: One at a time, lift a chicken piece from the buttermilk, letting excess drip off. Coat thoroughly in flour mixture, pressing firmly. Shake off excess and set on a plate.
5. Heat oil: Fill skillet with about ½ inch oil (350°F / 175°C). Use a thermometer to maintain temperature.
6. Fry in batches: Place chicken in hot oil, not overcrowding. Cook 4–5 minutes per side until golden brown and internal temp reaches 165°F. Transfer to wire rack.
7. For the Nashville Hot version: After frying, brush immediately with a mixture of ¼ cup melted butter, 2 tbsp cayenne, 1 tsp brown sugar, and ½ tsp garlic powder. This creates that signature fiery glaze.
8. Assemble: Toast buns, spread sauce, add pickles, lettuce, and finally the crispy chicken. Serve right away.
Tip: For a classic Chicken Sandwich, skip the spicy glaze and instead add a smear of honey mustard. For the Nashville Hot Chicken Sandwich, pile on extra pickles to cut the heat.
Nutritional Benefits & Advantages
A homemade chicken sandwich is not only more satisfying but also offers better control over ingredients. Chicken breast is a lean protein source (about 30g per serving) that supports muscle repair and satiety. By shallow frying instead of deep-frying, you reduce oil absorption. The buttermilk marinade adds calcium and probiotics, while spices like paprika and cayenne provide antioxidants and metabolism-boosting capsaicin. Plus, you can easily adapt the recipe to lower sodium or skip added sugars—something fast food rarely offers.
Tips Variations & Cooking Advice
– Flavor twists: Swap paprika for chipotle powder for a smoky version, or add dried herbs (oregano, thyme) to the flour mix.
– Dietary swaps: Use gluten-free flour and cornstarch for a celiac-safe option. For dairy-free, marinate in a mixture of unsweetened almond milk + 1 tsp vinegar, and use vegan butter for the Nashville glaze.
– Cooking method alternative: Oven-bake at 425°F for 15 minutes, flipping halfway, if you prefer less oil. Spritz with cooking spray for extra crispness.
– Portion changes: Slice chicken into strips for “chicken tender” sandwiches, or use thighs for juicier results (adjust cooking time to 6–7 minutes per side).
Common Mistakes to Avoid
– Soggy breading: Oil too cool? The coating absorbs excess grease. Always preheat to 350°F and check with a thermometer.
– Dry chicken: Overcooking is the enemy. Use an instant-read thermometer and remove at 160°F (carryover cooking takes it to 165°F).
– Breading falls off: Pat chicken dry before marinating, and let the coated pieces rest for 5 minutes before frying—this helps the crust adhere.
– Too spicy or not spicy enough: Taste your seasoning mix before coating. For the Nashville version, adjust cayenne gradually.
Storage & Meal Prep Tips
– Refrigerate: Leftover cooked chicken (without bun) keeps in an airtight container for up to 3 days. Reheat in a 375°F oven for 5–7 minutes to restore crunch.
– Freeze: Breaded, uncooked chicken cutlets can be frozen on a baking sheet, then transferred to a freezer bag for up to 2 months. Fry directly from frozen, adding 2 minutes to cooking time.
– Reheat tip: Never microwave—it ruins the crust. Use an air fryer at 375°F for 3–4 minutes, or a skillet with a splash of oil.
Conclusion
Bringing a Chicken Sandwich to life at home is a simple yet rewarding project. You’ll impress yourself (and anyone you serve) with that shatteringly crisp coating and juicy interior. And if you’re brave enough, the Nashville Hot Chicken Sandwich adds a fiery, buttery twist that’s pure comfort. Master these techniques, and you’ll never settle for drive-through again. Try the recipe this weekend, share your photos, and explore more sandwich ideas on our site—your taste buds will thank you.
FAQs
Can I use chicken thighs instead of breasts?
Absolutely. Thighs are more forgiving and stay moist. Adjust frying time to 6–7 minutes per side and check internal temp of 165°F.
How do I make a gluten-free version work?
Use a 1:1 gluten-free flour blend mixed with cornstarch. The buttermilk marinade should be dairy-free if needed. The crust may be slightly less shatter-crisp but still delicious.
Why is my breading not sticking?
Ensure chicken is not too wet before dredging. Let excess buttermilk drip off, and press the flour mixture firmly onto the chicken. A rest period of 5 minutes before frying also helps.
Can I prepare the Nashville hot glaze ahead?
Yes. Melt butter and stir in cayenne, brown sugar, and garlic powder. Store in the fridge for up to a week. Reheat gently before brushing on hot chicken.
What’s the best oil for frying?
Use a neutral oil with a high smoke point, like canola, peanut, or vegetable oil. Avoid olive oil (burns quickly). Maintain steady temperature for best results.
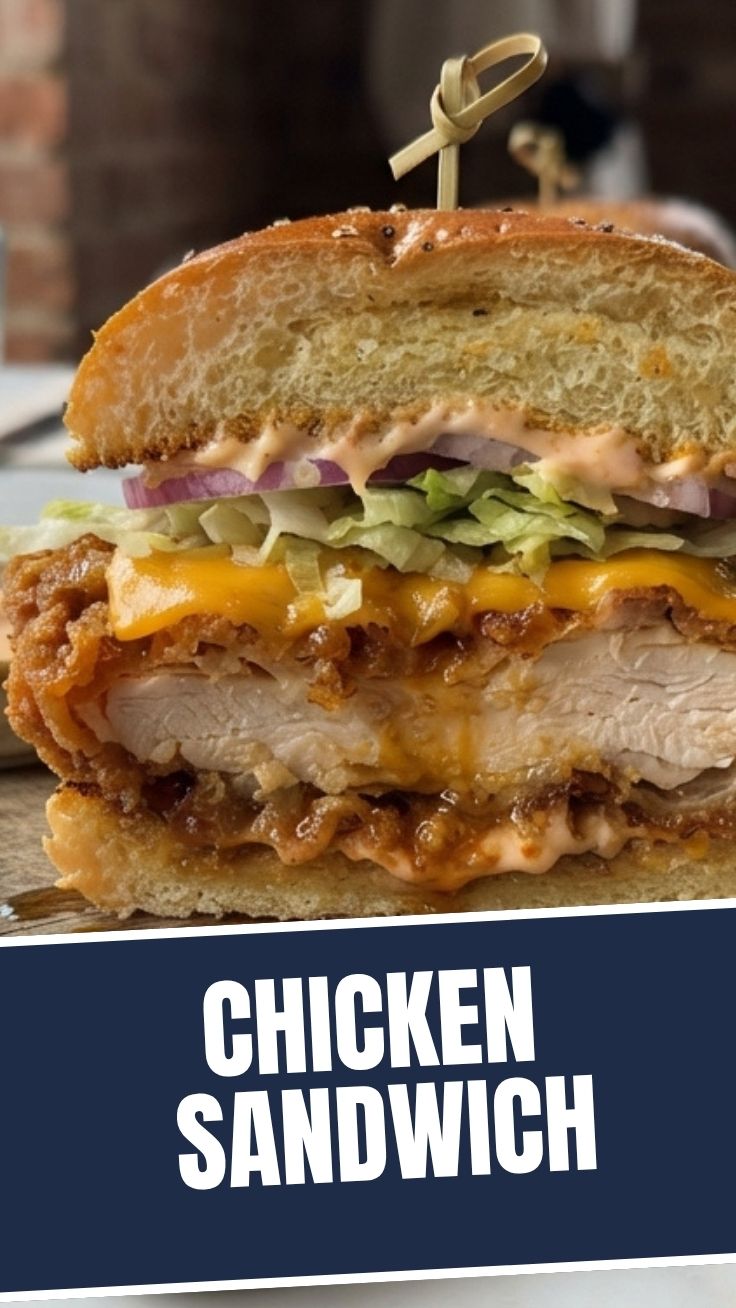
Proven way to grow Chicken Sandwich 5
Ingredients
Equipment
Method
- Season the chicken breasts with salt and black pepper on both sides.
- Slice the tomato and wash the lettuce leaves; set aside.
- Heat vegetable oil in a large skillet over medium-high heat.
- Cook the seasoned chicken breasts for 5-7 minutes per side, until cooked through and golden brown.
- Lightly toast the sandwich buns in a separate pan or toaster.
- Spread mayonnaise on the inside of each toasted bun.
- Place a cooked chicken breast on the bottom half of each bun.
- Top with lettuce leaves and tomato slices, then cover with the other half of the bun.
- Serve immediately and enjoy your freshly grown chicken sandwich!