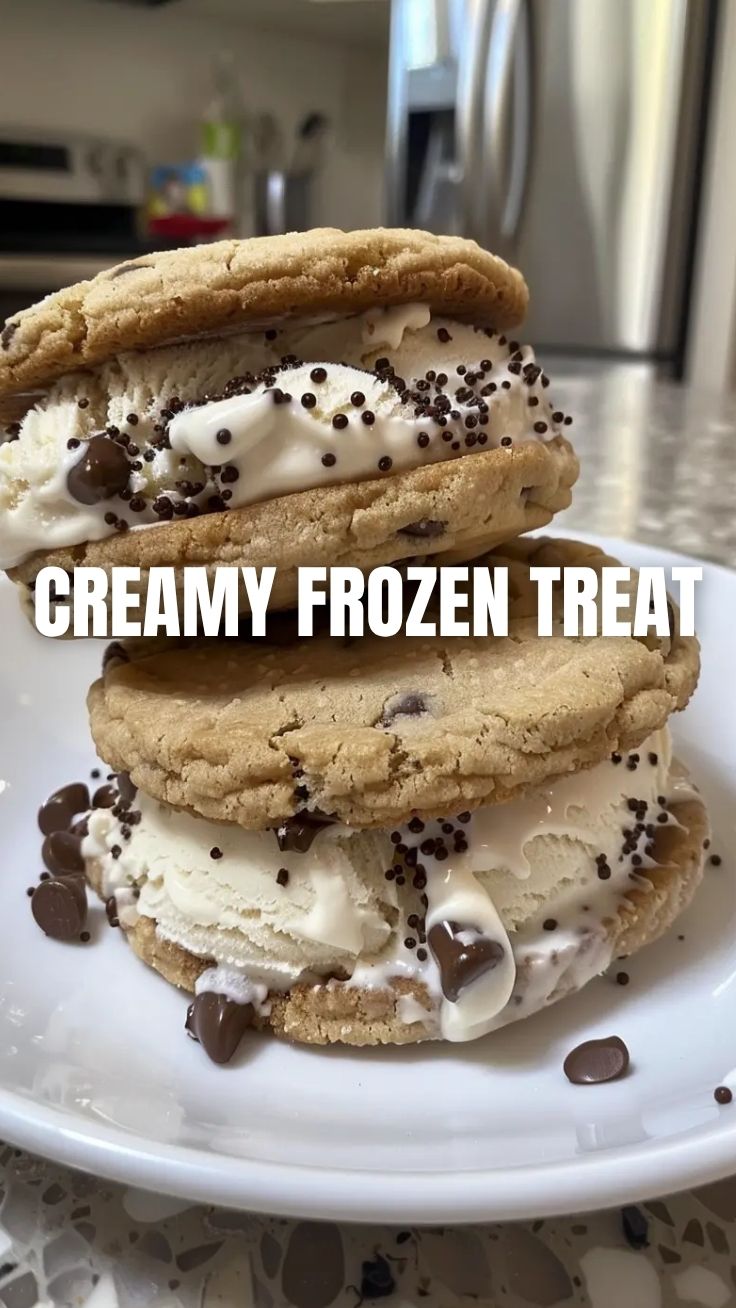
Unwrap Sweet Bliss: The Ultimate Guide to Homemade Ice Cream Sandwiches (Homemade)
Ever bitten into a perfectly crafted ice cream sandwich, the soft cookie yielding to the creamy, cold interior, and wished you could recreate that magic at home? You absolutely can! Preparing your own Ice Cream Sandwiches (Homemade) isn’t just about saving a trip to the store; it’s about crafting a personalized dessert experience, tailored to your exact cravings. Imagine the joy of selecting your favorite cookie, your preferred ice cream flavor, and assembling a treat that’s far superior to anything pre-packaged. And while you’re at it, incorporating a stellar Cookie Dough Recipe into the process elevates this simple dessert to an art form. This guide will walk you through every delectable step, ensuring your homemade ice cream sandwiches are nothing short of spectacular. Get ready to impress yourself and everyone you share them with!
Ingredients & Kitchen Tools
- All-Purpose Flour (2 cups): The backbone of our glorious cookies. Unbleached is always a good choice.
- Unsalted Butter (1 cup, 2 sticks, softened): Provides richness and tenderness. Softened means it yields to gentle pressure, but isn’t melted.
- Granulated Sugar (3/4 cup): For sweetness and crispy edges.
- Brown Sugar (1/2 cup, packed): Adds moisture, chewiness, and a lovely caramel note. Light brown or dark brown work equally well.
- Large Eggs (2): Binds ingredients and adds structure. Room temperature eggs emulsify better.
- Vanilla Extract (1 teaspoon): Essential for a warm, inviting flavor. Pure vanilla is always best!
- Baking Soda (1 teaspoon): The leavening agent that gives our cookies a lift.
- Salt (1/2 teaspoon): Crucial for balancing sweetness and enhancing all other flavors.
- Your Favorite Ice Cream (1.5 quarts, slightly softened): This is where your personal flair shines! Choose any flavor you adore, from classic vanilla to adventurous rocky road. Slightly softened makes it easier to spread.
- Optional Mix-ins (1/2 cup, e.g., mini chocolate chips, sprinkles, chopped nuts): For an extra layer of texture and fun!
- Large Baking Sheets: Essential for baking multiple cookies evenly.
- Parchment Paper or Silicone Baking Mats: Prevents sticking and makes cleanup a breeze.
- Electric Mixer (stand or hand-held): For creaming butter and sugar, ensuring a smooth dough.
- Spatula: For mixing and scraping down bowls.
- Ice Cream Scoop or Cookie Scoop: For uniform cookie sizes.
- Sharp Knife: For trimming cookies if desired.
- Plastic Wrap or Airtight Container: For chilling and storage.
Prep Time & Cooking Schedule
- Cookie Prep Time: 20 minutes
- Cookie Chill Time: 30 minutes (minimum, but longer is better for flavor development)
- Cookie Bake Time: 10-12 minutes per batch
- Assembly Time: 15 minutes
- Freezing Time: 2-4 hours (to set the sandwiches firmly)
This recipe is designed for flexibility. The cookie dough can be made ahead of time and refrigerated for up to 3 days or frozen for up to 3 months, making it perfect for meal prepping or spontaneous dessert cravings. The chilling time for the dough is crucial for preventing spread and ensuring your cookies retain their shape, leading to a much better ice cream sandwich experience.
Step-by-Step Instructions
1. Prepare the Cookie Dough: In a large bowl, using an electric mixer, cream together the softened unsalted butter, granulated sugar, and brown sugar on medium speed until light and fluffy (about 2-3 minutes). This aeration is key to a tender cookie. Beat in the eggs one at a time, incorporating each fully before adding the next, then stir in the vanilla extract. In a separate bowl, whisk together the all-purpose flour, baking soda, and salt. Gradually add the dry ingredients to the wet ingredients, mixing on low speed until just combined. Be careful not to overmix. This foundational Cookie Dough Recipe is a versatile base for many treats, and it’s perfect for our Ice Cream Sandwiches (Homemade).
2. Chill the Dough: Cover the bowl with plastic wrap and refrigerate for at least 30 minutes. This helps the flavors meld and prevents excessive spreading during baking.
3. Bake the Cookies: Preheat your oven to 375°F (190°C). Line baking sheets with parchment paper. Scoop out uniform balls of dough (about 1.5 tablespoons each) and place them about 2 inches apart on the prepared baking sheets. Bake for 10-12 minutes, or until the edges are golden brown and the centers are just set. They will firm up as they cool.
4. Cool Completely: Transfer cookies to a wire rack to cool completely. This is vital before assembly to prevent the ice cream from melting too quickly.
5. Prepare the Ice Cream: While the cookies cool, take your chosen ice cream out of the freezer to soften slightly. It should be pliable enough to spread but not melted.
6. Assemble the Sandwiches: Pair up cookies of similar size. Spread a generous layer of ice cream (about 1/2 to 3/4 inch thick) onto the flat side of one cookie. If desired, roll the edges in your chosen mix-ins. Gently top with the second cookie, pressing lightly to secure.
7. Freeze: Wrap each assembled ice cream sandwich individually in plastic wrap or parchment paper. Place them on a baking sheet and freeze for at least 2-4 hours, or until thoroughly firm. This ensures a clean bite and prevents a messy eating experience.
Nutritional Benefits & Advantages
While these are undoubtedly a treat, making Ice Cream Sandwiches (Homemade) offers several advantages. You have complete control over the ingredients, allowing you to choose high-quality butter, natural vanilla, and your favorite ice cream with fewer artificial additives. Opting for whole wheat flour in your Cookie Dough Recipe can add fiber, while using lower-sugar ice creams can reduce overall sugar content. Plus, the sheer joy of creating something delicious from scratch can be incredibly satisfying and a wonderful way to connect with your food.
Tips Variations & Cooking Advice
- Cookie Variations: Experiment with different cookie types! Chocolate chip, oatmeal raisin, peanut butter, or even snickerdoodle cookies make fantastic ice cream sandwich bases.
- Ice Cream Flavors: The possibilities are endless! Beyond classic vanilla and chocolate, try coffee, mint chip, strawberry, or even a sorbet for a lighter option.
- Mix-in Magic: Roll the sides of your assembled sandwiches in sprinkles, mini chocolate chips, chopped nuts, toasted coconut, or even crushed candies for extra flair and texture.
- Gluten-Free Option: Substitute all-purpose flour with a 1:1 gluten-free baking blend in your Cookie Dough Recipe.
- Dairy-Free Option: Use dairy-free butter and a high-quality dairy-free ice cream for a delicious alternative.
- Perfectly Shaped Sandwiches: For neat edges, once the sandwiches are frozen solid, trim any excess ice cream with a hot knife (run under hot water and wipe dry).
Common Mistakes to Avoid
- Overmixing the Dough: This can lead to tough cookies. Mix only until the flour is just incorporated.
- Not Chilling the Dough: Skipping this step will result in cookies that spread too much, making it difficult to form neat sandwiches.
- Warm Cookies for Assembly: Attempting to assemble with warm cookies will immediately melt the ice cream, leading to a soupy mess. Ensure cookies are fully cooled.
- Insufficient Freezing Time Post-Assembly: Not freezing the assembled sandwiches long enough will result in a soft, difficult-to-eat treat. Patience is key for firm, delightful sandwiches.
- Uneven Cookie Sizes: Try to scoop uniform amounts of dough for each cookie to ensure easy pairing and assembly.
Storage & Meal Prep Tips
Once your Ice Cream Sandwiches (Homemade) are firmly frozen, they can be stored in an airtight container or a freezer-safe bag in the freezer for up to 2-3 weeks. Ensure they are individually wrapped to prevent freezer burn and to make it easy to grab just one when a craving strikes. For meal prep, consider baking a large batch of cookies and freezing them. Then, assemble your sandwiches as needed, allowing for fresh, personalized treats whenever you desire.
Conclusion
Crafting your own Ice Cream Sandwiches (Homemade) is a rewarding culinary adventure, allowing for endless creativity and a truly personalized dessert experience. From the foundational Cookie Dough Recipe to the final, satisfying bite, every step offers an opportunity to infuse your passion into a delicious treat. We encourage you to dive in, experiment with flavors, and share your delightful creations! What’s your favorite ice cream and cookie combination for this ultimate homemade dessert? Let us know in the comments below!
FAQs
Q1: Can I use store-bought cookie dough for this recipe?
A1: Absolutely! While our Cookie Dough Recipe is fantastic, using store-bought cookie dough is a great shortcut to making Ice Cream Sandwiches (Homemade) quicker. Just follow the package instructions for baking.
Q2: How do I prevent the ice cream from melting too quickly during assembly?
A2: Work quickly! Have all your cooled cookies ready, and only take the ice cream out of the freezer right before you need to spread it. You can also place your baking sheet with assembled sandwiches back into the freezer in short bursts if you feel things are getting too soft.
Q3: My cookies came out too hard. What went wrong?
A3: Overbaking is the most common culprit. Cookies will continue to cook slightly on the hot baking sheet even after being removed from the oven. Aim for cookies that are just set in the center and lightly golden at the edges.
Q4: Can I make mini ice cream sandwiches?
A4: Yes! Use a smaller cookie scoop (about 1 tablespoon) and adjust baking time down by a minute or two. Mini sandwiches are perfect for parties or portion control.
Q5: What’s the best way to cut the ice cream for a clean spread?
A5: You can spread the slightly softened ice cream directly onto one cookie. Alternatively, line a baking dish with parchment paper, spread the ice cream evenly, freeze until firm, then cut out rounds or squares using a cookie cutter or knife that match your cookie size. This method creates very neat sandwiches.

Homemade Ice Cream Sandwiches
Ingredients
Equipment
Method
- Preheat your oven to 350°F (175°C) and line two baking sheets with parchment paper.
- In a medium bowl, whisk together the flour, cocoa powder, baking soda, and salt; set aside.
- In a large bowl, cream together the softened butter and granulated sugar until light and fluffy.
- Beat in the egg and vanilla extract until well combined.
- Gradually add the dry ingredients to the wet ingredients, mixing until just combined and a soft dough forms.
- Drop spoonfuls of dough onto the prepared baking sheets, leaving some space between them.
- Bake for 10-12 minutes, or until the edges are set and the centers are still slightly soft; let cool on the baking sheets for a few minutes before transferring to a wire rack to cool completely.
- Allow the ice cream to soften slightly at room temperature for about 10-15 minutes or transfer to a bowl and mix until spreadable.
- Pair up cooled cookies of similar size, then spread a generous scoop of softened ice cream onto the flat side of one cookie.
- Gently place another cookie on top, flat side down, and press lightly to create a sandwich.
- If desired, roll the edges of each ice cream sandwich in sprinkles or mini chocolate chips.
- Wrap each assembled ice cream sandwich individually in plastic wrap or parchment paper.
- Place the wrapped sandwiches in a freezer-safe container and freeze for at least 2-4 hours, or until the ice cream is firm.