The Ultimate Guide to Perfect Peanut Butter Blossoms
What if I told you that one simple cookie can transport you straight back to your grandmother’s kitchen, filling your home with an aroma so warm and nostalgic it feels like a hug? That’s the magic of Peanut Butter Blossoms—the classic holiday cookie that combines a soft, chewy base with a rich chocolate kiss on top. While store-bought versions are convenient, preparing this beloved treat at home gives you total control over texture, sweetness, and quality ingredients. Plus, the process itself is a joyful ritual that rewards you with a batch of irresistible cookies. Whether you’re a seasoned baker or a complete beginner, mastering these peanut butter cookies will elevate your baking game and impress everyone who takes a bite.
—
Ingredients & Kitchen Tools
Before you begin, gather everything you need. Having your ingredients at room temperature (especially butter and eggs) ensures a smooth, evenly mixed dough.
Ingredients
– 1 ½ cups all-purpose flour – Provides structure. For a gluten-free version, use a 1:1 gluten-free baking flour blend.
– 1 tsp baking soda – Helps the cookies spread and rise slightly.
– ½ tsp salt – Balances sweetness and enhances the peanut butter flavor.
– ½ cup unsalted butter, softened – Adds richness and tenderness. You can substitute salted butter, but reduce the added salt by ¼ tsp.
– ½ cup creamy peanut butter – The star of the show. Use a no-stir, commercial brand (like Jif or Skippy) for the best texture; natural peanut butter can make the cookies greasy and dry.
– ½ cup granulated sugar – For sweetness and a slight crisp edge.
– ½ cup packed light brown sugar – Adds moisture and a subtle caramel note.
– 1 large egg, room temperature – Binds the dough and adds structure.
– 1 tsp vanilla extract – Enhances all the flavors.
– ¼ cup granulated sugar (for rolling) – Creates a sparkly, slightly crunchy exterior.
– 24–36 Hershey’s Kisses, unwrapped – The classic chocolate topping. Dark chocolate or white chocolate kisses work beautifully too.
Kitchen Tools
– Mixing bowls – One large, one medium.
– Electric hand mixer or stand mixer – Makes creaming butter and sugar effortless.
– Measuring cups and spoons – For accuracy.
– Baking sheets – Light-colored, rimmed sheets prevent over-browning.
– Parchment paper or silicone baking mat – Prevents sticking and ensures even browning.
– Cookie scoop (1.5 tbsp size) – For uniform cookies.
– Wire cooling rack – Essential for cooling and setting the chocolate.
—
Prep Time & Cooking Schedule
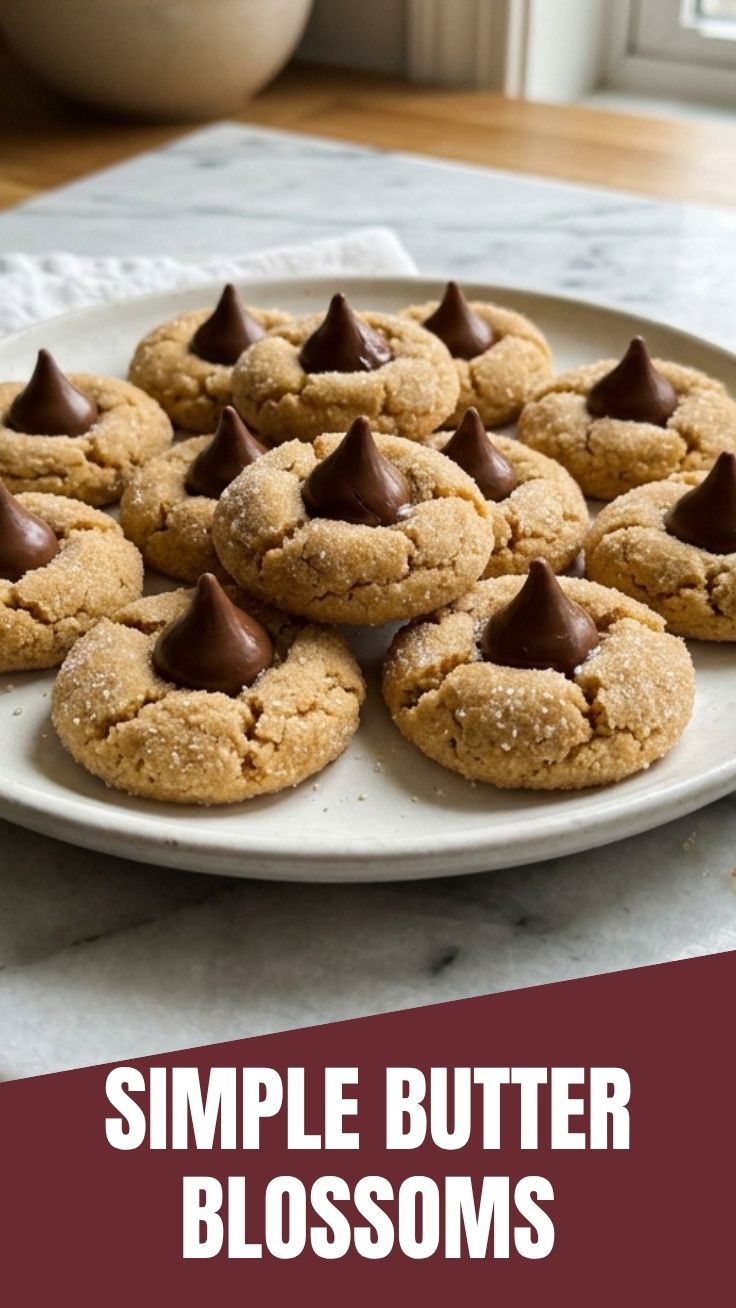
– Prep Time: 15 minutes
– Chill Time: 30 minutes (optional but highly recommended for thick cookies)
– Cook Time: 10–12 minutes per batch
– Total Time: Approximately 1 hour
Plan ahead: The dough can be made a day in advance and refrigerated. If you’re short on time, skip the chill time—just bake immediately and expect slightly flatter cookies. This recipe yields 24–36 cookies depending on scoop size.
—
Step-by-Step Instructions
Follow these steps carefully for cookies that are perfectly soft in the center with a slight chew on the edges.
1. Preheat and prepare. Preheat your oven to 375°F (190°C). Line two baking sheets with parchment paper or silicone mats.
2. Whisk dry ingredients. In a medium bowl, whisk together the flour, baking soda, and salt. Set aside.
3. Cream butter and sugars. In a large bowl, beat the softened butter, creamy peanut butter, granulated sugar, and brown sugar together with an electric mixer on medium speed until light and fluffy—about 2–3 minutes. Scrape down the sides as needed.
4. Add wet ingredients. Beat in the egg and vanilla extract until fully incorporated. The mixture should look smooth and creamy.
5. Combine dry and wet. Gradually add the dry ingredients to the wet mixture, mixing on low speed until just combined. Overmixing will develop gluten and make the cookies tough. The dough will be soft but not sticky.
6. Chill the dough (optional). Cover the bowl with plastic wrap and refrigerate for 30 minutes. This step prevents the cookies from spreading too much and creates a thicker, chewier texture.
7. Shape and roll. Scoop 1.5-tablespoon-sized portions of dough (about 1.5 inches in diameter). Roll each ball between your palms until smooth, then roll it in the extra granulated sugar to coat evenly. Place the sugared dough balls 2 inches apart on the prepared baking sheets.
8. Bake. Bake one sheet at a time on the center rack for 10–12 minutes. The cookies are done when they are puffed and lightly golden around the edges, but still soft in the center. Do not overbake—they will continue to set as they cool.
9. Press the kisses. Remove the baking sheet from the oven. While the cookies are still hot, gently press one Hershey’s Kiss into the center of each cookie. The warmth will soften the chocolate slightly, helping it adhere. If you press too hard, the cookie may crack.
10. Cool completely. Let the cookies rest on the baking sheet for 2 minutes to allow the chocolate to set slightly. Then transfer them to a wire cooling rack to cool completely. The chocolate will firm up as they cool.
Pro tip: For perfectly round Peanut Butter Blossoms, use a round cookie cutter or the bottom of a glass to gently swirl the cookies into a circle immediately after removing them from the oven (before pressing the kisses). And remember, the key to the best peanut butter cookies is not overbaking—pull them out when they look slightly underdone in the center.
—
Nutritional Benefits & Advantages
While these cookies are a treat, they offer a few nutritional perks when enjoyed in moderation:
– Protein from peanut butter: Each cookie contains about 2–3 grams of protein, which helps satisfy hunger more than a plain sugar cookie.
– Healthy fats: Peanut butter provides monounsaturated and polyunsaturated fats that support heart health.
– Calcium and iron: The Hershey’s Kiss adds a small amount of calcium, and the flour provides iron.
– Portion control: Because they are individually portioned, it’s easier to enjoy one or two without overindulging.
Advantage of homemade: You can control the sugar content by reducing the sugar in the dough by ¼ cup or using a sugar substitute like monk fruit. You can also swap the chocolate for dark chocolate (70% cocoa) for more antioxidants.
—
Tips, Variations & Cooking Advice
Flavor Variations
– Chocolate Peanut Butter Blossoms: Use a chocolate peanut butter spread (like Nutella mixed with peanut butter) for a double-chocolate twist.
– White Chocolate or Caramel: Replace the milk chocolate kisses with white chocolate, dark chocolate, or caramel-filled chocolate candies.
– Spiced Blossoms: Add ½ tsp cinnamon and ¼ tsp nutmeg to the dry ingredients for a warm, holiday-inspired flavor.
Dietary Adaptations
– Gluten-free: Substitute the all-purpose flour with a 1:1 gluten-free baking flour blend. Add ¼ tsp xanthan gum if your blend doesn’t include it.
– Dairy-free: Use a plant-based butter (like Earth Balance) and dairy-free chocolate kisses. The texture will be slightly different but still delicious.
– Egg-free: Replace the egg with a flax egg (1 tbsp ground flaxseed + 3 tbsp water, let sit for 5 minutes). The cookies will be slightly denser.
Substitutions & Cooking Advice
– Peanut butter alternatives: Almond butter, sunflower seed butter, or cookie butter (like Biscoff) work well, but the texture may vary. Sunflower butter turns green when baked—don’t worry, it’s safe!
– Sugar swaps: Coconut sugar can replace brown sugar for a deeper flavor, but the cookies will be darker in color.
– Baking method: For a crispier cookie, flatten the dough balls slightly before baking. For a softer, cakier cookie, bake immediately without chilling.
—
Common Mistakes to Avoid
1. Overbaking the cookies. This is the #1 mistake. The cookies will look slightly puffy and underdone when you pull them out. They continue to bake on the hot sheet. Overbaked blossoms are dry and hard.
2. Pressing the kisses too early or too late. Press immediately after removing from the oven. If you wait too long, the cookie sets and the chocolate won’t stick. If you press while the cookie is too hot, the chocolate melts completely and loses its shape.
3. Using natural peanut butter. Natural peanut butter separates and has a different fat content, causing the cookies to spread too much and become greasy. Stick with commercial brands for best results.
4. Skipping the chill time. While optional, chilling prevents excessive spreading. If you skip it, your cookies will be flatter—still tasty, but not as picture-perfect.
5. Not measuring flour correctly. Scooping flour directly from the bag compacts it, leading to dry cookies. Instead, spoon flour into your measuring cup and level it with a knife.
—
Storage & Meal Prep Tips
Room Temperature: Store Peanut Butter Blossoms in an airtight container at room temperature for up to 5 days. Place a slice of bread in the container to keep them soft—the bread absorbs excess air and releases moisture.
Refrigeration: Do not refrigerate unless the weather is very humid. Refrigeration can dry out the cookies. If you must, store them in an airtight container for up to 1 week.
Freezing: These cookies freeze beautifully. Place them in a single layer on a baking sheet and freeze until solid (about 1 hour). Then transfer to a freezer-safe bag or container with parchment paper between layers. They will keep for up to 3 months. To thaw, leave them at room temperature for 15–20 minutes.
Meal Prep: You can freeze the unbaked cookie dough balls. Roll them into balls, coat in sugar, and place on a baking sheet. Freeze until solid, then transfer to a freezer bag. Bake from frozen—just add 2–3 minutes to the baking time. No need to thaw!
—
Conclusion
There’s a reason Peanut Butter Blossoms have been a beloved classic for generations: they’re the perfect balance of sweet, salty, soft, and crunchy, all in one bite-sized package. By following this guide, you’ll bake cookies that are consistently delicious, with a tender interior and a glossy chocolate kiss that stays intact. Whether you’re making them for a holiday cookie exchange, a family gathering, or just a cozy weekend treat, these peanut butter cookies will never disappoint. So go ahead—preheat your oven, unwrap those kisses, and create a batch of happy memories. And when you do, tag me in your photos or leave a comment below—I’d love to see how they turned out!
—
FAQs
1. Can I use crunchy peanut butter instead of creamy?
Yes, but the texture will be slightly grainier. The cookie itself will still be soft, but you’ll have small peanut pieces throughout. If you want a smoother finish, stick with creamy.
2. Why did my cookies spread too much?
This usually happens when the butter is too soft (or melted), the dough wasn’t chilled, or you used natural peanut butter. Make sure your butter is softened but not greasy, and chill the dough for at least 30 minutes.
3. How do I keep the chocolate kiss from melting into a puddle?
Press the kiss into the cookie immediately after baking, but don’t push it all the way down. The residual heat will soften the base just enough to adhere. If your kitchen is very hot, let the cookies cool for 1 minute before pressing.
4. Can I make these cookies without eggs?
Absolutely. Use a flax egg (1 tbsp ground flaxseed + 3 tbsp water, let sit for 5 minutes) or a commercial egg replacer. The texture will be slightly denser, but they will still taste fantastic.
5. How do I make sure the cookies are soft and chewy?
Don’t overbake them! Pull them out when the edges are just set and the center still looks soft. Also, using brown sugar (which is acidic) helps keep cookies tender. If your cookies are too hard, try reducing the baking time by 1–2 minutes next time.
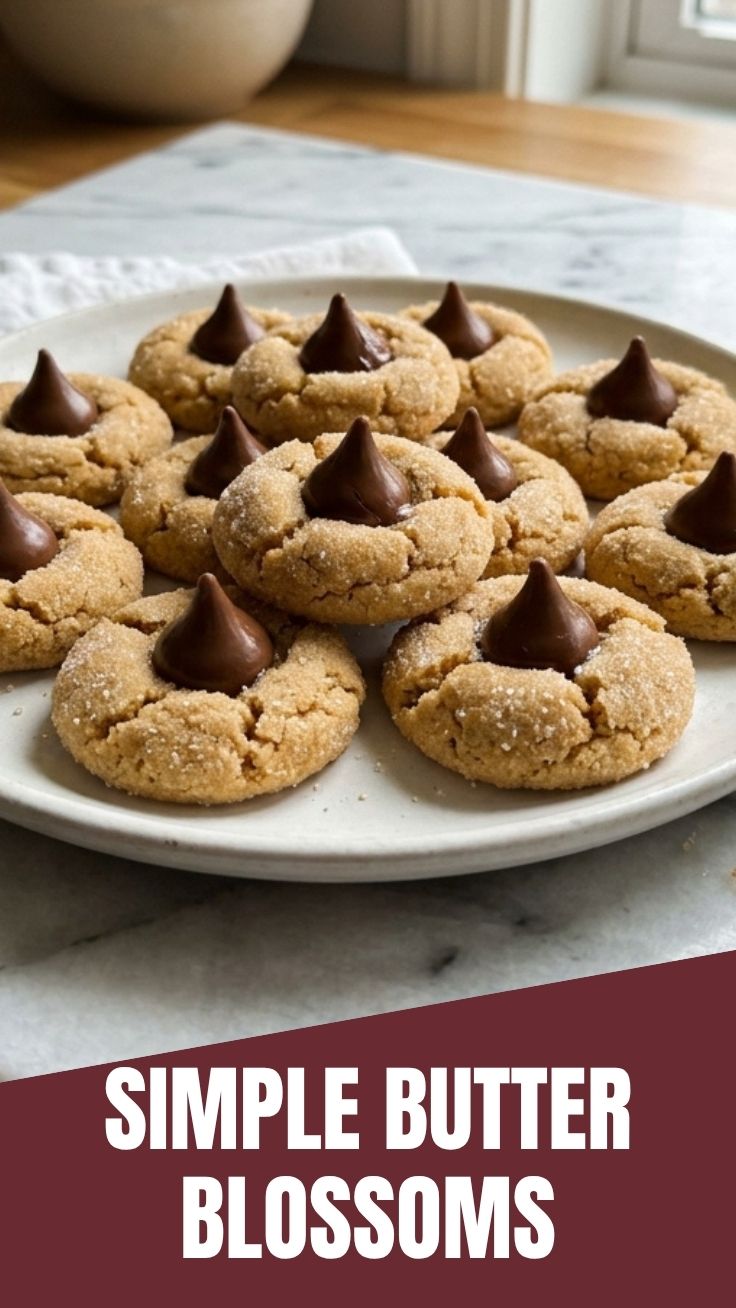
Quick way to grow 25 Peanut Butter Blossoms
Ingredients
Equipment
Method
- Preheat your oven to 375°F (190°C) and line baking sheets with parchment paper. In a medium bowl, whisk together the flour, baking soda, and salt.
- In a large bowl, cream together the softened butter, peanut butter, granulated sugar, and brown sugar until light and fluffy. Beat in the egg and vanilla extract until well combined.
- Gradually add the dry ingredient mixture to the wet ingredients, mixing on low speed until just combined to form the cookie dough.
- Roll the cookie dough into 1-inch balls, then roll each ball in the additional granulated sugar to coat evenly. Place the sugared balls about 2 inches apart on the prepared baking sheets.
- Bake for 8-10 minutes, or until the edges are lightly golden. Immediately upon removing from the oven, gently press an unwrapped Hershey's Kiss into the center of each warm cookie.
- Transfer the cookies to a wire rack to cool completely, allowing the chocolate to set.