Here is a comprehensive, SEO-optimized WordPress blog post tailored to your exact specifications.
—
Is there any aroma more welcoming than a perfectly golden, herb-crusted chicken emerging from the oven? The secret to a flawless Sunday dinner often feels elusive, but mastering the art of the perfect Roasted Chicken at home delivers a restaurant-quality centerpiece without the price tag. Whether you are a novice or a seasoned home cook, this guide provides a foolproof method for achieving crispy skin, tender meat, and deep, savory flavor. Many home cooks look for Easy Chicken Recipes that yield maximum flavor with minimal fuss, and this lemon-herb method perfectly fits the bill. Preparing your own Roasted Chicken not only fills your kitchen with an incredible fragrance but also allows you to control the quality of ingredients, making it a valuable skill for healthier, more economical meals.
Ingredients & Kitchen Tools
To ensure success, gather these components before you begin. Proper preparation, or mise en place, is the first step to a stress-free cooking experience.
– Whole Chicken (4-5 lbs): Look for a fresh, air-chilled bird for the crispiest skin. If using frozen, thaw completely in the refrigerator for 24-48 hours.
– 1 Large Lemon: Provides acidity to balance the fat and brighten the overall flavor.
– Fresh Herbs (Thyme, Rosemary, Parsley): These aromatic herbs infuse the meat and skin with a classic, savory profile.
– 4-5 Cloves of Garlic: Adds a pungent, nutty sweetness when roasted.
– 3-4 tbsp Unsalted Butter or Olive Oil: Butter offers richer flavor for basting; oil is a great dairy-free substitute.
– Coarse Kosher Salt & Fresh Black Pepper: Essential for seasoning inside and out.
– 1 Onion & 2 Celery Stalks (Optional): For stuffing the cavity to add moisture and subtle vegetable flavor.
Kitchen Tools: You will need a large roasting pan with a rack, a sharp chef’s knife, kitchen twine (for trussing), a meat thermometer, and a basting brush.
Prep Time & Cooking Schedule
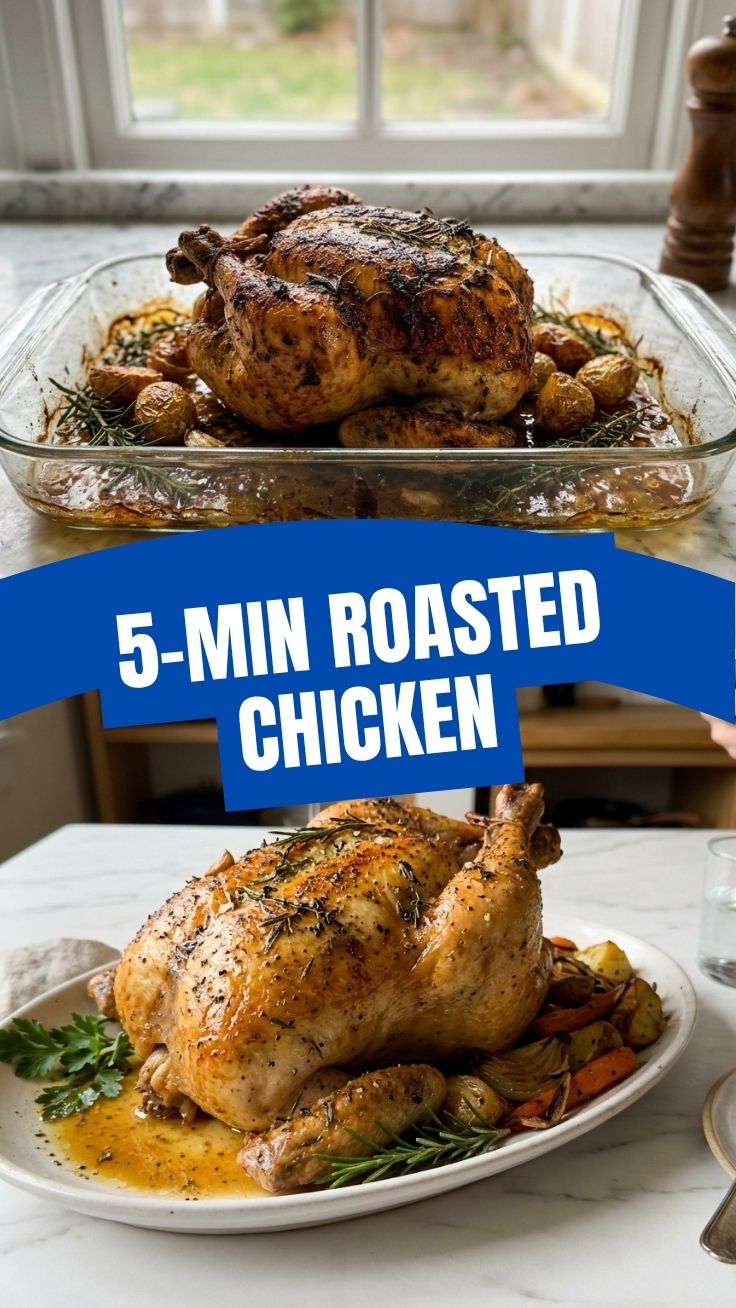
Planning your timing is crucial for a stress-free meal. The total active time is minimal, but the process requires patience.
– Prep Time: 20 minutes.
– Cooking Time: 1 hour 15 minutes to 1 hour 30 minutes (at 425°F / 220°C).
– Resting Time: 15-20 minutes (This is non-negotiable for juicy meat).
– Dry Brining (Optional but recommended): Pat the chicken dry, salt it generously, and leave it uncovered in the fridge for 2-24 hours. This dramatically improves crispy skin.
Schedule Tip: If serving at 6:00 PM, remove the chicken from the fridge by 4:00 PM to take the chill off. Start roasting by 4:30 PM, and it will be ready to carve around 6:00 PM.
Step-by-Step Instructions
Follow these steps precisely, paying close attention to temperature and texture cues.
1. Preheat & Prepare: Preheat your oven to 425°F (220°C). Remove the chicken from the fridge 30 minutes prior to let it come to room temperature. Pat the skin extremely dry with paper towels. Moisture is the enemy of crispy skin.
2. Season Generously: Season the cavity with salt and pepper, then stuff it with the halved lemon, a few sprigs of thyme, rosemary, and the whole garlic cloves.
3. Truss the Bird: Tie the legs together with kitchen twine and tuck the wing tips under the bird. This ensures even cooking and a neat presentation.
4. Butter and Season: In a small bowl, mix softened butter with 1 tbsp of chopped herbs, salt, and pepper. Gently slide your fingers under the breast skin to loosen it, then spread the herb butter directly onto the breast meat. Rub the remaining butter all over the outside skin, followed by another generous dusting of salt.
5. Roast for Golden Perfection: Place the chicken breast-side up on the rack in the roasting pan. Roast for 15 minutes, then reduce the heat to 375°F (190°C). This initial blast of high heat jump-starts the Maillard reaction for a crispy exterior. This simple technique is a cornerstone of many Easy Chicken Recipes, but it elevates a whole Roasted Chicken to the next level.
6. Baste and Rotate: Roast for about 1 hour more. Baste the chicken with the pan juices every 20-30 minutes. If the skin is browning too fast, tent loosely with foil.
7. Check Doneness: The chicken is done when a meat thermometer inserted into the thickest part of the thigh (without touching bone) reads 165°F (74°C). The juices should run clear, not pink.
8. Rest and Carve: Transfer the chicken to a cutting board. Tent it loosely with foil for 15 minutes. This allows the juices to redistribute throughout the meat, ensuring every bite is moist.
Nutritional Benefits & Advantages
This dish is more than just a comforting meal; it offers significant nutritional value. A serving of Roasted Chicken provides a high-quality, lean source of protein which is essential for muscle repair and satiety. When prepared with the skin, it contains healthy fats that support brain function. Chicken is also a rich source of B-Vitamins (especially B6 and B12), which boost energy and support a healthy metabolism. By roasting it yourself, you avoid the excessive sodium and preservatives often found in store-bought rotisserie chickens, giving you full control over your dietary intake.
Tips, Variations & Cooking Advice
– Flavor Variation – Spatchcock: For a faster cook time (45-50 minutes) and incredibly crispy skin, remove the backbone and flatten the chicken before roasting.
– Dietary Adaptation – Herb Paste: Replace butter with a paste made of olive oil, Dijon mustard, and herbs for a dairy-free and paleo-friendly version.
– Side Dish Hack: Add halved potatoes, carrots, and parsnips to the pan around the chicken for the last 40 minutes of cooking. They will roast in the flavorful drippings.
– Temperature Control: If your breast meat is cooking faster than the thighs, cover the breast with a strip of foil while the thighs finish.
Common Mistakes to Avoid
– Skipping the Dry Step: Not patting the skin dry enough is the #1 reason for soggy skin. Use paper towels liberally.
– Guessing Temperature: Cooking by time alone is unreliable. Always use an instant-read thermometer to avoid dry, overcooked meat.
– Peeking Over and Over: Opening the oven lets out heat and steam. Keep the door closed as much as possible to maintain a consistent roasting environment.
– Forgetting to Rest: Carving a chicken immediately after roasting causes all the flavorful juices to run out onto the cutting board instead of staying in the meat.
Storage & Meal Prep Tips
Leftover Roasted Chicken is a meal prep goldmine.
– Refrigeration: Once cooled, remove the meat from the bones. Store in an airtight container for 3-4 days.
– Freezing: Shredded or chopped chicken can be frozen in a sealed freezer bag for up to 3 months. Remove as much air as possible to prevent freezer burn.
– Reheating: To retain moisture, reheat in a 350°F oven with a splash of chicken broth for 10 minutes. Avoid the microwave, which can make the meat rubbery.
– Repurposing: Use the carcass and bones to make a rich chicken stock. This is a zero-waste habit that pays off in flavor for soups and sauces.
Conclusion
Mastering the classic Roasted Chicken is a rite of passage in any kitchen, transforming simple ingredients into a memorable feast. This method deconstructs the process, from achieving brilliantly crispy skin to ensuring impossibly juicy meat, while using only basic pantry staples. It stands as one of the most reliable Easy Chicken Recipes you can have in your repertoire, perfect for busy weeknights and special occasions alike. We encourage you to try this lemon-herb version, share your creation, and explore more comforting dishes on our site. Your perfect roast is just one oven cycle away.
FAQs
1. Can I use a different cut of chicken for this recipe?
Absolutely. This method and seasoning works beautifully on bone-in, skin-on thighs, legs, or breasts. The cook time will be significantly shorter (about 30-40 minutes for thighs or breasts).
2. My chicken skin is browning too fast. What should I do?
Simply tent a piece of aluminum foil loosely over the top of the chicken. This blocks direct heat without trapping steam, allowing the meat to finish cooking without burning the skin.
3. Why is my chicken dry?
The most common cause is overcooking. Ensure you remove the chicken from the oven precisely when the internal temperature of the thigh reaches 165°F. Also, never skip the resting period, which allows juices to redistribute.
4. Can I make this Roasted Chicken gluten-free?
Yes! This recipe is naturally gluten-free. Just ensure that any stock you use for basting or the pan is certified gluten-free, as some commercial broths contain additives.
5. I don’t have fresh herbs. Can I use dried?
Yes, but use about half the amount of dried herbs compared to fresh (e.g., 1 tsp dried thyme vs. 1 tbsp fresh). Dried herbs are more concentrated in flavor.
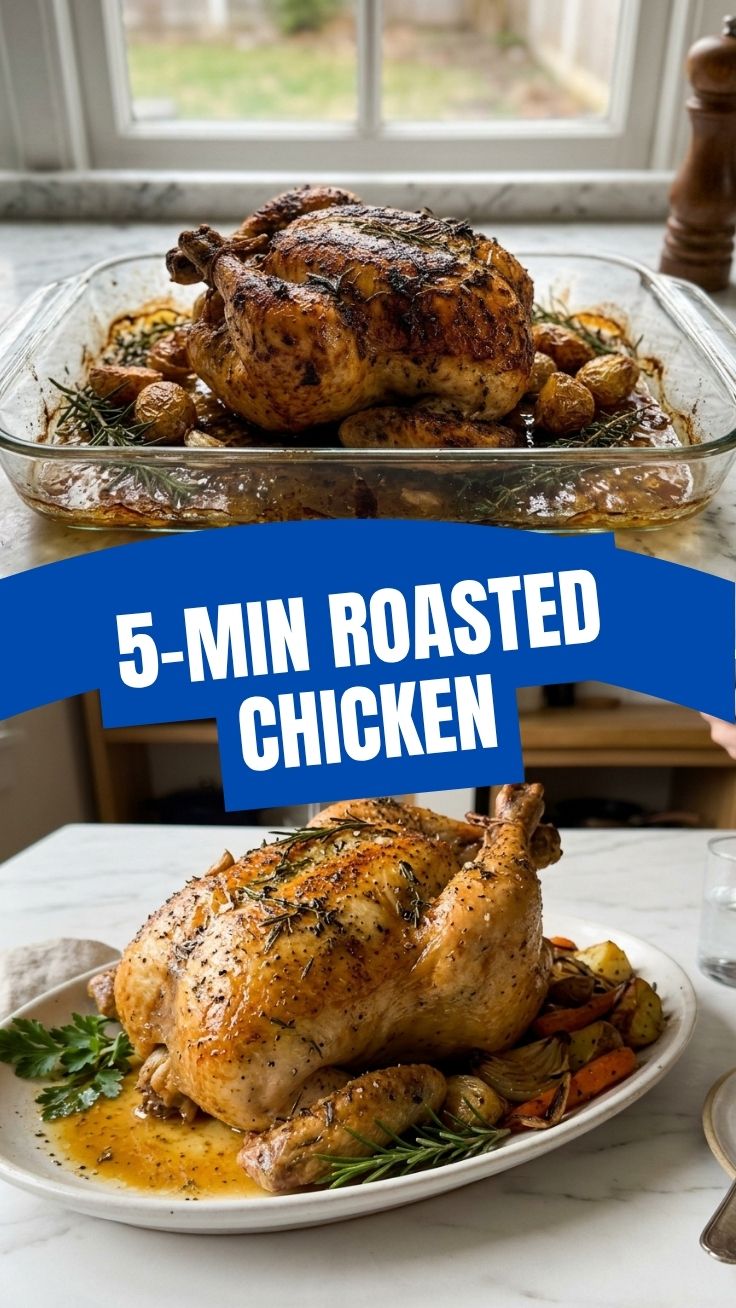
Proven way to grow the perfect Roasted Chicken
Ingredients
Equipment
Method
- Preheat your oven to 400°F (200°C) and pat the chicken dry with paper towels to ensure crispy skin.
- In a small bowl, mix together salt, black pepper, garlic powder, and paprika to create your seasoning blend.
- Rub the olive oil all over the chicken, then sprinkle the seasoning blend evenly over the entire bird, inside and out.
- Stuff the cavity of the chicken with the quartered onion, halved lemon, and fresh rosemary sprigs for added flavor.
- Place the chicken in a roasting pan, breast-side up; if using, arrange chopped carrots and potatoes around the chicken.
- Roast for 60-90 minutes, or until a meat thermometer inserted into the thickest part of the thigh reads 165°F (74°C).
- Baste the chicken every 20-30 minutes with the pan juices to keep it moist and promote even browning.
- Once cooked, remove the chicken from the oven and transfer it to a cutting board, covering it loosely with foil.
- Let the chicken rest for 10-15 minutes before carving; this allows the juices to redistribute, ensuring a tender and flavorful result.
- Carve the chicken and serve immediately with the roasted vegetables and pan juices.