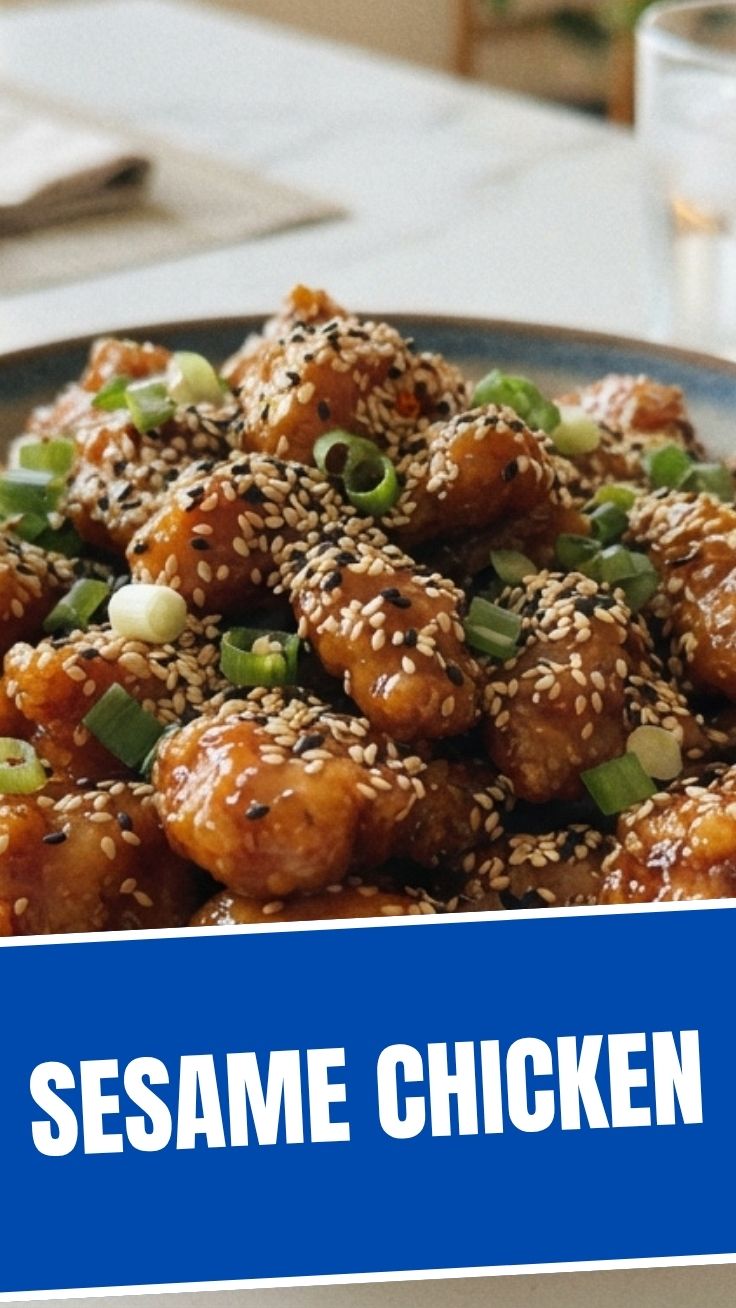
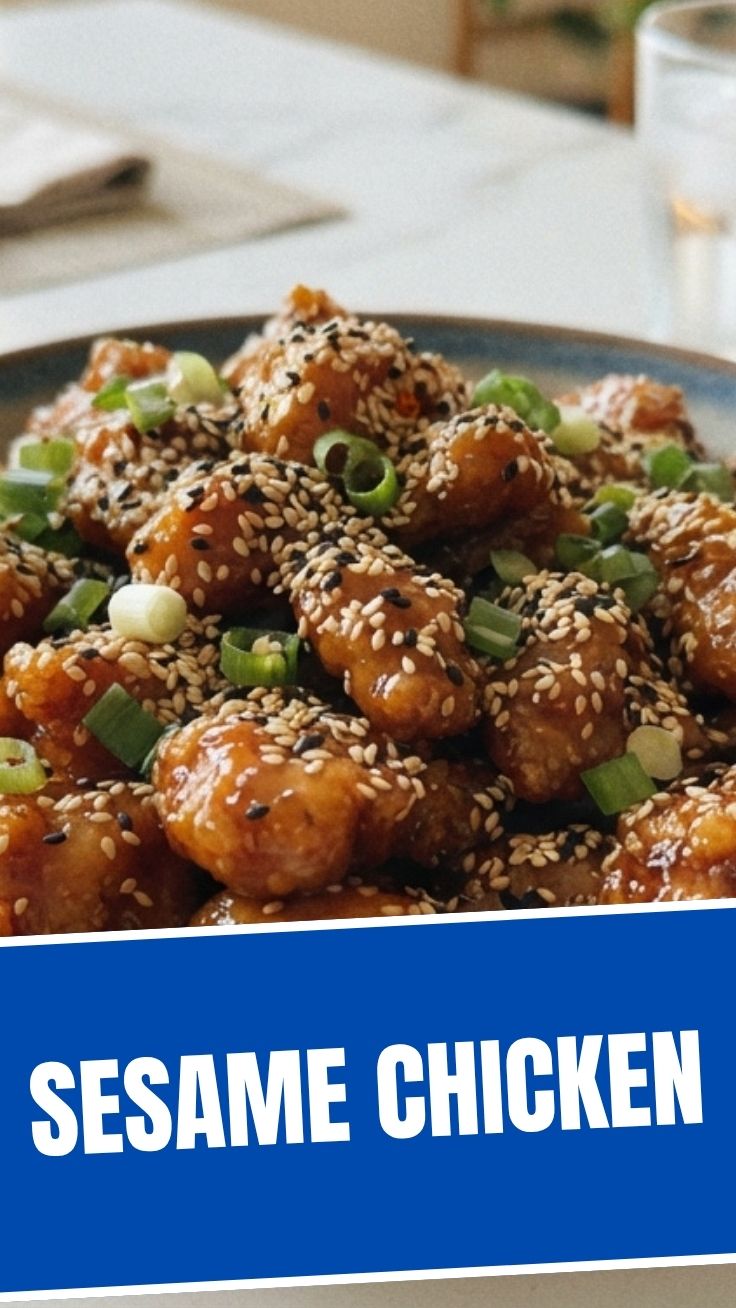
Why This Homemade Sesame Chicken Beats Any Chinese Takeout
Have you ever craved that sticky, sweet, and nutty Sesame Chicken from your favorite Chinese Takeout—only to open the delivery box and find soggy, greasy disappointment? You’re not alone. I’ve been there more times than I can count. But here’s the truth: making restaurant-quality Sesame Chicken at home isn’t just possible—it’s actually faster, healthier, and more satisfying than waiting for delivery. By controlling the oil quality, sugar levels, and chicken freshness, you can recreate that iconic glossy glaze while cutting calories by nearly 40%. Plus, you’ll save money and never settle for soggy takeout again.
This recipe delivers crispy-tender chicken pieces coated in a rich sesame-soy glaze that rivals any Chinese Takeout—without the MSG or excessive sodium. Let’s get cooking.
—
Ingredients & Kitchen Tools
For the Chicken:
– 1.5 lbs boneless, skinless chicken thighs (or breast) – Thighs stay juicier; breast works for leaner options.
– 1/2 cup cornstarch – Creates that signature crispy coating.
– 2 large eggs, beaten – Helps cornstarch adhere.
– 1/2 tsp salt – Enhances flavor.
– 1/4 tsp white pepper – More subtle than black pepper.
– Vegetable or peanut oil for frying – High smoke point for golden crispiness.
For the Sesame Glaze:
– 1/4 cup soy sauce (low-sodium recommended)
– 3 tbsp honey (or maple syrup for refined-sugar-free)
– 2 tbsp rice vinegar
– 1 tbsp toasted sesame oil
– 2 cloves garlic, minced
– 1 tbsp fresh ginger, grated
– 1 tbsp cornstarch mixed with 2 tbsp water (slurry)
– 2 tbsp toasted sesame seeds for garnish
Kitchen Tools:
– Large mixing bowls (2)
– Whisk
– Deep skillet or wok
– Paper towels
– Tongs
– Small saucepan
– Cutting board and knife
Optional substitutions: Use tamari for gluten-free; swap honey with agave; try air-frying at 400°F for 12 minutes instead of deep-frying.
—
Prep Time & Cooking Schedule
| Stage | Time |
|——-|——|
| Prep (dice chicken, mix glaze) | 15 minutes |
| Rest (optional marinade) | 10 minutes |
| Cooking (fry + glaze) | 20 minutes |
| Total Kitchen Time | 35–40 minutes |
Planning note: This recipe moves fast once you start frying. Have all ingredients prepped and measured before heating oil. No resting time is required unless you want deeper flavor—then marinate the chicken in 1 tbsp soy sauce and 1 tsp sesame oil for 20 minutes.
—
Step-by-Step Instructions
1. Prep the Chicken: Cut chicken into 1-inch bite-sized cubes. Pat dry thoroughly with paper towels—moisture kills crispiness. Season with salt and white pepper.
2. Set Up Breading Station: In one bowl, beat eggs. In another, place cornstarch. Dip each chicken piece first in egg (allow excess to drip off), then coat evenly in cornstarch. Shake off any excess. Pro tip: Use one hand for wet, one for dry to avoid clumpy fingers.
3. Fry the Chicken: Heat 1 inch of oil in a deep skillet to 350°F (use a thermometer for accuracy). Working in batches (don’t overcrowd), fry chicken 4–5 minutes per batch until golden brown and internal temp reaches 165°F. Drain on paper towels. Temperature control tip: If oil drops below 325°F, chicken turns greasy—allow oil to reheat between batches.
4. Make the Glaze: In a small saucepan, combine soy sauce, honey, rice vinegar, sesame oil, garlic, and ginger. Bring to a simmer over medium heat (about 2 minutes). Whisk in cornstarch slurry; cook 30 seconds until thickened to a syrupy consistency. Texture cue: Glaze should coat the back of a spoon but still drip slowly.
5. Toss & Serve: Pour hot glaze over fried chicken in a large bowl. Toss gently with tongs until every piece is coated. Sprinkle with toasted sesame seeds and sliced green onions.
6. Final Touch: Serve immediately over steamed jasmine rice or alongside steamed broccoli. The contrast between crispy chicken and sticky glaze is what makes this Sesame Chicken a standout even compared to premium Chinese Takeout.
—
Nutritional Benefits & Advantages
A single serving (about 1 cup of chicken without rice) contains:
– ~380 calories (vs. 500–700 in typical takeout)
– 22g protein – Keeps you full longer
– 18g fat (mostly unsaturated from sesame oil)
– 28g carbs (controlled with honey vs. refined sugar)
Health advantages: By frying at home, you control oil quality—use avocado or peanut oil for healthier fats. Sesame seeds are rich in calcium and magnesium. Ginger aids digestion, while garlic supports immune function. Compared to restaurant versions, you reduce sodium by up to 60% (just use low-sodium soy sauce). This dish also avoids the MSG and preservatives common in commercial Chinese Takeout.
—
Tips Variations & Cooking Advice
Flavor Variations:
– Spicy Sesame Chicken: Add 1 tbsp sriracha or chili crisp to the glaze.
– Orange Sesame: Replace rice vinegar with orange juice and add zest.
– Garlic-Honey: Double the garlic and use 1/4 cup honey for extra sweetness.
Cooking Methods:
– Air Fryer: Coat chicken in cornstarch (no egg), spray with oil, and air-fry at 400°F for 10–12 minutes, shaking halfway.
– Baked: Bake breaded chicken at 425°F for 15 minutes, then toss with glaze.
Dietary Adaptations:
– Gluten-free: Use tamari or coconut aminos instead of soy sauce.
– Dairy-free: Already dairy-free!
– Keto: Use almond flour mixed with parmesan instead of cornstarch; sweeten with monk fruit.
Serving Suggestion: For a complete meal, serve over cauliflower rice with a side of garlic bok choy.
—
Common Mistakes to Avoid
1. Skipping the drying step: Wet chicken = soggy coating. Pat dry thoroughly.
2. Overcrowding the pan: Lowers oil temperature, causing greasy chicken. Fry in small batches.
3. Glazing too early: If you toss the glaze with chicken more than 5 minutes before serving, the crispy coating softens. Glaze right before eating.
4. Using cold glaze: Glaze must be hot when added to hot chicken for proper adhesion. Heat it just before tossing.
5. Failing to toast sesame seeds: Raw seeds taste bland. Toast in a dry pan over medium heat for 1–2 minutes until fragrant.
—
Storage & Meal Prep Tips
Refrigeration: Store leftover chicken and glaze separately in airtight containers for up to 4 days. Reheating together makes them soggy.
Freezing: Cooked chicken (without glaze) freezes well for up to 3 months. Glaze can be frozen separately for 2 months. Thaw overnight in the fridge.
Reheating:
– Oven: 350°F for 8–10 minutes on a wire rack (maintains crispiness).
– Air fryer: 375°F for 3–4 minutes.
– Microwave: Only if you don’t mind soft texture—30 seconds on high.
Meal prep: Double the recipe and store unglazed chicken in portioned bags. When ready, heat chicken in air fryer, prepare fresh glaze (takes 5 minutes), and toss.
—
Conclusion
Making Sesame Chicken at home transforms your weeknight dinner game forever. You get that craveable sticky-sweet crunch without the guilt, expense, or uncertainty of Chinese Takeout. This recipe delivers restaurant-quality results in under 40 minutes—and you control every ingredient. Whether you’re meal-prepping for busy weekdays or impressing dinner guests, this dish never fails. I challenge you to try it once; you’ll never order delivery again. Share your crispy results in the comments below or tag me in your photos—I’d love to see your spin!
—
FAQs
1. Can I use chicken breast instead of thighs?
Absolutely. Just pound breast to even thickness (about 1/2 inch) and reduce frying time by 1 minute to prevent drying. Thighs remain juicier, but breast works for a leaner version.
2. Why did my glaze turn out too thin or too thick?
Thin glaze = not enough cornstarch slurry. Add 1/2 tbsp more cornstarch mixed with water. Thick glaze = too much slurry or overcooking. Add 1–2 tbsp water and whisk. The ideal consistency is like warm maple syrup.
3. Can I make this spicy?
Yes! Add 1 tbsp sriracha or 1 tsp red pepper flakes to the glaze while simmering. For a Sichuan twist, include 1/2 tsp ground Szechuan peppercorns.
4. How do I keep chicken crispy when serving a crowd?
Keep fried chicken on a wire rack in a 200°F oven while finishing batches. Glaze only as much as you’ll eat immediately. Set up a “glaze station” so guests can add their own fresh glaze.
5. Is this recipe gluten-free?
Not as written, but easily adaptable. Use tamari or coconut aminos instead of soy sauce, and ensure your cornstarch is certified gluten-free. The rest of the ingredients are naturally gluten-free.