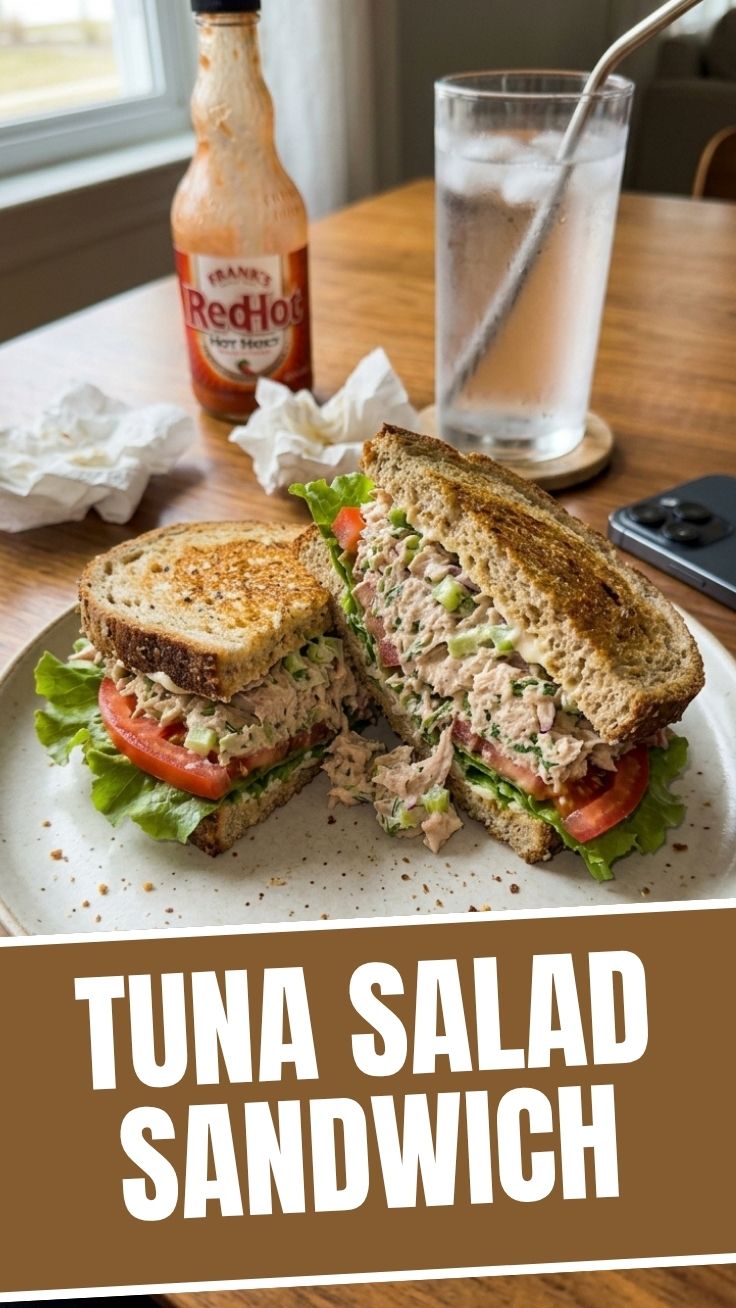
The Ultimate Tuna Salad Sandwich: A Homemade Classic You’ll Crave
Have you ever stood in front of an open refrigerator, wondering what to whip up that’s both satisfying and effortless? That’s when the humble Tuna Salad Sandwich comes to the rescue—a timeless, protein-packed meal that feels like comfort on bread. While store-bought versions are convenient, preparing it at home lets you control the flavor, texture, and freshness. Plus, with a simple tuna salad recipe you can tweak to your taste, you’ll never settle for bland again. In this guide, we’ll walk you through every step, from pantry staples to pro tips, ensuring your sandwich turns out creamy, crunchy, and downright delicious every single time.
—
Ingredients & Kitchen Tools
For the Tuna Salad
– Canned tuna (preferably in water): 2 cans (5 oz each) – drained and flaked. Oil-packed works too, but adjust seasoning.
– Mayonnaise: 3–4 tablespoons – adds creaminess. Use Greek yogurt for a lighter version.
– Celery: 1 stalk, finely diced – gives crunch and freshness.
– Red onion: 2 tablespoons, minced – for a mild bite. Soak in cold water 5 minutes to mellow sharpness.
– Lemon juice: 1 teaspoon – brightens the flavor.
– Dijon mustard: 1 teaspoon – optional but adds depth. Substitute with yellow mustard.
– Salt and black pepper: to taste.
– Fresh parsley or dill: 1 tablespoon, chopped – optional, for herbaceous lift.
For the Sandwich
– Bread: 8 slices of your choice – sourdough, whole wheat, or brioche. Thick slices hold up best.
– Lettuce leaves: 4–6 – crisp iceberg or romaine.
– Tomato: 1 medium, sliced – pat dry with paper towels to avoid sogginess.
Kitchen Tools
– Can opener
– Mixing bowl
– Fork for flaking tuna
– Cutting board and sharp knife
– Measuring spoons
– Toaster or skillet (optional, for toasting bread)
Substitutions
– Vegan: Use mashed chickpeas or tofu instead of tuna, and vegan mayo.
– Gluten-free: Swap bread with gluten-free slices or lettuce wraps.
—
Prep Time & Cooking Schedule

| Task | Time |
| ——————- | ———- |
| Prep vegetables | 10 minutes |
| Mix tuna salad | 5 minutes |
| Assemble sandwich | 5 minutes |
| Optional toasting | 3–4 minutes|
Total time: About 20 minutes. No resting or marinating needed—this recipe is ready to eat immediately. The tuna salad can be made ahead of time and chilled for up to 3 days, which only improves the flavor as the ingredients meld.
—
Step-by-Step Instructions
Perfecting a Tuna Salad Sandwich begins with the right texture. Follow these clear steps for a creamy, balanced filling.
1. Drain and flake the tuna: Open both cans, drain thoroughly (press with a spoon to remove excess liquid), and transfer to a mixing bowl. Flake with a fork until finely separated. Tip: Dry tuna means a less watery salad.
2. Chop the vegetables: Dice celery and red onion into small, even pieces. Aim for about ¼-inch cubes to ensure every bite has crunch without overpowering the tuna.
3. Mix the dressing: In a separate small bowl, combine mayonnaise, lemon juice, Dijon mustard, salt, and pepper. Whisk until smooth. Adjust mayo amount based on your creaminess preference—start with 3 tablespoons, then add more if needed.
4. Combine everything: Add the chopped veggies and dressing to the flaked tuna. Fold gently with a spatula until evenly coated. Taste and adjust seasoning—add more lemon for brightness or a pinch of cayenne for heat. Stir in fresh herbs if using. Note: This is your base tuna salad recipe—it’s versatile enough to add chopped pickles, capers, or hard-boiled eggs later.
5. Toast the bread (optional): For extra crunch, toast slices in a toaster or lightly buttered skillet until golden. This prevents the bread from getting soggy from the salad.
6. Assemble the sandwich: Lay lettuce leaves on half the bread slices, top with a generous scoop of tuna salad (about ½ cup per sandwich), add tomato slices, then cover with remaining bread. Press gently to secure.
7. Slice and serve: Cut diagonally for classic presentation. Serve immediately with chips or a side of pickles.
Pro tip: If prepping ahead, keep the tuna salad and bread separate until ready to serve to avoid sogginess.
—
Nutritional Benefits & Advantages
– High-quality protein: Tuna provides lean protein (about 20g per can) that supports muscle repair and keeps you full.
– Healthy fats: Omega-3 fatty acids in tuna promote heart and brain health.
– Crunchy veggies: Celery adds fiber and vitamins K and C, while red onion offers antioxidants.
– Low-carb option: Serve the tuna salad in lettuce cups instead of bread for a keto-friendly meal.
– Quick energy: Complex carbs from whole-grain bread provide steady fuel without a sugar crash.
A homemade tuna salad sandwich is also far lower in sodium and preservatives than store-bought versions—you control the salt and mayo.
—
Tips Variations & Cooking Advice
Flavor Variations
– Mediterranean: Add chopped kalamata olives, sun-dried tomatoes, and crumbled feta.
– Spicy: Mix in sriracha, chopped jalapeño, or a pinch of smoked paprika.
– Curry: Stir in ½ teaspoon curry powder and a handful of golden raisins.
– Avocado: Replace half the mayo with mashed avocado for a creamy, heart-healthy twist.
Dietary Adaptations
– Dairy-free: Use vegan mayo or avocado; skip cheese-based variations.
– Gluten-free: Serve on gluten-free bread, rice cakes, or in a hollowed cucumber.
– Paleo/Whole30: Use compliant mayo (no sugar) and wrap in lettuce leaves.
Cooking Advice
– Texture control: For a chunkier salad, flake tuna less; for smoother, mash a bit.
– Temperature: Cold tuna salad is classic, but you can serve it at room temperature if you’re in a hurry.
– Bread choice: Sourdough holds up well; avoid soft white bread that turns mushy.
—
Common Mistakes to Avoid
– Overdressing: Too much mayo makes the salad runny and heavy. Start with less, then add gradually.
– Soggy bread: Always pat tomatoes dry with paper towels. Toast bread or spread a thin layer of butter to create a moisture barrier.
– Underseasoning: Canned tuna can be bland. Don’t skip salt, pepper, and an acid like lemon juice.
– Skipping the veggies: They provide essential crunch and balance the creamy texture. At least add celery or diced bell pepper.
– Overmixing: Fold gently to keep some texture—mushing everything into a paste ruins the mouthfeel.
—
Storage & Meal Prep Tips
– Refrigeration: Store leftover tuna salad in an airtight container for up to 3 days. Keep bread separate.
– Freezing: Not recommended for tuna salad—mayonnaise-based mixtures separate upon thawing, becoming watery.
– Reheating: Tuna salad is best served cold. If you prefer it slightly warm, let it sit at room temperature for 10 minutes before assembling.
– Meal prep: Make a double batch of tuna salad on Sunday. Use it for sandwiches, stuffed tomatoes, or as a dip with crackers throughout the week.
—
Conclusion
We’ve shown you how a simple Tuna Salad Sandwich can be transformed into a homemade star—fresh, customizable, and ready in under 20 minutes. The key lies in balancing textures, seasoning wisely, and using quality ingredients. Whether you stick with the classic tuna salad recipe we shared or add your own twist, this meal is perfect for lunches, picnics, or quick dinners. Give it a try, snap a photo, and let us know how it turned out in the comments. Craving more? Explore our other copycat classics and lightened-up salads on the blog.
—
FAQs
1. Can I substitute Greek yogurt for mayonnaise?
Yes! Use plain Greek yogurt 1:1 for a tangier, lower-fat alternative. Add a splash of olive oil to prevent dryness.
2. How do I fix tuna salad that’s too dry?
Add more mayonnaise or a drizzle of olive oil, plus a squeeze of lemon juice for moisture and flavor.
3. What’s the best tuna to use for a tuna salad sandwich?
Solid albacore tuna (packed in water) holds its shape beautifully and has a mild flavor. Skip the chunk light if you want firmer pieces.
4. Can I make tuna salad dairy-free?
Absolutely—use vegan mayonnaise or mashed avocado instead. Ensure any add-ins like cheese or yogurt are omitted or substituted.
5. How long does tuna salad sandwich last after assembling?
It’s best within 2 hours at room temperature. Refrigerate assembled sandwiches for up to 24 hours, though the bread may soften.